
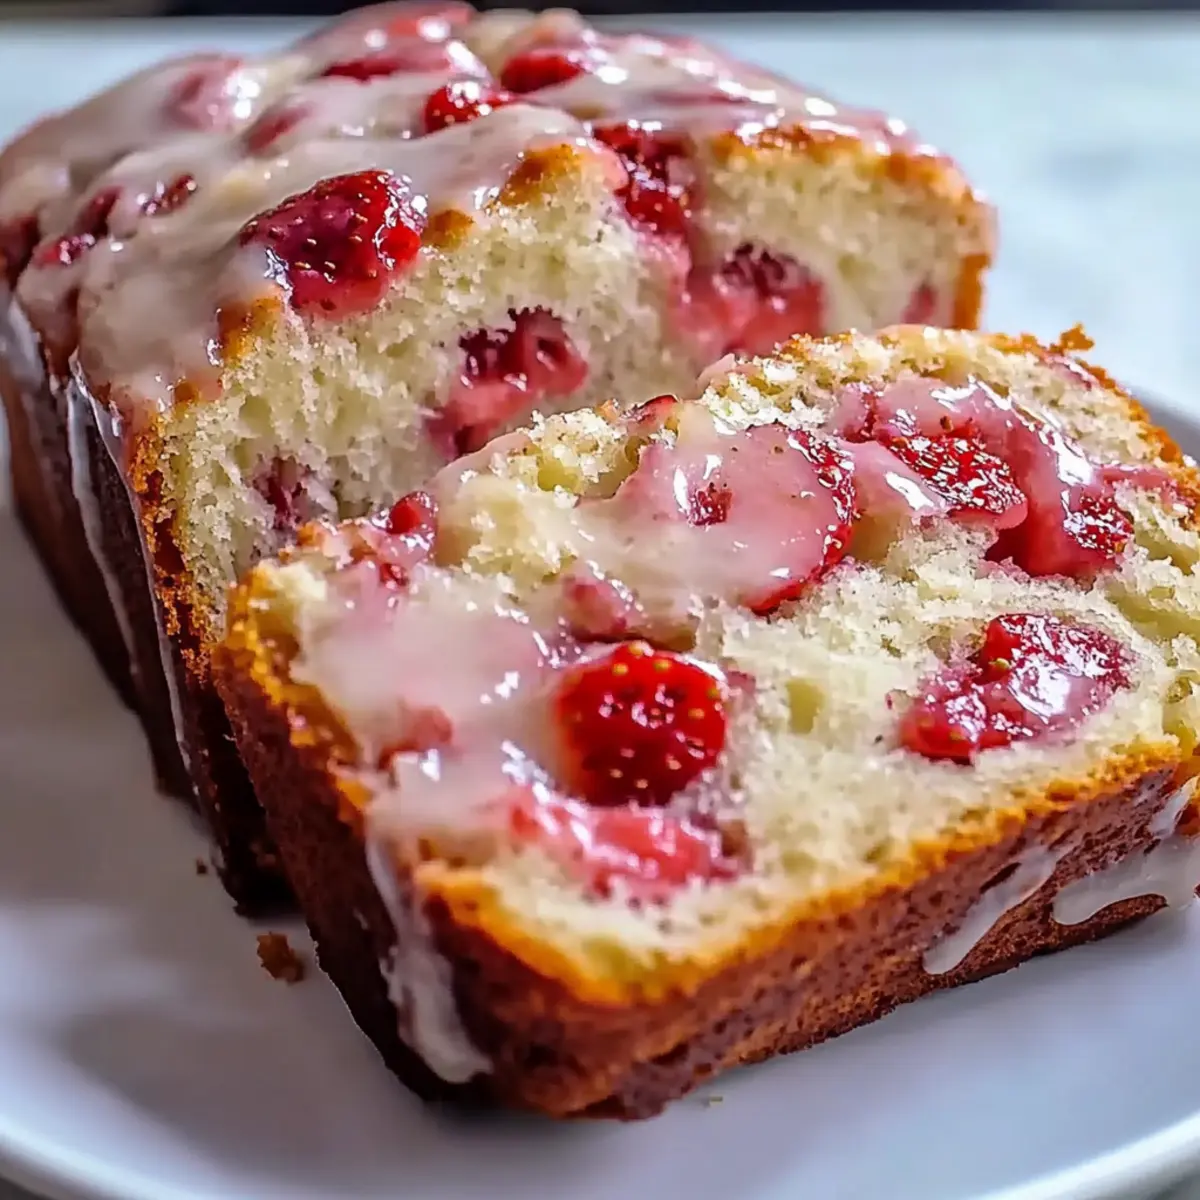
As I stood in my kitchen, the sweet aroma of fresh strawberries filled the air, instantly whisking me away to sun-drenched summer days. That’s the magic behind this Glazed Strawberry Bread—a tender, moist loaf that celebrates the juicy ripeness of strawberries, topped with a delightful glaze that gleams like a treasure. This isn’t just any quick bread; it’s perfect for breakfast, dessert, or an afternoon treat, making it a versatile addition to your recipe repertoire. With minimal ingredients and a super simple prep time, you’ll find this loaf is not only a crowd-pleaser but also an easy way to elevate your baking game. Ready to fill your home with the comforting scent of strawberry goodness? Let’s dive into the recipe!
Why is Glazed Strawberry Bread a Must-Try?
Irresistible flavor: The burst of fresh strawberries combined with a sweet glaze makes each bite a delightful experience. Simplicity at its core: With minimal ingredients and straightforward steps, even novice bakers can enjoy this recipe. Versatile options: Try variations like a strawberry-lemon loaf or mixed-berry loaf to keep things exciting. Perfect for any occasion: Whether it’s breakfast, dessert, or an afternoon snack, this loaf fits right in. For more fresh ideas, check out our Healthy Banana Bread or Snickerdoodle Banana Bread.
Glazed Strawberry Bread Ingredients
• To create your delicious Glazed Strawberry Bread, gather these simple yet essential ingredients!
For the Bread
- All-purpose flour – Provides structure; remember to spoon and level for accuracy!
- Granulated sugar – Adds sweetness; swap half with coconut sugar for a deeper flavor.
- Baking soda – Acts as a leavening agent; always check for freshness to ensure a good rise.
- Salt – Enhances flavor; adjust if using salted butter.
- Unsalted butter, melted – Offers richness and moisture; let it cool slightly before mixing.
- Large eggs – Contributes lift and structure; using room temperature eggs helps in emulsifying.
- Fresh strawberries (chopped) – Brings flavor and moisture; remember to reserve some for the glaze! Use ripe but firm berries to prevent sogginess.
- Vanilla extract – Enhances the flavor beautifully.
For the Glaze
- Powdered sugar – Provides sweetness to your glaze; adjust milk for desired thickness.
- Milk – Helps create a smooth glaze; add gradually until you reach the perfect consistency.
- Chopped strawberries for glaze – Adds lovely color and texture to the icing.
Get ready to fill your kitchen with irresistible aromas as you whip up this delightful Glazed Strawberry Bread!
Step‑by‑Step Instructions for Glazed Strawberry Bread
Step 1: Preheat and Prepare the Pan
Begin by preheating your oven to 350°F (175°C). While the oven heats up, grab a 9×5-inch loaf pan and either grease it well or line it with parchment paper. This ensures that your Glazed Strawberry Bread releases easily after baking, allowing you to focus on the delightful aroma filling your kitchen.
Step 2: Whisk the Dry Ingredients
In a medium bowl, combine the all-purpose flour, granulated sugar, baking soda, and salt. Use a whisk to blend these dry ingredients thoroughly, which takes just a minute or so. This step is crucial for even distribution of the leavening agent, ensuring your bread rises beautifully and has a light, tender crumb.
Step 3: Mix the Wet Ingredients
In another bowl, melt the unsalted butter and allow it to cool slightly. Then, whisk in the large eggs until the mixture is smooth and creamy. Next, gently fold in the chopped strawberries and vanilla extract. The vibrant red strawberries will add a pop of color and moisture to your batter, enticing your senses as you prepare for the next step.
Step 4: Combine Wet and Dry Ingredients
Carefully pour the wet mixture into the bowl with the dry ingredients. Using a spatula, gently fold the two mixtures together, taking care not to overmix. Stop as soon as you see the flour is just incorporated; this ensures your Glazed Strawberry Bread remains light and airy instead of dense and heavy.
Step 5: Pour and Level the Batter
Transfer the batter into your prepared loaf pan, using a spatula to smooth the top. Level it out to promote even baking, as a uniform surface allows for consistent rising and browning. Now, it’s time to pop the loaf pan into the preheated oven and let the magic happen.
Step 6: Bake the Bread
Bake your strawberry bread for 50–60 minutes. Your kitchen will soon fill with the warm, inviting scent of fresh strawberries. To check for doneness, insert a toothpick into the center; it should come out clean. If the top starts to brown too quickly, loosely cover it with foil during the last 10 minutes of baking.
Step 7: Cool the Bread
Once baked, remove the pan from the oven, and allow it to cool in the pan for about 10 minutes. This resting period helps the bread set while keeping it moist. Afterward, carefully turn it out onto a wire rack to cool completely. The cooling process will enhance flavors and textures, making every slice irresistible.
Step 8: Prepare the Glaze
In a separate bowl, whisk together powdered sugar and milk, adding the milk incrementally to achieve your desired glaze consistency. Stir in the reserved chopped strawberries for a fresh, fruity finishing touch. This glaze adds a delightful sheen and enhances the flavor profile of your Glazed Strawberry Bread, making it even more enticing.
Step 9: Glaze the Bread
Once the bread has completely cooled, drizzle the prepared glaze over the top, allowing the sweet mixture to pool slightly. This step not only adds a beautiful visual presentation but also infuses each slice with extra sweetness. Your Glazed Strawberry Bread is now ready to be enjoyed, tantalizing taste buds with every delicious bite!
Expert Tips for Glazed Strawberry Bread
-
Fresh Ingredients: Ensure your strawberries are ripe and firm for the best flavor and moisture retention in your Glazed Strawberry Bread. Overripe berries can make the bread soggy.
-
Proper Mixing: Avoid overmixing when combining wet and dry ingredients. Stop as soon as no flour is visible to keep your loaf tender and light.
-
Prevent Sinking: Toss chopped strawberries in a bit of flour before folding them into the batter. This trick helps prevent the fruit from sinking to the bottom during baking.
-
Check Doneness: Begin checking your bread at the 50-minute mark, using a toothpick to insert into the center. It should come out clean when fully baked.
-
Storage Tips: For optimal freshness, store your Glazed Strawberry Bread without glaze at room temperature for up to two days, or refrigerate if glazed.
Variations & Substitutions for Glazed Strawberry Bread
Feel free to make this delightful recipe your own with these scrumptious variations that will awaken your taste buds!
-
Strawberry-lemon loaf: Add lemon zest to the batter and swap out some milk in the glaze with lemon juice for a bright, zesty twist. The combination of strawberry sweetness and lemony brightness will bring sunshine to each slice.
-
Mixed-berry loaf: Replace half of the strawberries with blueberries or raspberries, adjusting the total amount of fruit to ensure the loaf remains moist. This creates a delicious medley of flavors, perfect for those who love berries.
-
Gluten-free option: Use a 1:1 gluten-free flour blend with xanthan gum for a loaf that’s just as delightful. This swap ensures everyone can enjoy the fruity goodness, keeping the flavor intact while accommodating dietary needs.
-
Lower-sugar option: Swap half the granulated sugar for coconut sugar or light brown sugar to add a deeper flavor nuance. This will not only reduce the sugar content but also infuse your bread with a subtle caramel note that’s hard to resist.
-
Nutty addition: Toss in some chopped walnuts or pecans for a lovely crunch. This extra texture pairs beautifully with the soft bread and strawberries, adding a satisfying contrast.
-
Coconut twist: Substitute a bit of the all-purpose flour with shredded coconut for a tropical flavor boost. The coconut will infuse the bread with a delightful aroma, transporting you to a sunny beach getaway.
-
Spicy kick: Add a pinch of cayenne or cinnamon to the batter for a warm, spicy touch. The mild heat complements the sweetness of strawberries, creating an exciting new flavor dimension.
-
Cream cheese filling: Create a layer of cream cheese between the batter for an indulgent twist. Just mix softened cream cheese with a bit of sugar and vanilla. The creamy layer will add richness and moisture, elevating your bread experience.
For more delightful recipes, make sure to explore our Cream Cheese-Filled Banana Bread and these irresistible Cheesy Zucchini Breadsticks for added inspiration!
What to Serve with Glazed Strawberry Bread
Brighten your breakfast table or afternoon tea with delicious pairings that elevate your Glazed Strawberry Bread experience.
-
Creamy Greek Yogurt: Its tanginess complements the sweetness of the bread, adding a delightful creamy contrast to every bite. A sprinkle of granola on top brings a nice crunch.
-
Fresh Berries Medley: A vibrant selection of raspberries, blueberries, and blackberries adds a burst of color and flavor to your spread, balancing the bread’s sweetness with their tartness.
-
Herbal Tea (e.g., Earl Grey): The fragrant notes of bergamot enhance the fruity flavors of the bread, providing a soothing, aromatic experience. Sipping this tea will make it feel like a fancy café moment at home.
-
Vanilla Ice Cream: A scoop of smooth vanilla ice cream melts luxuriously atop warm slices, creating an indulgent dessert that’s hard to resist. The temperature contrast adds a delightful surprise!
-
Nutty Granola: Offering a satisfying crunch, granola adds an earthy flavor that complements the strawberry notes beautifully. It’s perfect for a breakfast parfait with yogurt.
-
Lemon Glaze: For an extra zing, drizzling a lemon glaze on top will brighten the flavors of the loaf, enhancing the overall experience with refreshing citrus notes.
-
Sparkling Water with Mint: A light, bubbly drink with fresh mint sprigs awakens the palate and refreshes your senses, making your mealtime feel like a special occasion.
Make Ahead Options
These delicious Glazed Strawberry Bread loaves are perfect for meal prep, allowing you to enjoy a slice of home-baked goodness without the last-minute rush! You can mix the dry ingredients and prepare the batter up to 24 hours in advance; simply refrigerate it in an airtight container to keep it fresh. Additionally, you can chop the strawberries and set them aside for the glaze so they stay vibrant and juicy. When you’re ready to bake, just preheat the oven and pour the batter into the prepared loaf pan—bake as directed. With this preparation, you’ll have an irresistibly moist loaf that’s just as delightful as if you had made it fresh that day!
How to Store and Freeze Glazed Strawberry Bread
Room Temperature: Store the cooled loaf tightly wrapped in plastic wrap or aluminum foil for up to 2 days, keeping it fresh and moist.
Fridge: If glazed, refrigerate to extend the loaf’s life up to 4 days. The glaze may become slightly firm, but the flavors will intensify over time.
Freezer: For longer storage, slice the Glazed Strawberry Bread and wrap each slice tightly in plastic wrap, followed by foil. Freeze for up to 3 months; defrost in the fridge or at room temperature.
Reheating: For a cozy treat, gently warm slices in the microwave for about 10-15 seconds or toast them lightly in an oven. Enjoy the fresh-out-of-the-oven taste!

Glazed Strawberry Bread Recipe FAQs
What strawberries should I use for the best flavor?
Absolutely! Look for ripe yet firm strawberries that have a vibrant red color and are free of dark spots. The ripeness will ensure a sweet, juicy flavor without turning your bread soggy. If possible, buy them from a local farmers’ market to enjoy their peak freshness.
How should I store leftover Glazed Strawberry Bread?
To keep your Glazed Strawberry Bread fresh, wrap it tightly in plastic wrap or aluminum foil and store it at room temperature for up to 2 days. If you’ve already glazed the loaf, refrigerate it for up to 4 days. Although the glaze might firm up slightly in the fridge, the flavors will deepen and remain delicious.
Can I freeze Glazed Strawberry Bread?
Yes! For freezing, slice the Glazed Strawberry Bread and wrap each slice tightly in plastic wrap, followed by aluminum foil to prevent freezer burn. You can freeze it for up to 3 months. When ready to enjoy, either defrost in the fridge overnight or let sit at room temperature for a few hours. Microwave slices for about 10-15 seconds for an instant warm treat!
What can I do if my bread is too dense?
Very! A dense loaf can often result from overmixing the batter. When combining wet and dry ingredients, mix just until no flour is visible. If you’ve accidentally overmixed, try incorporating the wet ingredients more gently or using a lighter hand. Also, be sure your baking soda is fresh for optimal rising!
Is this recipe suitable for gluten-free diets?
Definitely! To make Glazed Strawberry Bread gluten-free, substitute the all-purpose flour with a 1:1 gluten-free flour blend that already contains xanthan gum. This will help maintain a similar texture to the original recipe. The flavor will still shine through as beautifully as ever!
Irresistibly Moist Glazed Strawberry Bread Recipe
Ingredients
Equipment
Method
- Preheat your oven to 350°F (175°C) and prepare a 9x5-inch loaf pan by greasing it or lining it with parchment paper.
- In a medium bowl, whisk together the all-purpose flour, granulated sugar, baking soda, and salt until well combined.
- In another bowl, melt the unsalted butter and let it cool slightly before whisking in the eggs, then folding in the chopped strawberries and vanilla extract.
- Pour the wet ingredients into the dry ingredients and fold gently until just combined.
- Transfer the batter into the prepared loaf pan and smooth the top before baking.
- Bake for 50–60 minutes, checking for doneness with a toothpick inserted into the center.
- Allow the bread to cool in the pan for 10 minutes, then transfer to a wire rack to cool completely.
- Prepare the glaze by whisking together powdered sugar and milk, then stir in the reserved chopped strawberries.
- Once the bread is cool, drizzle the glaze over the top before serving.
Leave a Reply