
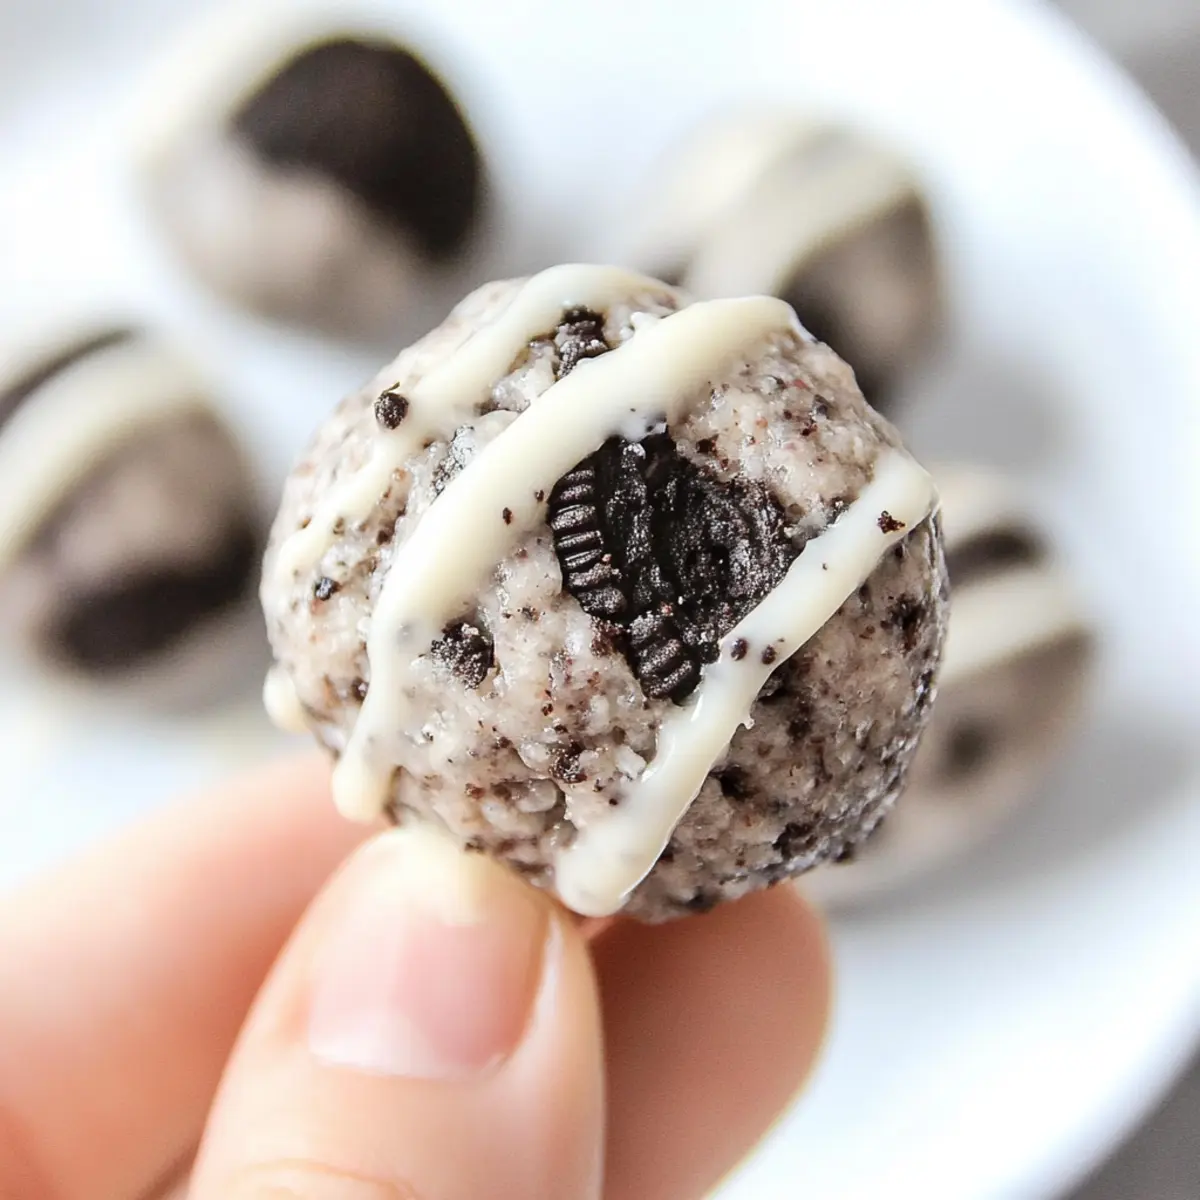
As I scrolled through my endless to-do list, a chocolate craving hit me like a bolt of lightning. That’s when I remembered the joy of making no-bake Oreo Protein Balls. These little delights are not just a snack; they’re the perfect quick energy boost after a workout or during a busy day. With just six gluten-free ingredients and ready in under ten minutes, this recipe is designed to fit seamlessly into your life while satisfying that sweet tooth we all have. Plus, they’re high in protein, making them a guilt-free treat that’s both easy to make and utterly satisfying. Are you ready to discover how simple and delicious healthy snacking can be?
Why Are Oreo Protein Balls a Game Changer?
Quick and Easy: Whip these up in just ten minutes with no baking required! Perfect for those busy days when you need a sweet treat without the fuss.
Nutritiously Indulgent: Each ball is packed with protein, satisfying your cravings while supporting your fitness goals.
Customizable: With options to swap flavors and ingredients, you can make these protein balls uniquely yours.
Gluten-Free Goodness: Made with simple, gluten-free ingredients, everyone can enjoy this tasty snack!
Perfect for Sharing: These irresistible bites appeal to family and friends, making them an excellent addition to gatherings or potlucks.
Feeling adventurous? You might also want to check out our Cookie Energy Balls for a different flavor twist!
Oreo Protein Balls Ingredients
For the Batter
• Vanilla Protein Powder – Adds protein for energy and structure; you can substitute with chocolate protein powder for a richer flavor.
• Coconut Flour – Provides fiber and helps bind the mixture together; you may use oat flour if coconut flour isn’t available, adjusting the amount based on texture.
• Monk Fruit Sweetener – Offers sweetness without calories and lowers the carb count; feel free to use regular granulated sugar, just adjust based on taste preference.
• Cream Cheese – Gives a creamy texture to the balls; consider low-fat or vegan cream cheese as alternatives for different dietary needs.
• Oreo Cookies – The classic key flavor and crunch; gluten-free Oreos can be used for those with gluten sensitivities.
• White Chocolate Chips – Optional drizzle for added sweetness; try using dark chocolate for a healthier twist or skip it altogether!
Ready to create some delicious Oreo Protein Balls? These easy-to-make treats will keep your cravings at bay while fueling your day!
Step‑by‑Step Instructions for Oreo Protein Balls
Step 1: Prepare the Oreo Crumbs
Begin by finely chopping the Oreo cookies into small crumbs using a food processor or a zip-top bag and a rolling pin. This should take about 2-3 minutes for a fine texture, as larger chunks can affect the final product. Set aside these crumbs in a bowl; they’ll add that beloved chocolatey flavor to your Oreo protein balls.
Step 2: Mix the Dry Ingredients
In a large mixing bowl, combine the vanilla protein powder, coconut flour, and monk fruit sweetener. Stir the dry ingredients together for about 1-2 minutes until evenly blended. The mix should be dry and light, which will later help create the perfect texture in your Oreo protein balls.
Step 3: Add Cream Cheese and Cookie Crumbs
Next, add the softened cream cheese and the Oreo cookie crumbs to the dry mixture. Use a spatula or your hands to mix everything together thoroughly for approximately 3-4 minutes. The mixture should become cohesive and sticky, allowing you to form it into balls easily.
Step 4: Adjust the Mixture Consistency
If the mixture feels too thick or crumbly, gradually add 1-2 tablespoons of almond milk, mixing well after each addition. Keep incorporating until the mixture reaches a soft, moldable consistency, which is crucial for shaping those delightful Oreo protein balls.
Step 5: Shape the Protein Balls
Once your mixture is ready, use a tablespoon to scoop portions and roll them into balls between your palms, ensuring they are compact and uniform in size. Place these formed balls on a tray lined with parchment paper, leaving a little space between each one for easy handling.
Step 6: Chill to Set
Refrigerate the protein balls for about 15 minutes, allowing them to firm up. This step helps enhance their texture and makes for a more satisfying bite. Once chilled, the Oreo protein balls should be easier to handle and ready for serving.
Step 7: Optional Chocolate Drizzle
If desired, melt some white chocolate chips in the microwave in 15-second intervals, stirring until smooth. Once melted, drizzle the chocolate over the chilled Oreo protein balls for a sweeter touch. This step adds an extra layer of indulgence, so feel free to skip it if you prefer a lighter snack.
Expert Tips for Oreo Protein Balls
-
Crumb Consistency: Finely chop Oreo cookies until they resemble sand; larger pieces can impact the overall texture.
-
Adjust Consistency: If the mix is too dry, add almond milk gradually. Conversely, use more coconut flour if it’s too wet.
-
Chill Properly: For the best texture, make sure to refrigerate the protein balls for at least 15 minutes before serving to let them set.
-
Experiment with Flavors: Don’t hesitate to try different flavored protein powders; it can elevate your Oreo protein balls to a whole new level!
-
Storage Savvy: Keep them in an airtight container in the fridge for up to a week to maintain freshness and enjoy guilt-free snacking!
Make Ahead Options
These Oreo Protein Balls are a fantastic meal prep option for busy home cooks! You can mix the batter and form the balls up to 24 hours in advance, storing them in an airtight container in the refrigerator. To ensure they stay fresh and delicious, refrigerate them immediately after shaping. You can also prepare the Oreo crumbs and the dry ingredients together up to 3 days ahead; simply combine them and store in a sealed container. When you’re ready to enjoy, just drizzle melted white chocolate over the chilled protein balls and serve. With these make-ahead steps, you’ll have healthy, satisfying snacks at your fingertips, saving you time and effort throughout the week!
Oreo Protein Balls Variations & Substitutions
Feel free to unleash your creativity and tailor these protein balls to suit your taste and dietary preferences!
- Flavor Swap: Substitute vanilla protein powder with chocolate or cookies and cream for a unique twist.
- Flour Alternatives: Replace coconut flour with almond flour for a nutty flavor or oat flour for a different texture.
- Sweetener Options: Use honey or maple syrup in place of monk fruit sweetener for a touch of natural sweetness.
- Dairy-Free Delight: Swap cream cheese with Irish cream cheese or coconut yogurt for a vegan-friendly option that maintains creaminess.
- Nutrient Boost: Add chia seeds or flaxseeds to enhance the nutritional profile and provide additional fiber and healthy fats.
- Extra Crunch: Toss in some chopped nuts, like walnuts or almonds, for a delightful crunch that complements the creamy texture.
- Fruit Flavor: Incorporate dried fruits, such as cranberries or raisins, for a burst of sweetness and a chewy texture.
- Spice it Up: Add a pinch of cinnamon or a dash of cayenne pepper for an unexpected yet delicious flavor twist.
By customizing your Oreo protein balls, you can enjoy a variety of flavors and textures! For more delightful snacks, consider exploring our Sweet Sour Meatballs for a flavorful treat or check out our Cookie Energy Balls for another energy-packed option. Happy snacking!
Storage Tips for Oreo Protein Balls
Fridge: Store your Oreo protein balls in an airtight container for up to 5-7 days. This will keep them fresh and ready to snack on whenever a craving strikes.
Freezer: For longer storage, freeze the protein balls in a single layer on a baking sheet, then transfer to a freezer-safe container or bag. They can last up to 3 months.
Reheating: These no-bake treats are best enjoyed cold, straight from the fridge or freezer. Allow frozen balls to thaw in the fridge for about 30 minutes before eating.
Avoid Moisture: Keep the protein balls away from moisture to prevent them from getting soggy. Use wax paper between layers if stacking them in a container.
What to Serve with No-Bake Oreo Protein Balls
Elevate your snacking experience by pairing these decadent treats with complementary delights that add flavor and enhance their wholesome goodness.
- Fresh Berries: Juicy strawberries or blueberries provide a refreshing contrast to the rich cookie flavor, adding a burst of sweetness.
- Nut Butter: Drizzle almond or peanut butter on top for a creamy balance, enhancing the protein content and satisfying cravings.
- Greek Yogurt Parfait: Layer your protein balls with tangy yogurt and fruit for a delightful breakfast or snack that feels indulgent yet healthy.
- Banana Slices: The softness and natural sweetness of bananas beautifully complement the crunch of the protein balls, creating a satisfying texture combo.
- Iced Coffee: The rich, caffeinated kick pairs perfectly for an energizing afternoon treat. Sip while enjoying your Oreo protein balls for a delightful boost.
- Dark Chocolate Dipped Fruit: Enjoy strawberries or oranges dipped in dark chocolate alongside your protein balls for a luxurious flavor experience. These combinations turn an ordinary snack into a celebration of tastes!
Oreo Protein Balls Recipe FAQs
How do I know if my ingredients are ripe or suitable for this recipe?
For the best results, ensure that your cream cheese is softened to room temperature. This makes it easier to mix with other ingredients, creating a creamy texture. Avoid using cream cheese that has an off smell or a grainy texture. When selecting Oreo cookies, check that they are fresh and free from dark spots to ensure they deliver the delightful crunch and flavor that makes these protein balls irresistible.
What is the best way to store Oreo protein balls?
You can store your Oreo protein balls in an airtight container placed in the refrigerator for up to 5-7 days. Make sure they are well-covered to keep them fresh and avoid drying out. If you want to save them for longer, consider freezing them, which is an excellent option for meal prepping!
Can I freeze Oreo protein balls, and if so, how?
Absolutely! To freeze your Oreo protein balls, place them in a single layer on a baking sheet lined with parchment paper and freeze until solid, about 2 hours. Once frozen, transfer them to a freezer-safe bag or container, separating layers with wax paper to prevent sticking. They can last for up to 3 months in the freezer. Just remember to let them thaw in the fridge for about 30 minutes before enjoying!
What should I do if my protein ball mixture is too sticky or crumbly?
If your mixture is too sticky, you can gradually add 1-2 tablespoons of almond milk while mixing until it reaches a more manageable consistency. On the other hand, if it’s too crumbly, try mixing in a little more coconut flour to help bind it better. Don’t hesitate to adjust according to your desired texture—experimenting a bit can lead to the perfect bite!
Are Oreo protein balls suitable for people with dietary restrictions or allergies?
Yes! These protein balls can be customized to meet various dietary needs. If you have a gluten sensitivity, simply use gluten-free Oreos. You can also swap out regular cream cheese for low-fat or vegan cream cheese to accommodate different diets. Always double-check the ingredient labels, especially for allergies, to ensure everything works for you!
Delicious Oreo Protein Balls: Guilt-Free Treats in Minutes
Ingredients
Equipment
Method
- Finely chop Oreo cookies into crumbs using a food processor or a zip-top bag and rolling pin. Set aside.
- In a mixing bowl, combine vanilla protein powder, coconut flour, and monk fruit sweetener. Stir for 1-2 minutes.
- Add softened cream cheese and Oreo cookie crumbs to the dry mixture. Mix thoroughly for 3-4 minutes.
- If too thick, gradually add almond milk until mixture reaches a soft, moldable consistency.
- Scoop the mixture into tablespoon portions and roll into balls. Place on a tray lined with parchment paper.
- Refrigerate for 15 minutes to firm up the protein balls.
- If desired, melt white chocolate chips and drizzle over the chilled protein balls.
Leave a Reply