
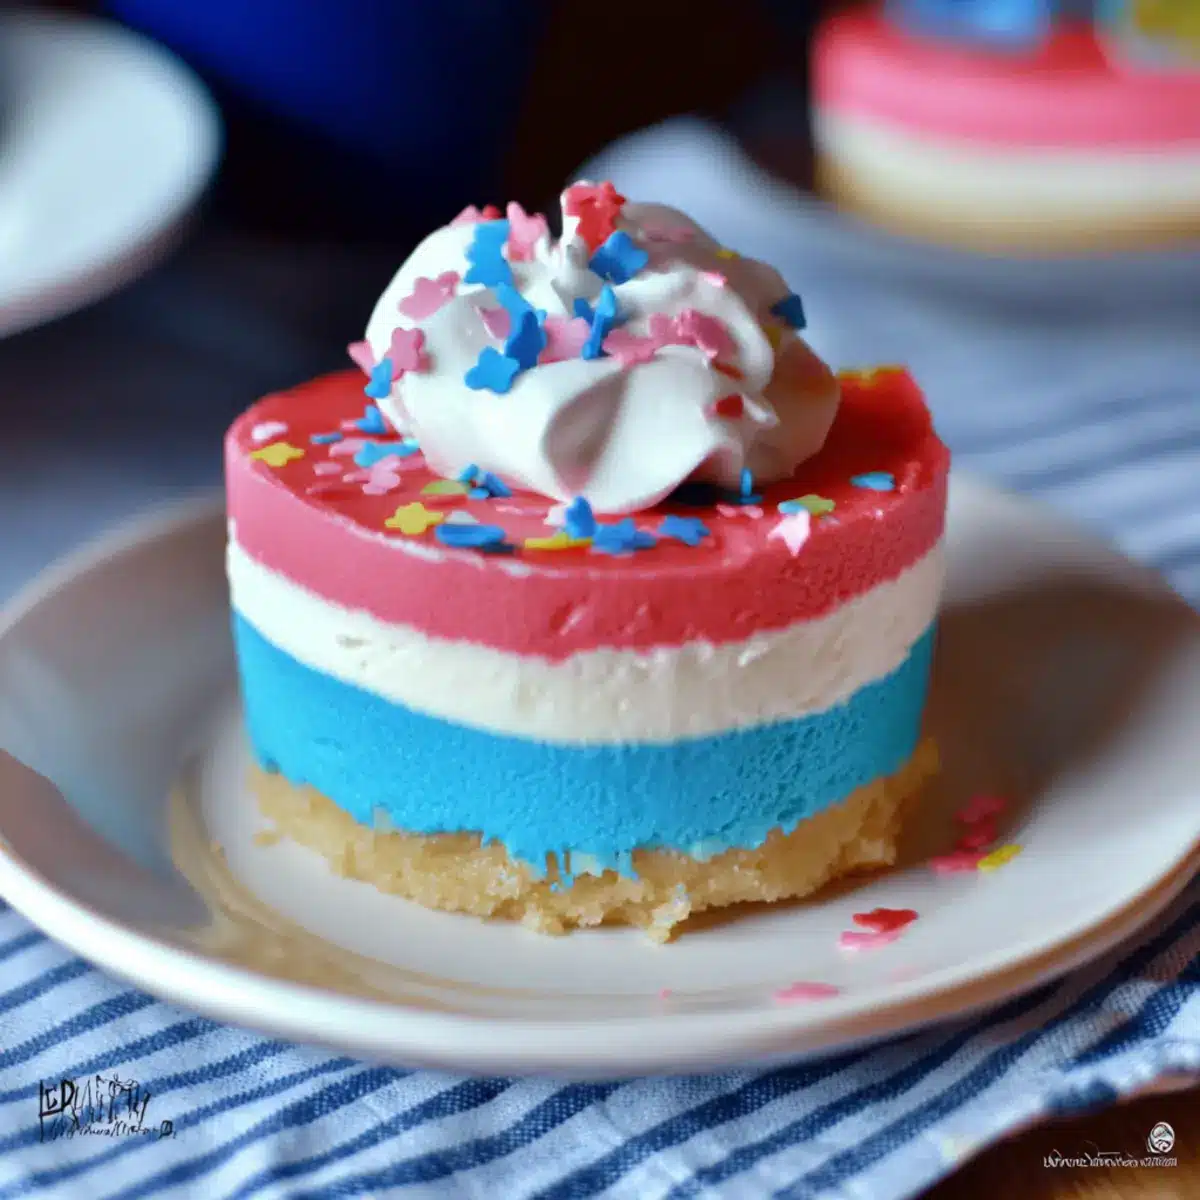
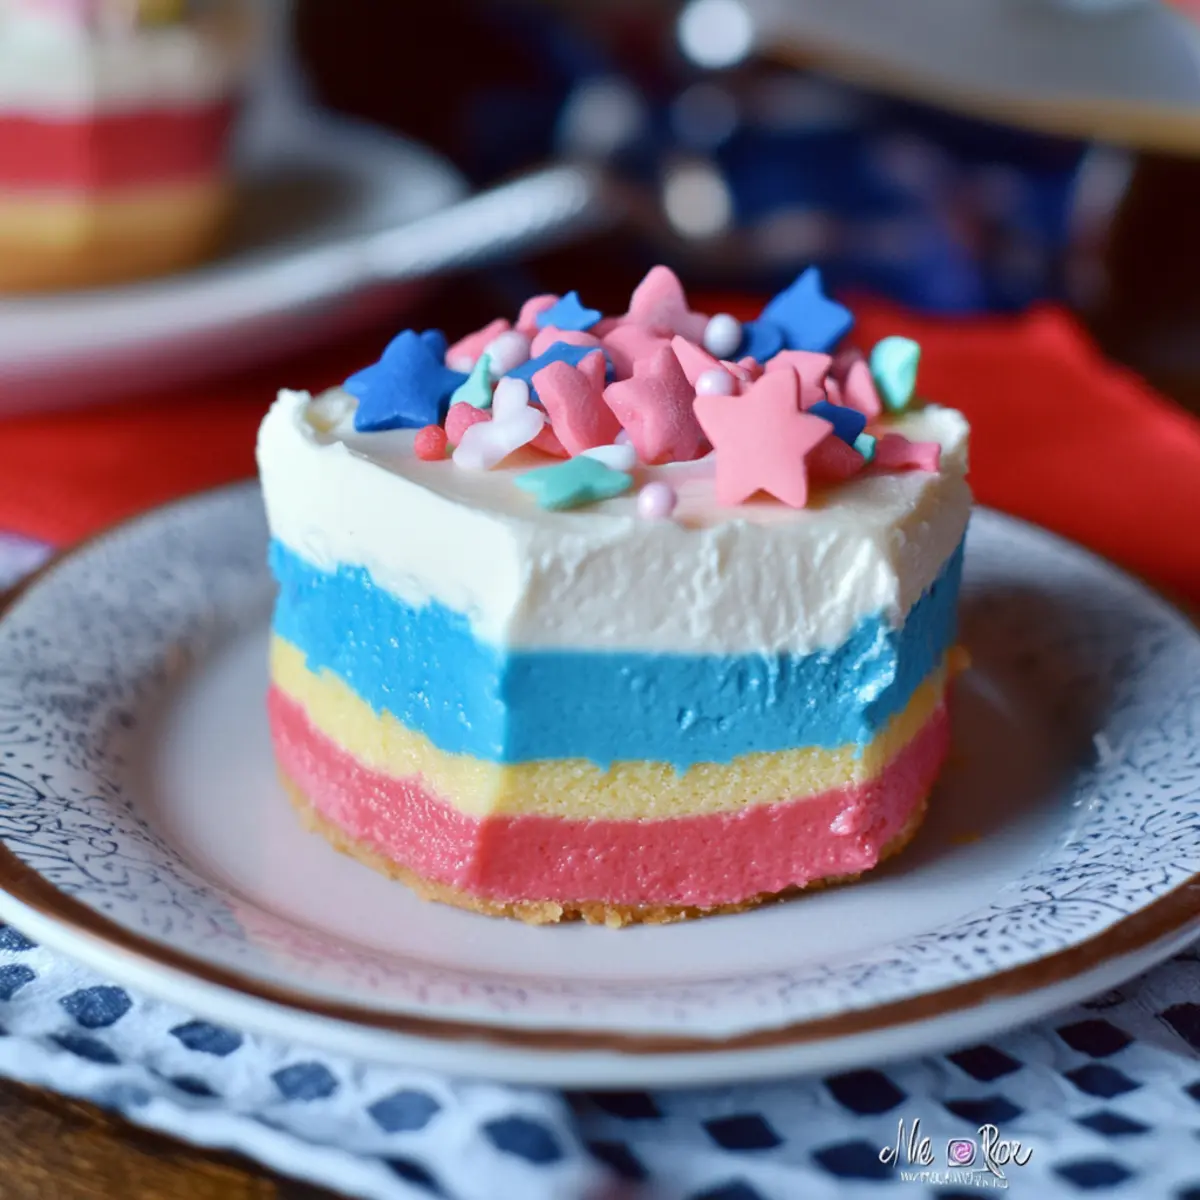
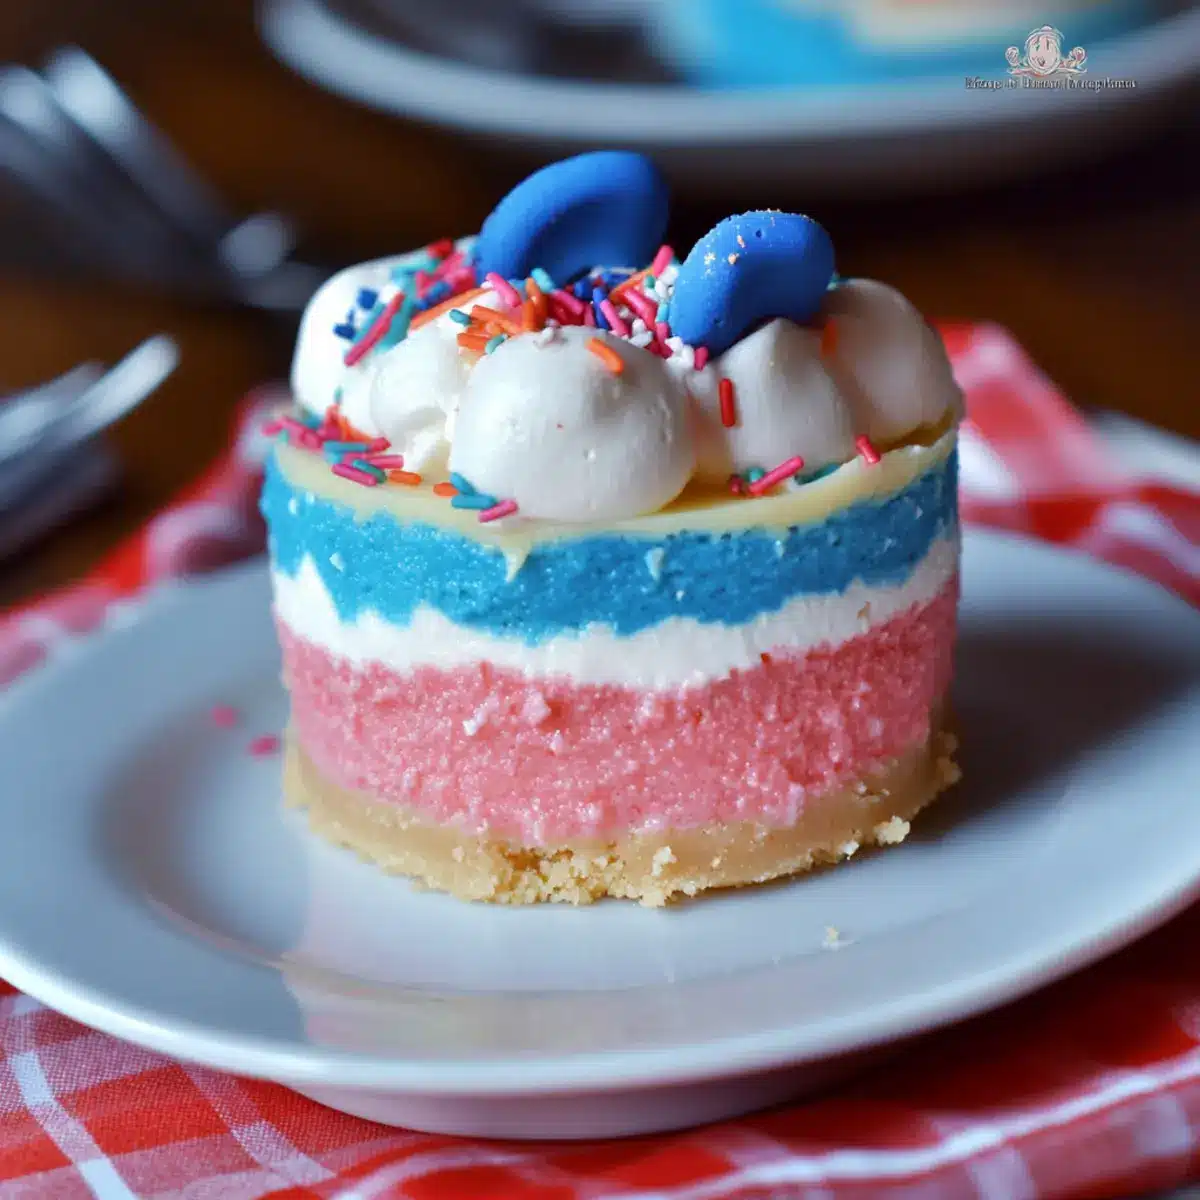
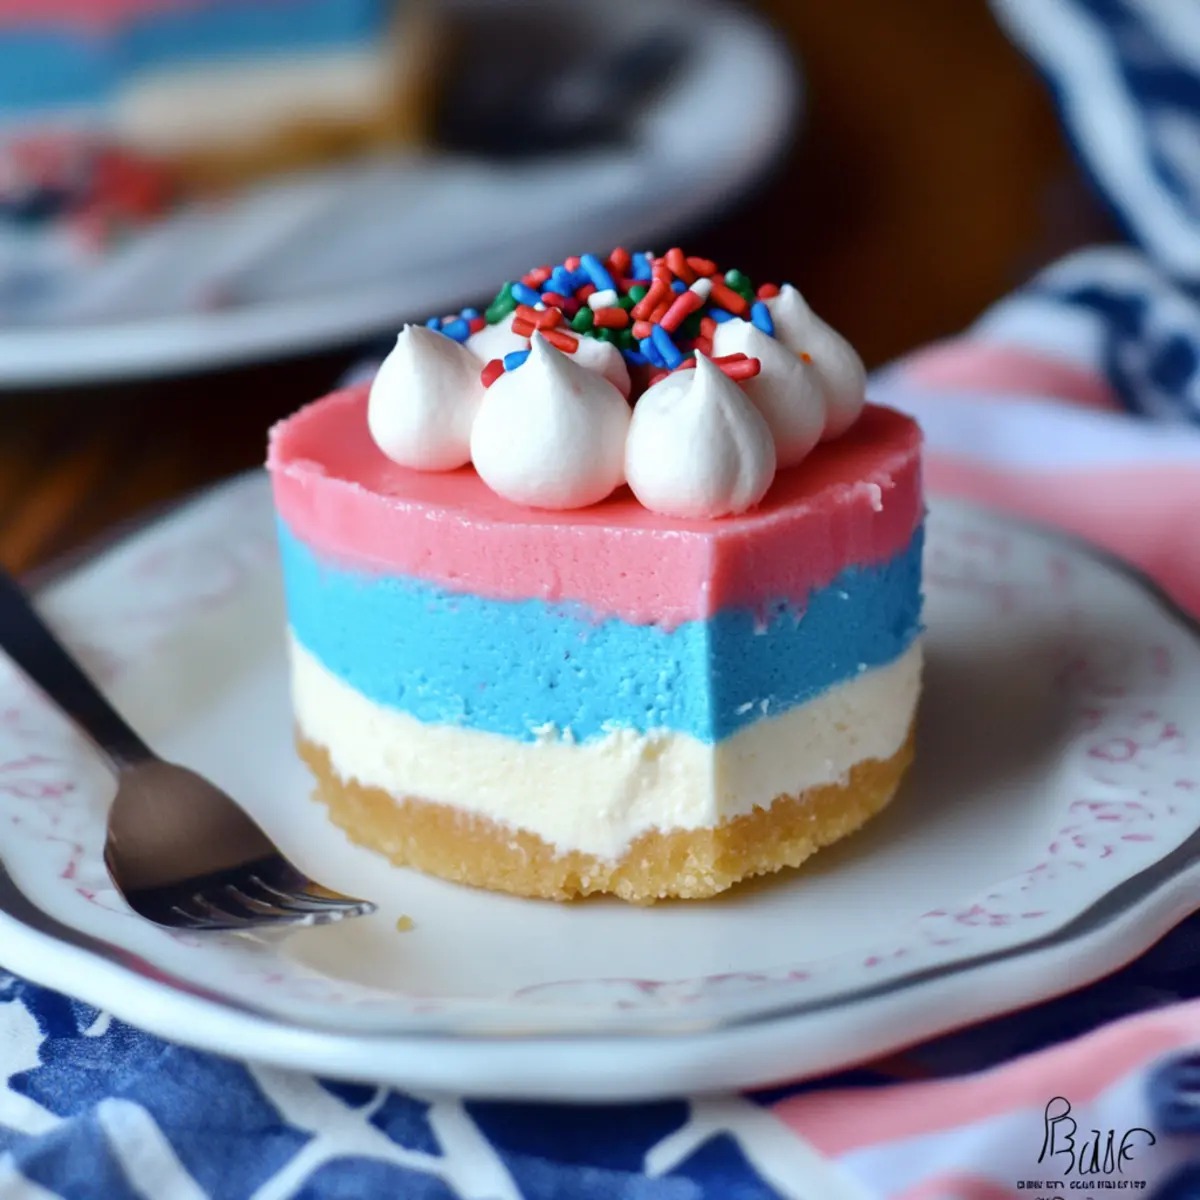
As I rummaged through my kitchen drawers, an idea sparked: a dessert that embodies all the joy and vibrancy of a celebration—enter the No Bake Rainbow Cheesecake! This stunning treat doesn’t just look like a work of art; it’s a creamy delight that comes together without turning on the oven. Perfect for birthdays, holidays, or those special moments when you want to impress, this recipe is wonderfully simple, making it an ideal project to share with the kids. Imagine the delight on their faces as we layer vibrant colors to create a jaw-dropping, show-stopping centerpiece! Whether you’re planning a Fourth of July bash, a Christmas gathering, or a sweet Valentine’s surprise, this festive dessert is bound to steal the show. Are you ready to dive into the colorful world of no-bake desserts?
Why Is This Cheesecake So Special?
Colorful Layers: Each slice of this No Bake Rainbow Cheesecake reveals vibrant colors that are visually stunning, making it an eye-catching centerpiece at any gathering.
No Baking Required: Absolutely no oven is needed! This recipe is ideal for those hot days when you want a delicious dessert without heating up the kitchen.
Kid-Friendly Fun: Involve the kids in the process! They’ll love mixing colors and helping layer this dessert, turning baking time into family fun.
Versatile and Adaptable: Celebrate any occasion with ease—switch up the colors for patriotic holidays, winter themes, or even Valentine’s Day, ensuring that it’s always festive!
Crowd-Pleaser: Impress your guests with this creamy delight. The luscious texture combined with sweet layers will leave everyone asking for seconds.
For a different flavor twist, check out my Peanut Butter Bake or consider a Japanese Cheesecake Light for another decadent yet easy dessert option!
No Bake Rainbow Cheesecake Ingredients
For the Crust
- Shortbread Cookies – Provides a buttery base; you can substitute with graham crackers for a unique twist.
- Melted Butter – Binds the cookie crumbs together for a sturdy crust.
For the Cheesecake Filling
- Unflavored Gelatin – Helps set the cheesecake without baking; consider agar-agar as a vegetarian alternative.
- Cold Water – Activates the gelatin to achieve the perfect texture.
- Cream Cheese – The star of the filling; ensure it’s softened for smooth mixing.
- Sugar – Sweetens the mixture; feel free to adjust based on your taste preference.
- Lemon Juice – Adds a bright tang to balance out the sweetness.
- Vanilla – Enhances the overall flavor; choose pure vanilla for the best taste.
- Pinch of Salt – Balances the sweetness while enhancing the flavors.
- Heavy Cream – Whipped to create a light and airy filling.
- Sweet Cream Creamer – Adds richness; you can swap it for milk or half-and-half if needed.
For the Colorful Layers
- Concentrated Gel Food Coloring – Essential for vibrant colors; avoid liquid colors as they may affect texture.
- Whipped Cream (optional) – Perfect for adding a creamy topping.
- Sprinkles (optional) – For an extra touch of whimsy and celebration!
You now have everything you need for your No Bake Rainbow Cheesecake, ready to bring bursts of color and joy to your next gathering!
Step‑by‑Step Instructions for No Bake Rainbow Cheesecake
Step 1: Prepare Crust
Start by grinding shortbread cookies into fine crumbs using a food processor. Melt some butter and mix it with the cookie crumbs until well combined. Press this mixture evenly into the bottoms of your silicone molds to form a solid crust. Ensure the crust is firmly packed, then set the molds aside to harden while you prepare the filling.
Step 2: Activate Gelatin
In a small bowl, sprinkle the unflavored gelatin over cold water and let it sit for about 5 minutes until it becomes firm. Once firm, microwave the mixture for 10-15 seconds to dissolve the gelatin completely, stirring gently until there are no lumps. Set the activated gelatin aside to cool slightly.
Step 3: Mix Filling
In a mixing bowl, beat the softened cream cheese until smooth and creamy, about 2 minutes. Gradually add in the sugar, lemon juice, vanilla, and a pinch of salt, mixing until everything is well incorporated. Gently fold in the room-temperature heavy cream and sweet cream creamer until the mixture is light and fluffy.
Step 4: Incorporate Gelatin
Carefully add the dissolved gelatin to the cream cheese mixture, blending well to ensure everything is fully combined. Make sure to mix gently to avoid incorporating too much air, which will keep the cheesecake light yet creamy. This smooth filling will be the heart of your No Bake Rainbow Cheesecake.
Step 5: Color Layering
Divide the cream cheese mixture into several bowls depending on how many colors you want to create. Add concentrated gel food coloring to each bowl, mixing until you achieve your desired vibrant hues. Begin pouring the first color into the prepared molds, using a spatula to encourage even coverage while ensuring distinct layers.
Step 6: Freeze
Place the molds in the freezer for at least 2 to 4 hours, or until the cheesecake is fully set and firm to the touch. This freezing process will help solidify the colorful layers of your No Bake Rainbow Cheesecake. Check to ensure they are completely firm before removing from the freezer.
Step 7: Serve
Once set, allow the cheesecake to thaw for about 30 minutes at room temperature for easier slicing. Carefully remove from the molds, place on a serving plate, and garnish with whipped cream and sprinkles if desired. This will complement the vibrant layers and add that final festive touch to your No Bake Rainbow Cheesecake!
Make Ahead Options
This No Bake Rainbow Cheesecake is perfect for meal prep, making it easy to whip up ahead of time for busy celebrations! You can prepare the crust and the filling separately up to 24 hours in advance. Simply grind the shortbread cookies and mix them with melted butter, then press into molds; store them in the refrigerator. The cheesecake filling can also be mixed and refrigerated, just be sure to cover it tightly to maintain its creamy texture. When you’re ready to finish, layer the colors and freeze the cheesecake for 2 to 4 hours before serving. This way, you’ll enjoy a colorful, deliciously creamy dessert with minimal last-minute effort!
Expert Tips for No Bake Rainbow Cheesecake
-
Color Mixing: Use concentrated gel food coloring rather than liquid to ensure vibrant layers without compromising texture.
-
Crust Consistency: Make sure the crust is firmly packed; a loose crust will crumble and may not hold the layers together during slicing.
-
Layering Technique: Pour layers gently to keep colors distinct. A spatula can help spread the mixture evenly without blending colors.
-
Chill Time: Give the cheesecake sufficient freezing time of 2 to 4 hours. Insufficient chilling can lead to a runny filling, compromising the no bake experience.
-
Choosing Molds: Opt for silicone molds for easy removal; they help retain the shape of the No Bake Rainbow Cheesecake without any fuss!
No Bake Rainbow Cheesecake Variations
Feel free to customize your No Bake Rainbow Cheesecake to make it truly your own. Each variation opens a door to new flavors and festive fun!
-
Dairy-Free: Substitute cream cheese with a vegan cream cheese alternative, and use coconut cream instead of heavy cream for a rich, plant-based delight.
-
Gluten-Free: Use gluten-free graham crackers or almond flour blended with melted butter for a delicious crust that everyone can enjoy.
-
Fruit-Infused Layers: Incorporate pureed fruits like strawberries or mangoes into your filling for natural sweetness and vibrant flavor. Kids will love this fruity twist!
-
Chocolate Drizzle: Add a decadent chocolate layer by mixing melted dark chocolate into part of your filling and creating a chocolate ribbon effect. This adds both richness and a delightful surprise!
-
Nutty Crunch: Fold in crushed nuts or granola into the crust or layers for unexpected texture and flavor. This little crunch can elevate your dessert to new heights!
-
Less Sweet: Reduce sugar in the filling or opt for a sugar alternative like maple syrup or honey to make it a touch healthier while maintaining deliciousness.
-
Holiday Themes: For a Halloween twist, use purple and orange layers. Think festive! You can also swap designs for your Valentine’s heart-shaped molds for a romantic dessert.
No matter which variation you choose, your cheesecake will be a delightful treat to share! Speaking of desserts, consider pairing this colorful cheesecake with a light Japanese Cheesecake Light or explore the delightful flavors of my Baked Prosciutto Egg for a balanced menu that everyone will love.
How to Store and Freeze No Bake Rainbow Cheesecake
-
Fridge: Store leftover No Bake Rainbow Cheesecake in an airtight container in the refrigerator for up to 3 days to maintain the best texture and freshness.
-
Freezer: For longer storage, wrap individual slices tightly in plastic wrap and then in aluminum foil, keeping them in the freezer for up to 2 months.
-
Thawing: When ready to enjoy, thaw the cheesecake in the refrigerator overnight or at room temperature for about 30 minutes before serving.
-
Reheating: There’s no need to reheat this no bake cheesecake; it’s best served chilled. Enjoy it straight from the fridge for the ideal creamy delight!
What to Serve with No Bake Rainbow Cheesecake
This colorful dessert is a delightful centerpiece that can elevate any gathering, making the table buzz with excitement and cheer.
- Creamy Ice Cream: A scoop of vanilla or rainbow sherbet adds a delightful creaminess that pairs beautifully with the cheesecake’s smooth texture.
- Fresh Berries: Perfectly ripe strawberries and blueberries bring a refreshing burst of flavor and a gorgeous pop of color to each serving.
- Light Fruit Salad: A blend of seasonal fruits adds a crisp, refreshing element, balancing the richness of the cheesecake.
- Whipped Cream Topping: Amplify the creamy goodness by dolloping homemade whipped cream on top; it adds an extra layer of indulgence.
- Sparkling Lemonade: A fizzy drink with a citrus twist complements the cheesecake’s sweetness and keeps the celebration light and refreshing.
- Chocolate-Covered Pretzels: For a sweet-salty crunch, these bites provide a delightful contrast to the creamy layers of the cheesecake.
- Mini Cheesecake Bites: Serve as a fun alternative if you wish to have more options; these bite-sized versions keep the festive spirit alive.
- Coffee or Hot Cocoa: A warm beverage adds a cozy touch, making the dessert experience feel even more inviting and delightful.
No Bake Rainbow Cheesecake Recipe FAQs
What type of cookies work best for the crust?
I recommend using shortbread cookies for a buttery flavor, but graham crackers also work beautifully if you prefer a different taste. Just ensure they’re finely crushed for a firm base!
How long can I store leftover No Bake Rainbow Cheesecake?
You can keep leftovers in an airtight container in the refrigerator for up to 3 days. For best texture and taste, enjoy it chilled!
Can I freeze No Bake Rainbow Cheesecake?
Absolutely! Wrap individual slices tightly in plastic wrap and then in aluminum foil to prevent freezer burn, and store in the freezer for up to 2 months.
How do I thaw frozen cheesecake?
When you’re ready to indulge, simply thaw the cheesecake overnight in the refrigerator for the best results. Alternatively, you can leave it at room temperature for about 30 minutes—perfect for maintaining that creamy texture!
What should I do if my filling is too runny?
If you find your filling is runny, it might not have set properly due to unactivated gelatin. Ensure you dissolve the gelatin in cold water fully and microwave it briefly, then mix it into your cream cheese mixture while still warm. This can help achieve the right consistency!
Are there any dietary considerations for this recipe?
Yes! If you’re serving individuals with dietary restrictions, substitute gelatin with agar-agar for a vegetarian-friendly version. Always check food coloring labels for allergens, and consider using dairy-free cream cheese and creamer if necessary.
No Bake Rainbow Cheesecake: A Colorful Treat for Every Celebration
Ingredients
Equipment
Method
- Start by grinding shortbread cookies into fine crumbs using a food processor. Melt some butter and mix it with the cookie crumbs until well combined. Press this mixture evenly into the bottoms of your silicone molds to form a solid crust. Ensure the crust is firmly packed, then set the molds aside to harden while you prepare the filling.
- In a small bowl, sprinkle the unflavored gelatin over cold water and let it sit for about 5 minutes until it becomes firm. Once firm, microwave the mixture for 10-15 seconds to dissolve the gelatin completely, stirring gently until there are no lumps. Set the activated gelatin aside to cool slightly.
- In a mixing bowl, beat the softened cream cheese until smooth and creamy, about 2 minutes. Gradually add in the sugar, lemon juice, vanilla, and a pinch of salt, mixing until everything is well incorporated. Gently fold in the room-temperature heavy cream and sweet cream creamer until the mixture is light and fluffy.
- Carefully add the dissolved gelatin to the cream cheese mixture, blending well to ensure everything is fully combined. Make sure to mix gently to avoid incorporating too much air.
- Divide the cream cheese mixture into several bowls depending on how many colors you want to create. Add concentrated gel food coloring to each bowl, mixing until you achieve your desired vibrant hues. Begin pouring the first color into the prepared molds.
- Place the molds in the freezer for at least 2 to 4 hours, or until the cheesecake is fully set and firm to the touch.
- Once set, allow the cheesecake to thaw for about 30 minutes at room temperature for easier slicing. Carefully remove from the molds, place on a serving plate, and garnish with whipped cream and sprinkles if desired.
Leave a Reply