
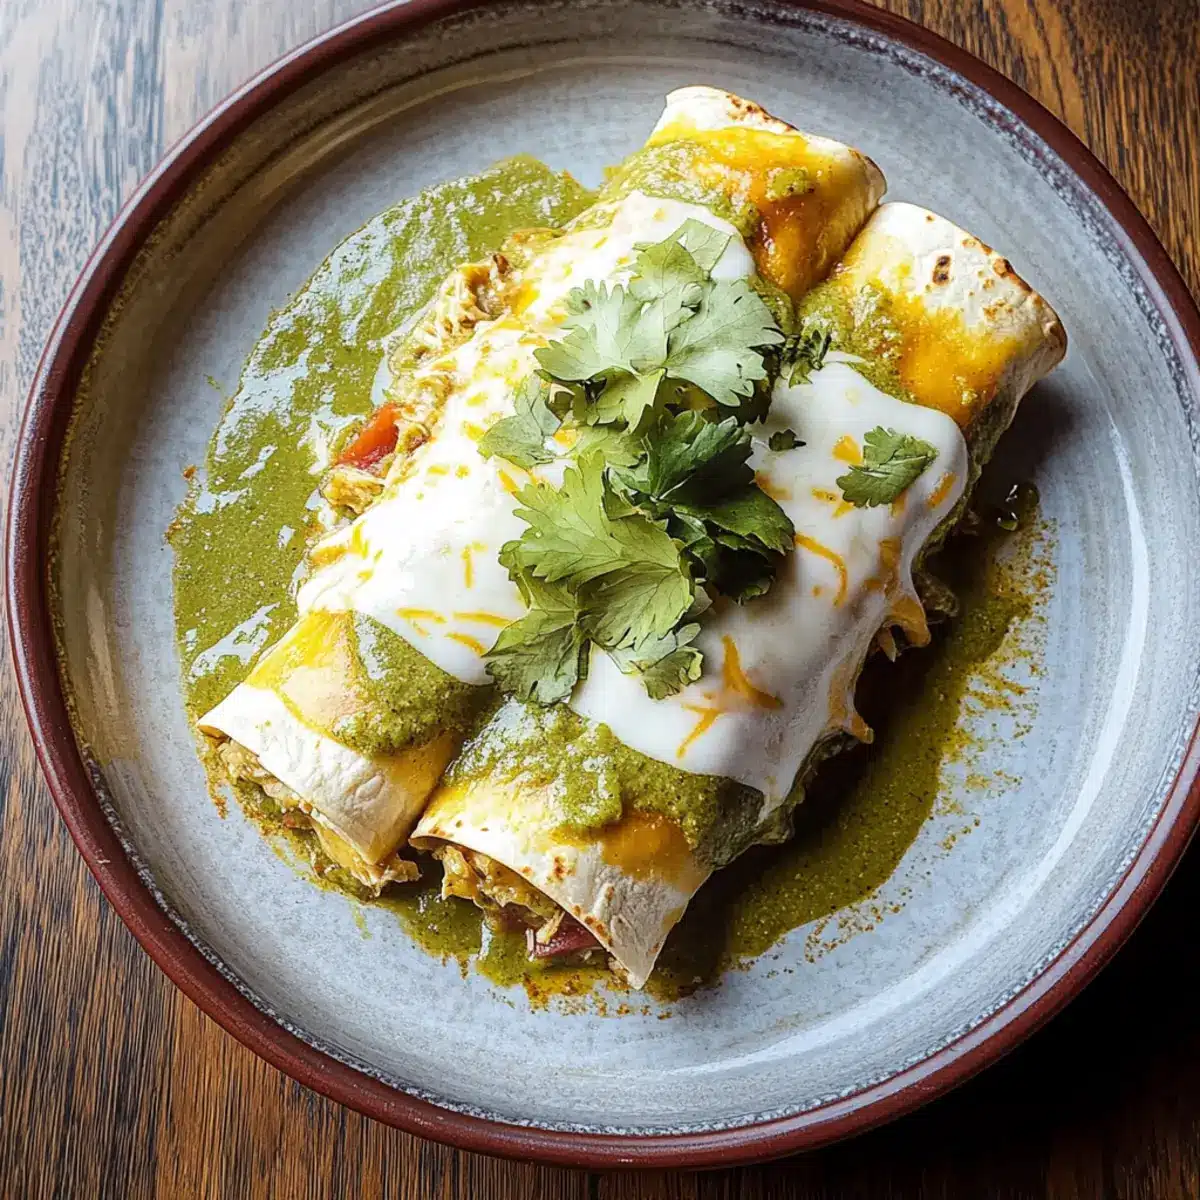
As I stood in my kitchen, the enticing aroma of sizzling onions and garlic filled the air, immediately transporting me to the bustling streets of Mexico. This is exactly the moment when I can’t resist making my Creamy Enchiladas Suizas with Shredded Chicken. These enchanting enchiladas offer a delightful comfort food experience, featuring soft corn tortillas wrapped around savory chicken and drizzled with a luscious, creamy green sauce. They’re not only a crowd-pleaser for family gatherings but also perfect for those busy weeknights when you want something that feels truly special without spending hours in the kitchen. And the best part? This dish is incredibly adaptable, allowing you to switch things up with your favorite fillings. Are you ready to dive into the delicious world of Enchiladas Suizas?

Why will you love Enchiladas Suizas?
Comforting goodness: These creamy enchiladas are the ultimate comfort food, providing a satisfying, warm embrace with every bite.
Quick preparation: Spend less time in the kitchen! With simple steps, you can whip up this delightful dish in about 30 minutes.
Endless customization: Fill these tortillas with chicken, beef, or beans for a vegetarian option, ensuring everyone finds their perfect match.
Crowd pleaser: Whether it’s a festive gathering or a cozy dinner, Enchiladas Suizas will impress your guests and leave them asking for seconds.
Make ahead: Preparing this dish in advance means less stress on busy nights—just assemble, refrigerate, and bake when you’re ready! Why not pair them with some tasty White Chicken Enchiladas for even more savory options?
Fresh flavors: The combination of cilantro and green enchilada sauce elevates the taste, bringing brightness to this hearty dish.
Enchiladas Suizas Ingredients
• Get ready to create a creamy delight with these essential ingredients!
For the Tortillas
- Corn Tortillas – They wrap the filling perfectly and bring authentic flavor; opt for flour tortillas if you prefer a softer texture.
For the Filling
- Shredded Chicken – The star protein; use rotisserie chicken for convenience or swap for beans for a vegetarian option.
- Onion (chopped) – Adds a robust flavor base; shallots can stand in if desired.
- Garlic (minced) – Essential for aroma and flavor; fresh garlic is ideal, but garlic powder works in a pinch.
- Chicken Broth – Moistens the mixture; substitute with vegetable broth for a vegetarian version.
For the Sauce
- Green Enchilada Sauce (or Salsa Verde) – The flavor hero of this dish; you can use homemade or store-bought, adjusting spice to your liking.
- Sour Cream – Adds a creamy texture and enhances flavor; swap in Greek yogurt for a lighter option.
For Topping
- Shredded Cheese (Monterey Jack or Mexican Blend) – Melts beautifully over the enchiladas; try Cheddar or Queso Fresco for different flavors.
- Fresh Cilantro (chopped) – A vibrant garnish; if you prefer, parsley can be an alternate.
For Seasoning
- Salt and Pepper – Essential for enhancing all the flavors in your dish!
Now you’re all set to create a mouthwatering version of Enchiladas Suizas that will be loved by everyone at the table!
Step‑by‑Step Instructions for Enchiladas Suizas
Step 1: Preheat the Oven
Begin by preheating your oven to 375°F (190°C). This ensures a perfectly baked dish that’s warm and comforting. While the oven heats up, prepare your ingredients and get your kitchen ready for the delightful process of making Enchiladas Suizas.
Step 2: Sauté the Aromatics
In a large skillet, heat 2 tablespoons of olive oil over medium heat. Add the chopped onion and minced garlic, sautéing for about 3–4 minutes until they become fragrant and translucent. The warm, inviting scent will set the tone for this hearty meal, making your kitchen feel cozy.
Step 3: Prepare the Filling
Stir in the shredded chicken, chicken broth, and green enchilada sauce into the skillet. Allow the mixture to simmer for 5 minutes, letting the flavors meld beautifully. Season with salt and pepper to taste, and keep an eye on the mixture as it thickens slightly, enhancing the delicious filling for your Enchiladas Suizas.
Step 4: Soften the Tortillas
To avoid sogginess, lightly fry each corn tortilla in the skillet for about 30 seconds on each side. You want them to be soft and pliable, making them easier to roll up with the scrumptious filling inside. As you do this, set the tortillas aside on a plate lined with paper towels to absorb excess oil.
Step 5: Mix the Cream Sauce
In a small bowl, combine the sour cream with a tablespoon of the green enchilada sauce to create a creamy topping. This mixture will add a rich flavor to your Enchiladas Suizas. Set it aside and take in the delightful aromas wafting from your skillet as you move on to assembly.
Step 6: Assemble the Enchiladas
Spread a layer of the chicken filling into a baking dish, then take a tortilla, place some of the filling in the center, and roll it up tightly, placing it seam-side down in the dish. Repeat this process until all tortillas are filled and neatly positioned within the baking dish, forming a comforting nest of enchiladas.
Step 7: Pour and Top
Once the tortillas are assembled, pour the remaining chicken mixture over the rolled enchiladas. Sprinkle generously with shredded cheese, covering them to ensure a gooey, melted topping. The cheese will add an irresistible golden-brown layer on top as it bakes—don’t skimp on this step for delicious Enchiladas Suizas!
Step 8: Bake to Perfection
Place the baking dish in your preheated oven and bake for 20–25 minutes, or until the cheese is bubbly and golden. You’ll know they’re ready when you see the cheese nicely caramelized and the flavors melded beautifully underneath—a true feast for the senses!
Step 9: Serve with Flair
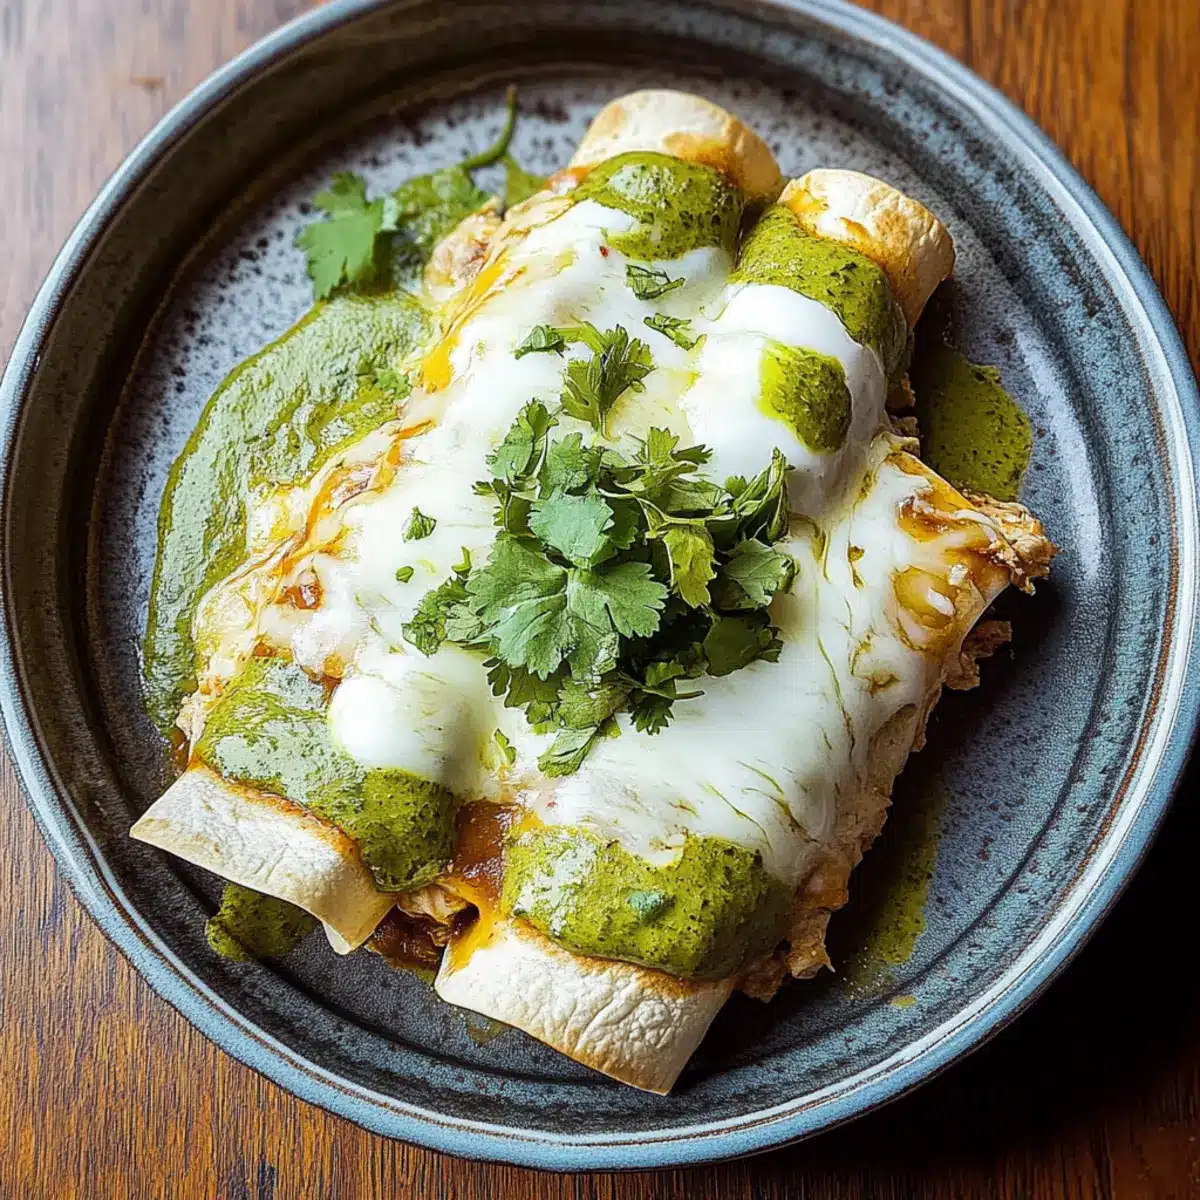
Once baked, remove the enchiladas from the oven and allow them to cool slightly. Serve your Enchiladas Suizas topped with the sour cream sauce you prepared earlier and a sprinkle of fresh cilantro for that pop of color. Gather around the table and enjoy this warm, comforting dish with loved ones!
How to Store and Freeze Enchiladas Suizas
Fridge: Store leftovers in an airtight container for up to 3 days. Reheat in the oven at 350°F (175°C) for about 15 minutes until warm and bubbly.
Freezer: To freeze, assemble the Enchiladas Suizas without baking, cover tightly with foil, and freeze for up to 3 months. Bake from frozen, adding an extra 10-15 minutes to the cooking time.
Reheating: For best results, reheat in the oven rather than the microwave to keep the tortillas from becoming soggy. Add a splash of chicken broth if needed to keep the filling moist.
Make-Ahead Tip: You can prepare Enchiladas Suizas a day prior and refrigerate before baking. Cover them with foil to maintain moisture, then bake when ready to serve!
What to Serve with Enchiladas Suizas
Elevate your meal experience by pairing these creamy delights with complementary sides and drinks that enhance their rich flavors.
-
Mexican Rice: A fluffy, flavorful accompaniment that soaks up the delicious sauce while adding texture to the meal.
-
Refried Beans: A classic pairing, their creamy goodness provides a satisfying contrast to the cheesy enchiladas, adding both protein and fiber.
-
Fresh Salad: A light, vibrant salad with fresh greens, tomatoes, and avocado will bring a refreshing balance to the rich enchiladas.
Squeezing a little lime over the salad brightens the flavor, making each bite feel invigorating.
-
Guacamole: This creamy, zesty dip offers a wonderful blend of flavors while cooling the spice, perfect for enhancing each bite of enchilada.
-
Pico de Gallo: This fresh salsa brings a burst of juiciness and zest, complementing the enchiladas while providing a crunchy texture.
-
Craft Beer or Sangria: A light, fruity beer or a refreshing sangria pairs beautifully with the rich, creamy elements of the enchiladas, making for a delightful experience.
Enjoy these wonderful pairings and create a memorable meal that feels like a fiesta on your dinner table!
Enchiladas Suizas Variations & Substitutions
Feel free to experiment with your Enchiladas Suizas and make them uniquely yours! Each variation adds a delightful twist that caters to your taste buds.
- Dairy-Free: Swap sour cream and cheese for coconut yogurt and nutritional yeast to enjoy a creamy texture without the dairy.
- Vegetarian: Replace shredded chicken with sautéed mushrooms, bell peppers, and zucchini for a colorful, plant-based filling. This doesn’t sacrifice flavor—just look at those vibrant veggies!
- Spicy Kick: Add diced jalapeños or a few dashes of hot sauce to the filling for an extra burst of heat. Your taste buds will dance with excitement!
- Cheesy Blend: Experiment with different cheeses like pepper jack or Gouda for a unique take on melting deliciousness. Each cheese brings its charm and adds depth to the flavors.
- Flavorful Broth: Use vegetable broth instead of chicken broth to keep your dish vegetarian-friendly while still packing in that savory goodness.
- Salsa Verde Twist: Swap your green enchilada sauce for tomatillo salsa for a fresh and zesty alternative that lightens the dish. Think about those bright flavors dancing on your palate!
- Tortilla Type: Try using wheat flour tortillas for a softer, chewy texture that contrasts wonderfully with the creamy filling. It feels like a whole new dish while still being comforting!
- Make-Ahead Magic: Assemble your enchiladas the night before and store in the fridge. When it’s time to bake, simply add a few extra minutes to ensure they are heated through. This gives you more time to enjoy your evening with loved ones!
Now, let the creative juices flow while you prepare comforting Enchiladas Suizas, and remember, there’s always room for a delightful side of White Chicken Enchiladas on your dinner table for an exciting culinary experience!
Helpful Tricks for Enchiladas Suizas
-
Fresh Tortillas: Always use freshly fried corn tortillas to prevent sogginess and enhance the flavor in your Enchiladas Suizas.
-
Adjust Spice Levels: Customize the heat in your green enchilada sauce or add jalapeños to match your family’s taste.
-
Make Ahead: Assemble your enchiladas in advance, cover with foil, and refrigerate. Just remember to bake them straight from the fridge, adding extra time if needed.
-
Toppings Matter: Don’t skip the cheese! A generous layer of shredded cheese creates that delightful gooey topping that elevates your dish.
-
Experiment with Fillings: Don’t hesitate to swap out shredded chicken for ground beef, pulled pork, or even beans for a vegetarian option.
Make Ahead Options
These Enchiladas Suizas are perfect for meal prep enthusiasts looking to save time on busy weeknights! You can assemble the entire dish and refrigerate it for up to 24 hours before baking. To maintain quality, make sure to cover the baking dish tightly with foil to prevent moisture loss. When you’re ready to enjoy, simply remove the foil and bake directly from the fridge, adding an extra 5-10 minutes to the cooking time to ensure they’re heated through and the cheese is beautifully melted. This make-ahead option not only alleviates mealtime stress but also delivers deliciously comforting results, ready to impress your family!

Enchiladas Suizas Recipe FAQs
What type of corn tortillas should I use for Enchiladas Suizas?
Absolutely, corn tortillas are essential for an authentic taste and perfect texture! Look for fresh corn tortillas at your local grocery store or tortilleria. If you prefer a softer texture, flour tortillas can be used, but keep in mind it may slightly alter the classic flavor.
How do I store leftover Enchiladas Suizas?
The more, the merrier! Store your leftovers in an airtight container in the fridge for up to 3 days. When you’re ready to enjoy them again, simply reheat in the oven at 350°F (175°C) for about 15 minutes until they are warm and bubbly.
Can I freeze Enchiladas Suizas, and how?
Absolutely! To freeze, assemble your Enchiladas Suizas without baking them. Cover the dish tightly with foil or plastic wrap and freeze for up to 3 months. When you’re ready to bake, simply place them directly from the freezer into the oven, adding an extra 10-15 minutes to the cooking time. Just keep an eye on that melty cheese!
What should I do if my enchiladas are soggy?
If you’re experiencing soggy enchiladas, make sure to fry the tortillas lightly before filling them, as this creates a barrier against the sauce. Additionally, avoid over-saturating them with sauce when assembling. If they do turn out soggy, a brief reheat in the oven can help crisp them up again.
Can I use a different protein or make these vegetarian?
Very much so! You can easily swap shredded chicken for ground beef, pulled pork, or beans for a fabulous vegetarian option. Feel free to mix in additional chopped vegetables like bell peppers or zucchini for delightful flavor variations!
Are there allergy concerns with Enchiladas Suizas?
For those with dietary restrictions, it’s essential to note that you can make this recipe gluten-free by using gluten-free tortillas. Additionally, if you have a dairy allergy, consider using dairy-free cheese and replacing sour cream with a suitable plant-based alternative. Always customization is a delicious way to cater to different needs!
Irresistible Enchiladas Suizas: Comfort Food with a Twist
Ingredients
Equipment
Method
- Preheat your oven to 375°F (190°C).
- In a large skillet, heat 2 tablespoons of olive oil over medium heat. Add the chopped onion and minced garlic, sautéing for 3-4 minutes.
- Stir in shredded chicken, chicken broth, and green enchilada sauce. Simmer for 5 minutes, seasoning with salt and pepper.
- Lightly fry each corn tortilla in the skillet for about 30 seconds on each side. Set aside on a paper towel-lined plate.
- In a small bowl, mix sour cream with a tablespoon of green enchilada sauce for the topping.
- Spread a layer of chicken filling in a baking dish, fill each tortilla, roll them up, and place seam-side down in the dish.
- Pour remaining chicken mixture over enchiladas, sprinkle with shredded cheese.
- Bake for 20-25 minutes until cheese is bubbly and golden.
- Serve slightly cooled, topped with the creamy sauce and chopped cilantro.
Leave a Reply