
As a child, summer always meant lazy afternoons spent at the corner diner, my heart set on the ultimate indulgence: a thick, creamy milkshake. This nostalgia wraps around me every time I whip up my Easy Chocolate Oreo Milkshake—it’s like a ticket back to those carefree days! This recipe comes together in just under five minutes, making it an effortless dessert that’ll wow friends and family alike. Imagine the delight as you savor each sip, where rich chocolate melds seamlessly with crunchy Oreo goodness. Not only is it a crowd-pleaser, but you can also tailor it to your dietary needs by choosing plant-based milk or dairy-free ice cream. So, are you ready to join me on this delicious journey and create a treat that’s perfect for any occasion?
Why is this milkshake a must-try?
Indulgent Flavor: The rich chocolate mingles with crunchy Oreo bits, creating a delicious explosion of taste in every sip.
Perfectly Easy: This recipe is incredibly simple to whip up in under five minutes, making it perfect for any craving.
Customizable Delight: Mix it up with vegan options or additional ingredients like peanut butter for a nutty twist!
Crowd-Pleasing Treat: Whether it’s a summer gathering or movie night, this milkshake is guaranteed to impress everyone around.
Nostalgic Experience: Relive childhood moments with this creamy dream that encapsulates a fun diner vibe, perfect for all ages.
Easy Chocolate Oreo Milkshake Ingredients
• Dive into the deliciousness with these must-have ingredients!
For the Milkshake
- Oreos – The essential base that brings a fantastic cookie flavor; use fresh ones for the best crunch!
- Ice Cream – A smooth and creamy choice that adds sweetness; high-quality vanilla ice cream elevates the flavor.
- Milk – This helps achieve the perfect consistency; feel free to swap with plant-based milk for a vegan easy chocolate Oreo milkshake.
For the Topping
- Whipped Cream – A light and airy finish that adds richness; homemade whipped cream is always the best choice!
- Chocolate Sauce – For that extra touch of indulgence and visual appeal; choose a quality chocolate sauce to enhance the flavor!
Each ingredient plays a significant role in creating a milkshake that’s not just easy but utterly irresistible.
Step‑by‑Step Instructions for Easy Chocolate Oreo Milkshake
Step 1: Blend the Base
Begin by placing 8 Oreos, 2 cups of high-quality vanilla ice cream, and 1 cup of milk into a blender. Secure the lid tightly, then blend on medium speed for about 30-45 seconds, or until the mixture is smooth and creamy. You should see a velvety texture with small Oreo bits visible; this means your Easy Chocolate Oreo Milkshake base is ready!
Step 2: Prepare the Glasses
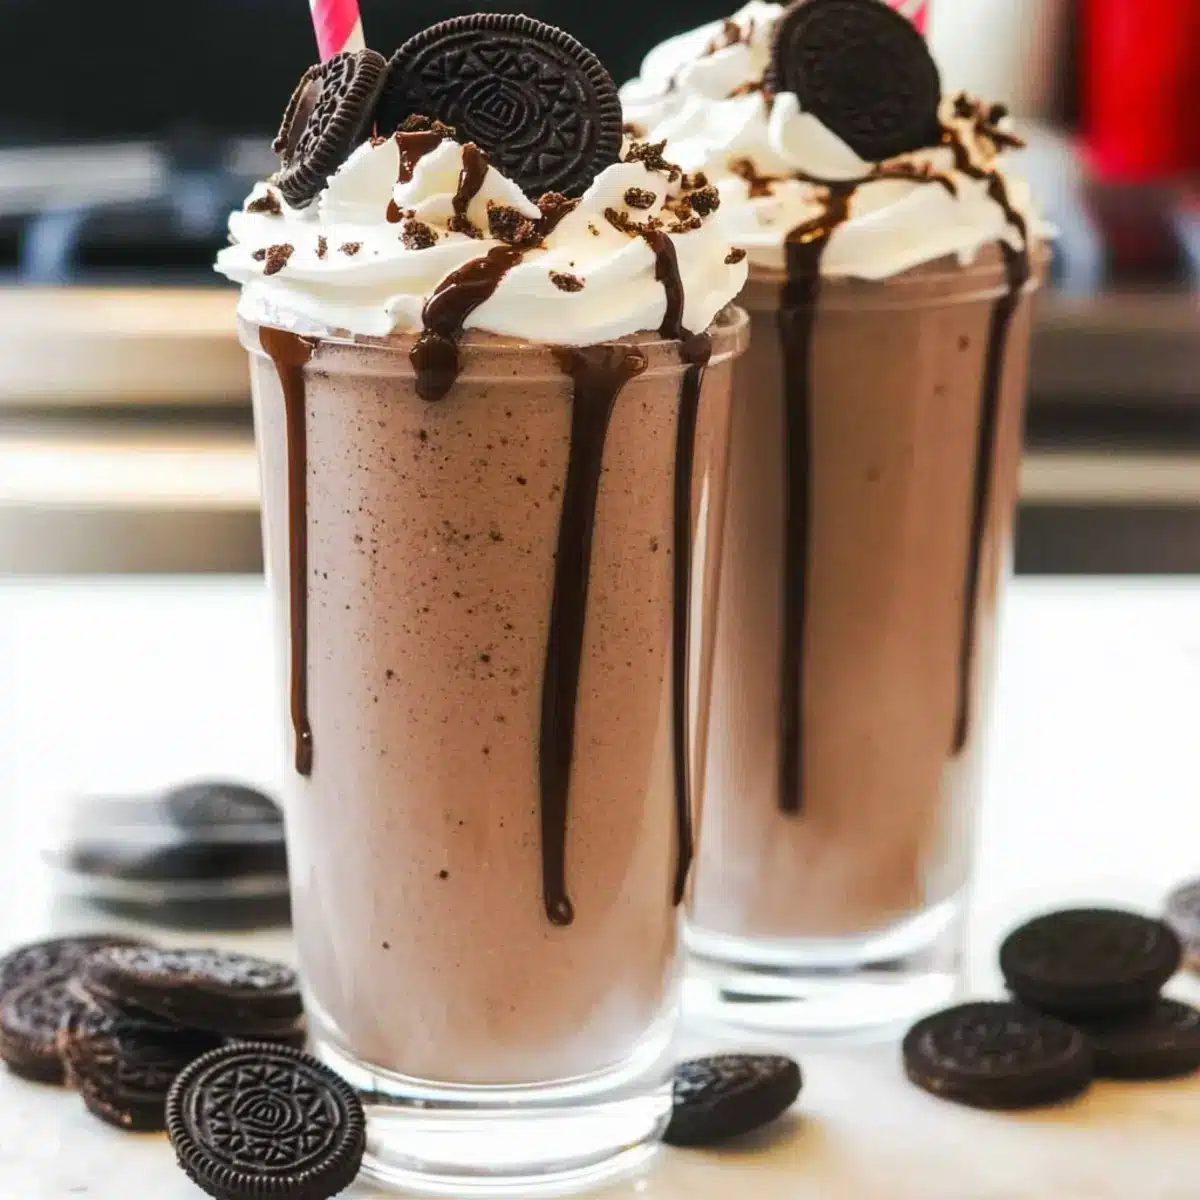
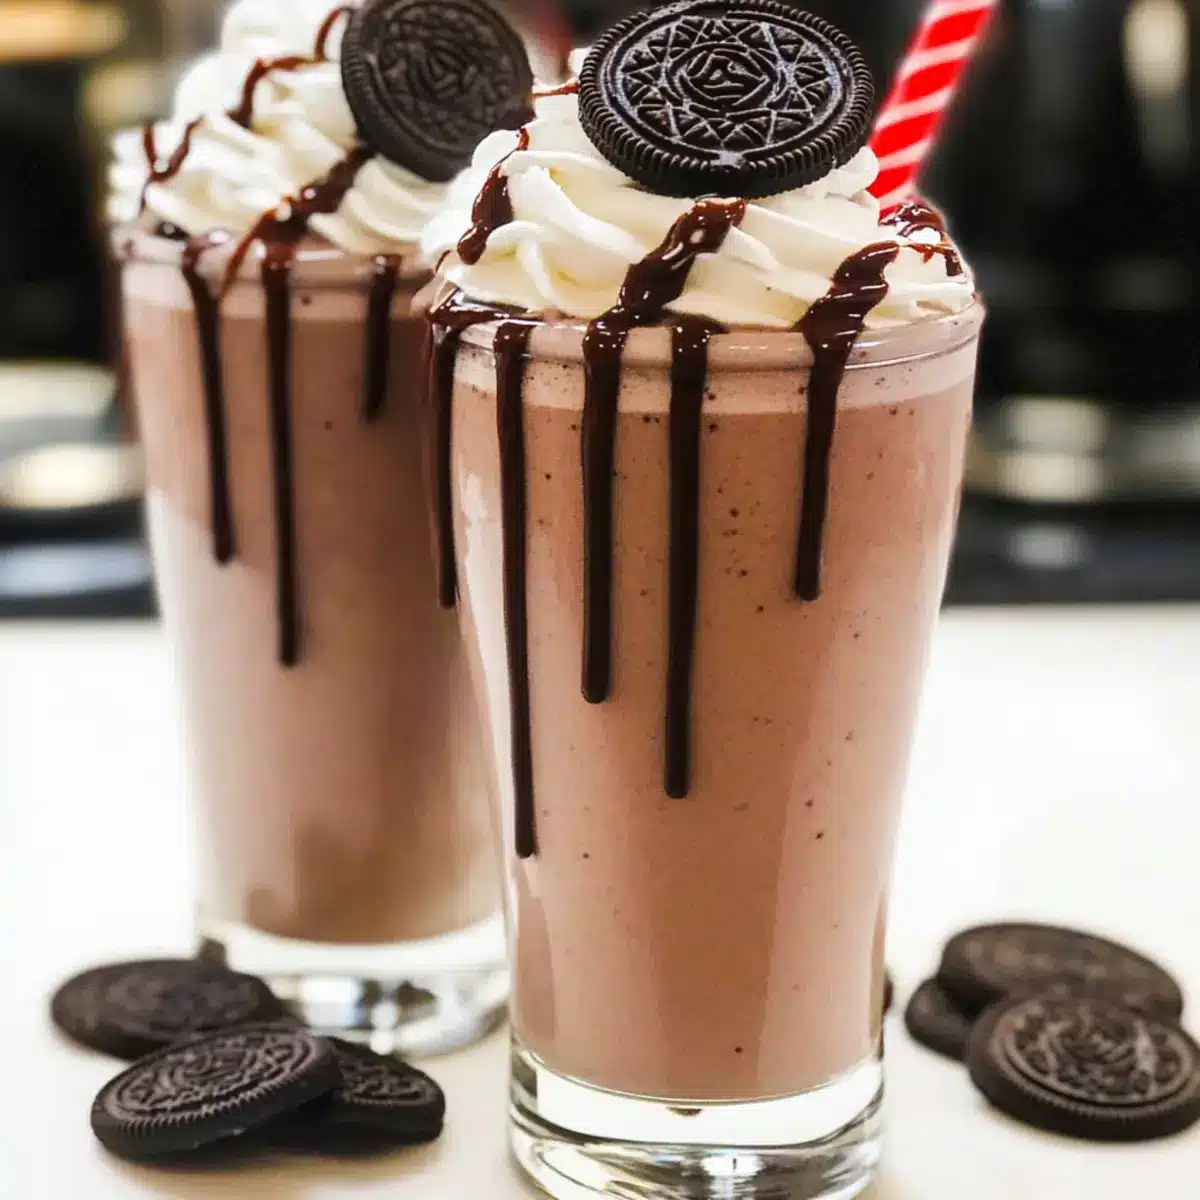
While your milkshake mixture is blending, take a couple of tall glasses and drizzle chocolate sauce around the inside rim. This creates a beautiful, decorative effect when serving. Allow the chocolate to settle for a moment while you finish blending the milkshake, ensuring you have the perfect presentation for your treat.
Step 3: Pour and Top
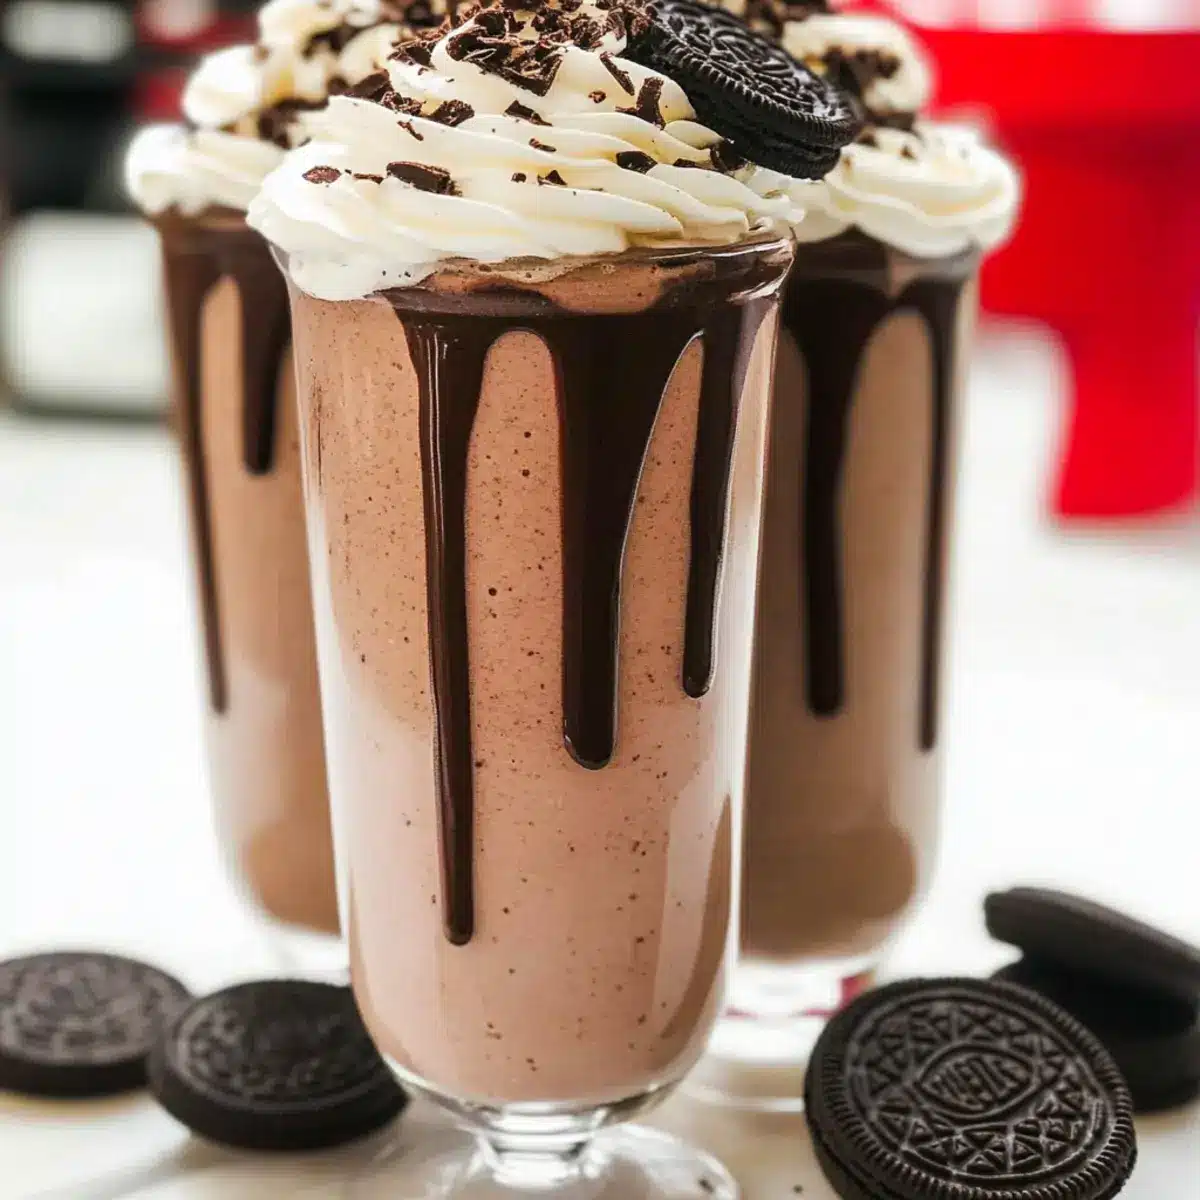
Once blended, carefully pour the luscious Easy Chocolate Oreo Milkshake into the prepared glasses, filling them about three-quarters full to avoid overflow. Then, generously top each milkshake with a swirl of homemade whipped cream. For an added touch, sprinkle some crushed Oreo crumbs over the whipped cream to enhance the flavor and texture.
Step 4: Serve Immediately
Finally, serve the milkshakes right away to preserve their creamy texture and delightful chill. Consider placing a straw in each glass for easy sipping and a fun gathering vibe. Enjoy the indulgence of your Easy Chocolate Oreo Milkshake while sharing it with family and friends, making every moment memorable!

Make Ahead Options
Busy home cooks will love how easy it is to prepare the Easy Chocolate Oreo Milkshake ahead of time! You can blend the milkshake base (8 Oreos, 2 cups of ice cream, and 1 cup of milk) up to 24 hours in advance and refrigerate it in an airtight container. This allows the flavors to meld beautifully while saving you precious time when you’re ready to serve. To maintain its delightful quality, stir the mixture gently before pouring it into prepared glasses. Just be sure to add the whipped cream and chocolate sauce just before serving to keep them fresh and airy. With these make-ahead tips, you’ll be savoring this creamy dream with minimal effort when the cravings hit!
Easy Chocolate Oreo Milkshake Variations
Feel free to customize this Easy Chocolate Oreo Milkshake to fit your unique taste preferences and dietary needs!
-
Nutty Twist: Add a tablespoon of peanut butter to the blender for a deliciously nutty flavor that complements the Oreos beautifully. It adds protein and richness, creating a decadent milkshake experience.
-
Cookie Swap: Experiment with different cookies like chocolate chip or mint for a fun flavor twist! Each cookie offers its unique taste profile, turning your milkshake into a personalized treat.
-
Plant-Based Delight: Substitute regular ice cream and milk for almond or coconut milk and dairy-free ice cream to enjoy a creamy vegan version. You won’t miss the dairy at all with this smooth combination!
-
Chocolate Overload: For serious chocolate lovers, mix in a scoop of chocolate ice cream instead of vanilla. This will amplify the chocolate flavor and make the milkshake ultra-rich and indulgent.
-
Fruity Fusion: Toss in a banana before blending for added creaminess and a hint of fruity flavor. The banana provides natural sweetness, enhancing the overall taste without overpowering the chocolate essence.
-
Minty Fresh: Introduce a few drops of mint extract for a refreshing mint chocolate Oreo milkshake. This delightful variation offers a cool contrast to the richness of the chocolate.
-
Extra Crunch: Add crushed nuts like almonds or walnuts to the mix for an added layer of texture. This will not only enhance the crunch factor but also add a nutty flavor that pairs well with the Oreos.
-
Spicy Kick: For those who like a little heat, a pinch of cayenne pepper can give your milkshake an unexpected yet pleasant kick. It’s a fun way to surprise your taste buds while enjoying this tasty treat.
Feel free to let your imagination run wild! You can even try pairing your Easy Chocolate Oreo Milkshake with a slice of chocolate cake—pure indulgence awaits! For more fun variations, don’t miss out on our Butter Toffee Chocolate Chip Cookies or Oreo Protein Balls for delicious treat ideas.
How to Store and Freeze Easy Chocolate Oreo Milkshake
Fridge: Store any leftover Easy Chocolate Oreo Milkshake in an airtight container for up to 2 hours. It’s best enjoyed fresh for the creamiest texture.
Freezer: If you want to enjoy it later, pour the milkshake into an airtight container and freeze it for up to 1 month. Let it thaw slightly before serving.
Reheating: To restore its creamy goodness after freezing, blend again with a splash of milk for a smoother consistency. This will help reincorporate any separated ingredients.
Serving Fresh: For the best flavor experience, always serve the milkshake fresh. From the tantalizing taste to the perfect chilled texture, it’s pure bliss!
Helpful Tricks for Easy Chocolate Oreo Milkshake
- Fresh Ingredients: Use fresh Oreos and high-quality ice cream for a richer flavor. Stale cookies can affect the texture and taste of your milkshake.
- Blending Time: Don’t over-blend; just a quick pulse until smooth ensures you keep that delightful Oreo crunch in your Easy Chocolate Oreo Milkshake.
- Adjust Consistency: If the milkshake is too thick, add an extra splash of milk until you reach your desired consistency.
- Whipped Cream Tips: For perfect whipped cream, whip until soft peaks form; this keeps it light and airy—avoid over-whipping for a grainy texture.
- Vegan Alternatives: Swap out regular ice cream and milk for dairy-free options to enjoy a delicious vegan Easy Chocolate Oreo Milkshake without compromise.
What to Serve with Easy Chocolate Oreo Milkshake?
Elevate your dessert experience with delightful pairings that perfectly complement this creamy, dreamy treat.
- Chocolate Cake: A slice of rich chocolate cake intensifies the chocolatey goodness, bringing a decadent vibe to your dessert table.
- Fresh Berries: Juicy strawberries or raspberries add a burst of freshness, balancing the milkshake’s sweetness with vibrant tanginess. Enjoy each sip alongside the berries for a refreshing contrast.
- Peanut Butter Cookies: The nutty flavor of homemade peanut butter cookies enhances the Oreo cookies while adding chewy texture, making every bite a delightful combination of flavors.
- Gooey Brownies: A fudgy brownie by the side will satisfy any chocolate lover and add a deeper indulgence to your dessert experience.
- Vanilla Ice Cream: For an extra creamy touch, serve a scoop of vanilla ice cream on top, creating an even more luxurious experience while delighting your taste buds.
- Milk Chocolate Bars: Pairing with a few squares of milk chocolate can enhance the chocolate experience, making each sip of the milkshake feel even more indulgent and satisfying.
- Frappuccino: A coffee frappuccino can provide a delightful caffeine kick while balancing the rich sweetness of the milkshake, perfect for those needing a little boost.
- Cold Brew Coffee: Serving a chilled glass of cold brew coffee alongside ramps up the flavor game, making it a delightful pairing for an afternoon treat.
- Chocolate Cookies: Extra Oreos or assorted chocolate cookies are an easy way to extend the chocolate theme while giving crunchy bites that perfectly contrast the creamy milkshake.
Easy Chocolate Oreo Milkshake Recipe FAQs
How should I choose my Oreos?
Absolutely! When selecting Oreos for your Easy Chocolate Oreo Milkshake, look for packs that have no visible dark spots or signs of staleness. Fresh Oreos provide the best crunch and flavor, ensuring your milkshake is delightful. I usually check the expiration date and choose the freshest ones available.
How can I store leftover milkshake?
For sure! Store any leftover Easy Chocolate Oreo Milkshake in an airtight container in the fridge for up to 2 hours. However, for the best taste and creamy texture, it’s ideal to enjoy it fresh. If you’d like to keep it longer, transfer it to the freezer.
Can I freeze the milkshake?
Yes, you can! To freeze your Easy Chocolate Oreo Milkshake, pour it into an airtight container, making sure to leave a little space at the top for expansion. It can be stored in the freezer for up to 1 month. When you’re ready to enjoy it again, let it thaw slightly and then blend it with a splash of milk to regain that smooth texture.
What if my milkshake is too thick?
Very common! If you find your Easy Chocolate Oreo Milkshake is too thick, no worries! Simply add a splash of milk and blend again until you reach your desired consistency. This adjustment will give it that creamy texture you’re looking for without compromising the delicious flavor.
Can I make this milkshake vegan?
Absolutely! To create a vegan version of your Easy Chocolate Oreo Milkshake, swap out the regular ice cream for a high-quality dairy-free alternative and use plant-based milk. I often use almond or coconut milk for a delicious twist! Just ensure that the Oreos you’re using are also vegan-friendly.
What topping suggestions do you recommend?
Many options exist! Besides the delightful whipped cream, consider drizzling a bit of extra chocolate sauce or even adding caramel sauce for a unique flavor profile. You could sprinkle crushed nuts, chocolate chips, or even colorful sprinkles for a fun, festive touch! The more the merrier!
Easy Chocolate Oreo Milkshake: A Creamy Dreamy Delight
Ingredients
Equipment
Method
- Blend the Base: Place 8 Oreos, 2 cups of high-quality vanilla ice cream, and 1 cup of milk into a blender. Blend on medium speed for about 30-45 seconds until smooth and creamy.
- Prepare the Glasses: Drizzle chocolate sauce around the inside rim of tall glasses. Allow the chocolate to set while finishing the milkshake.
- Pour and Top: Pour the milkshake into the prepared glasses, filling them about three-quarters full. Top with homemade whipped cream and crushed Oreo crumbs.
- Serve Immediately: Serve the milkshakes right away, optionally with a straw for easy sipping.
Leave a Reply