
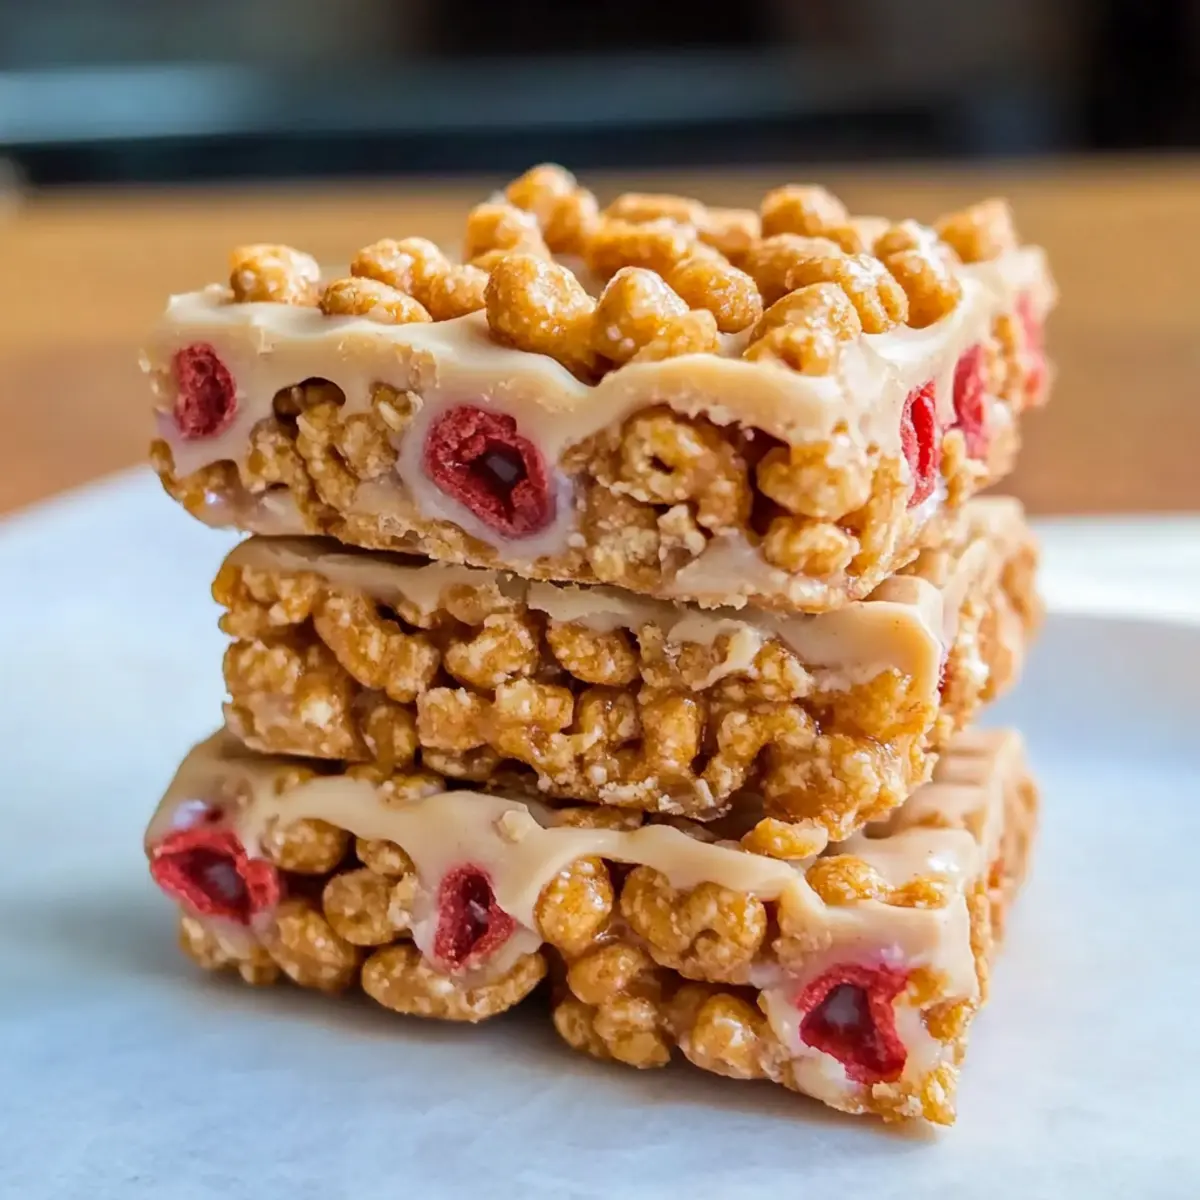
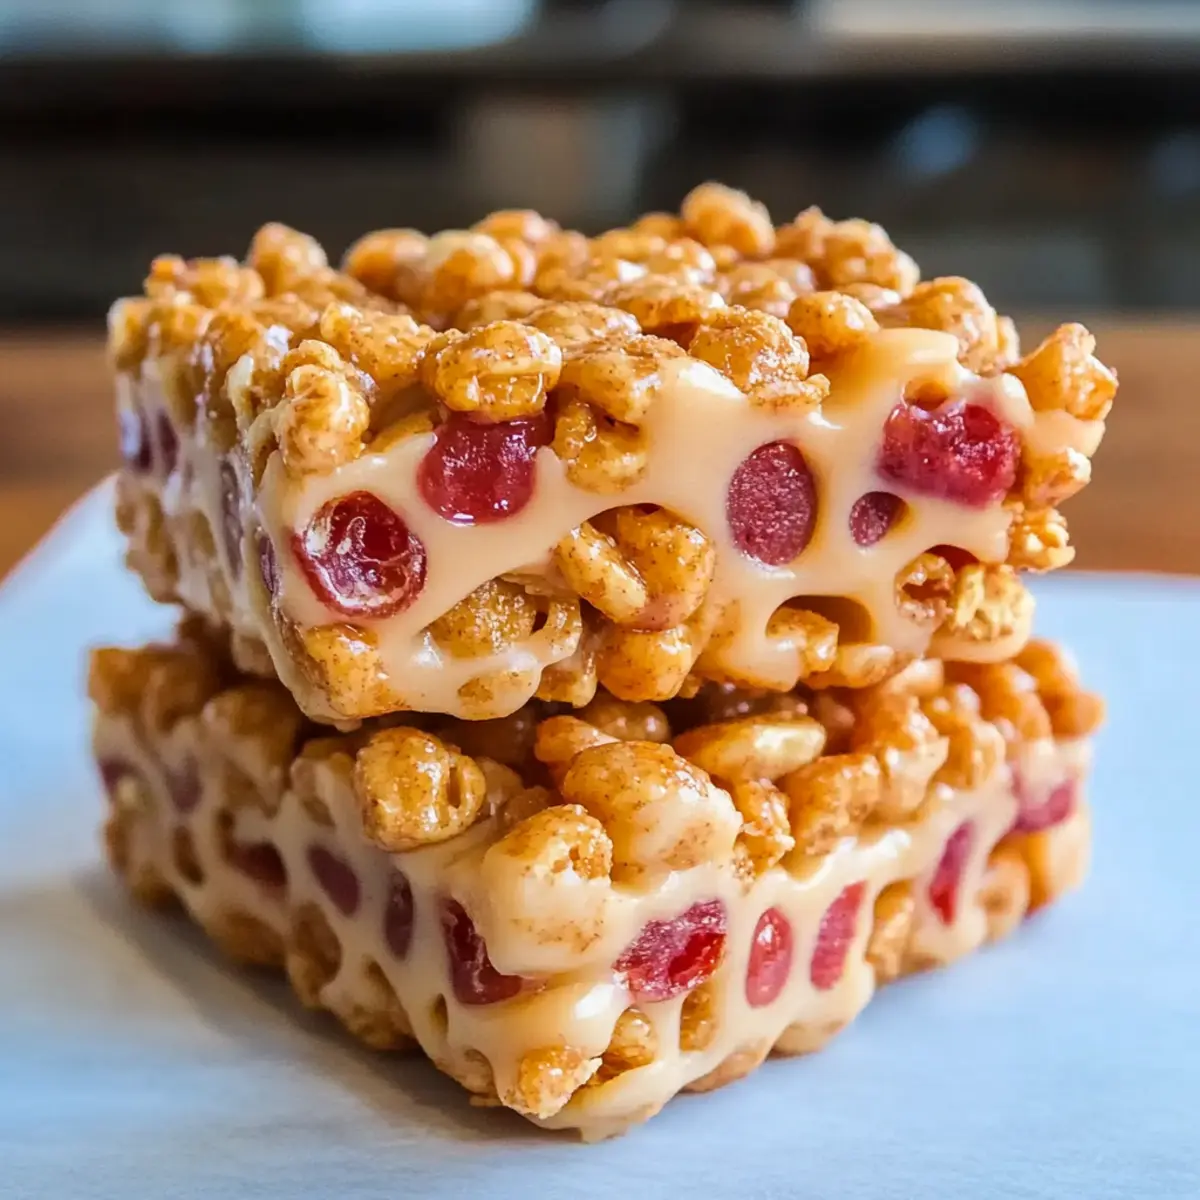
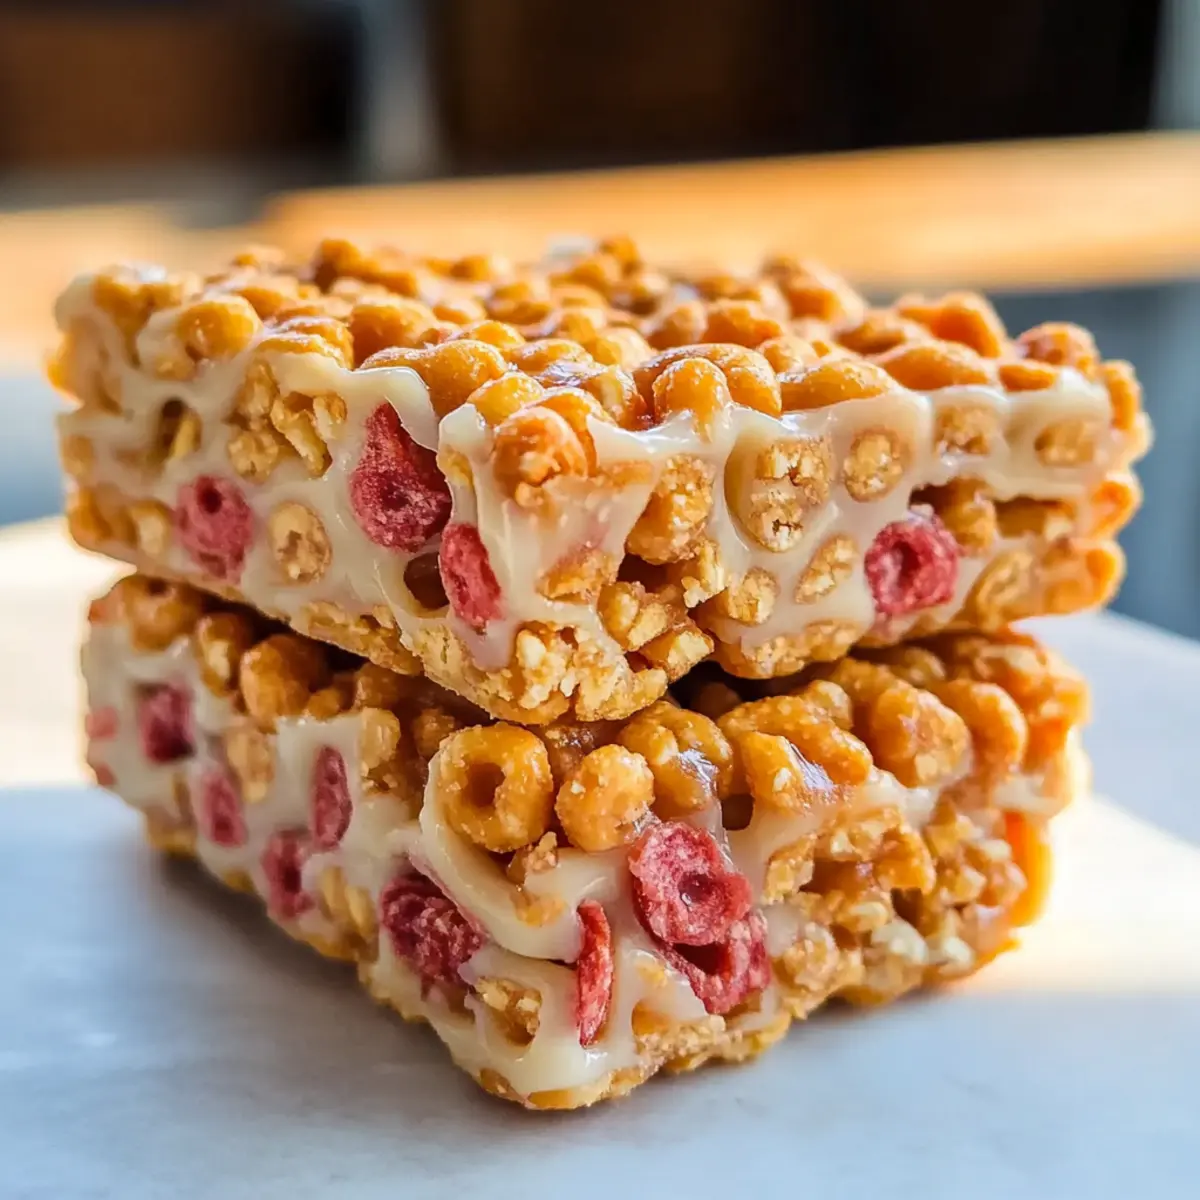
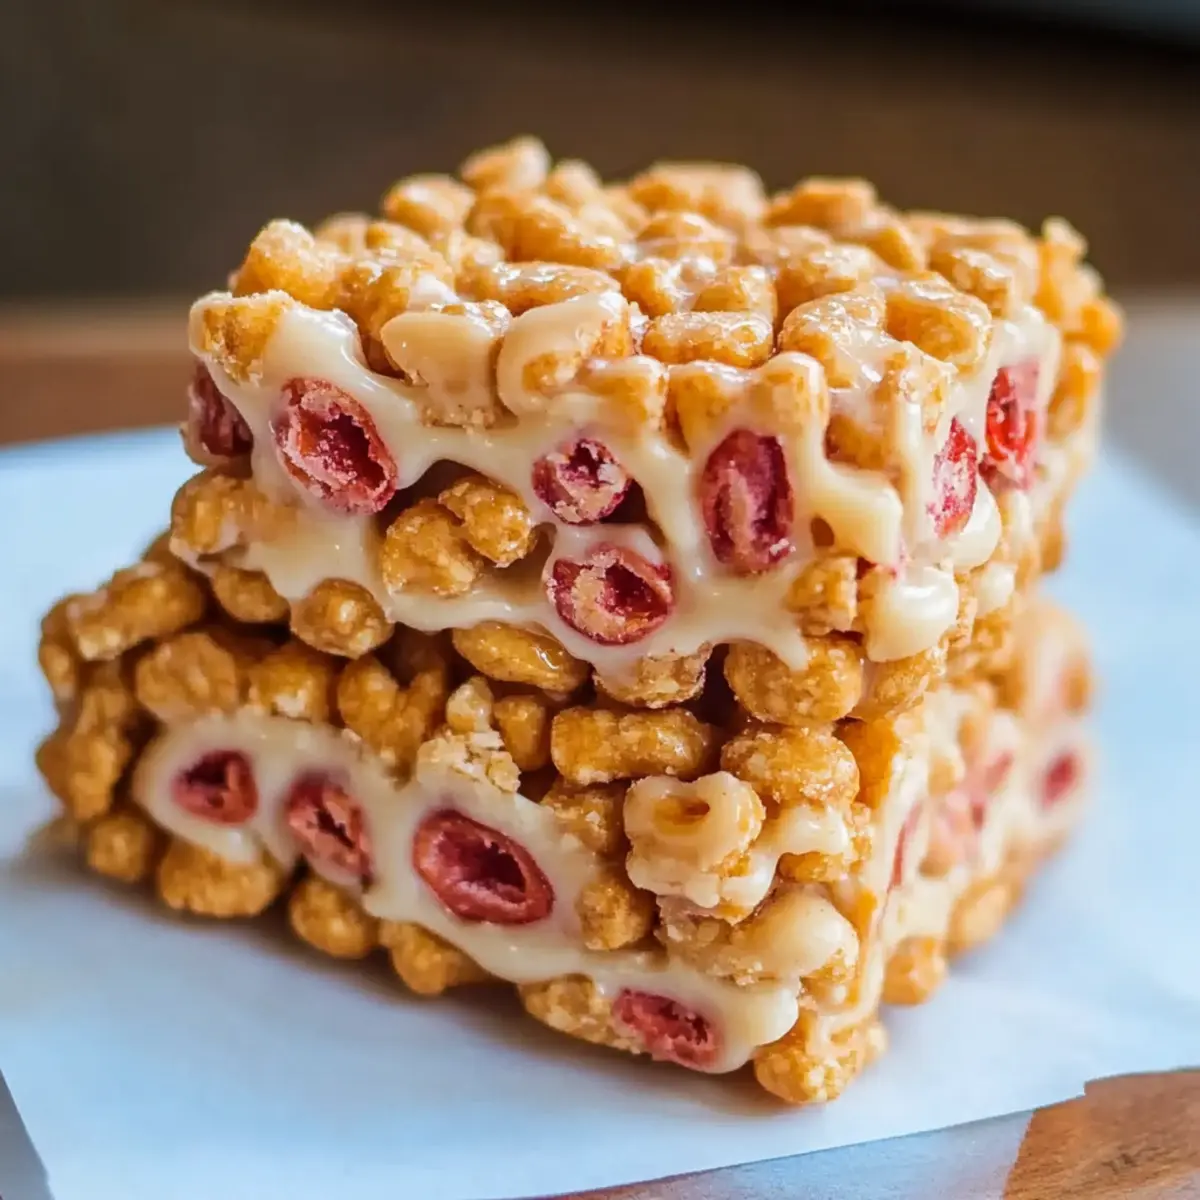
As I rummaged through my pantry one afternoon, I stumbled upon a delightful combination of ingredients just waiting to be transformed into something special. This moment led me to create 3-Ingredient Homemade Cereal Bars, the perfect solution for those hectic mornings or mid-afternoon slumps. With just three simple components, you can whip up these easy and healthy snacks that are not only fun to make but also entirely customizable to suit your taste. Whether you’re in need of a quick breakfast on the go or a lunchbox treat that kids will adore, these cereal bars come together without any baking required, making them a convenient option for busy lives. Curious about how to take your snacking game to the next level? Let’s dive into this tasty adventure!
Why are Cereal Bars a Must-Try?
Versatility at Its Core: These homemade cereal bars can be adapted with countless variations, allowing you to personalize them with your favorite flavors or dietary needs.
Quick and Easy: With just three main ingredients, the prep is a breeze. No baking is required, making this an effortless snack to whip up anytime.
Nutritious and Healthy: Packed with wholesome ingredients, these bars provide a balanced energy boost that feels good to indulge in, unlike typical fast food snacks.
Family-Friendly Delight: Perfect for kids and adults alike, they make an excellent lunchbox addition or a quick breakfast option.
Creative Topping Ideas: Want a twist? Top them with melted coconut butter or dark chocolate for added richness. Consider trying my Nut Free Bars recipe for another quick snack alternative!
Cereal Bars Ingredients
For the Base
- Cereal – Use small flake or shape cereals like Cheerios or Rice Krispies; ensure vegan options avoid brands with Vitamin D3.
- Peanut Butter (or Nut Butter of Choice) – Acts as the binder while adding creaminess; warmed for easier mixing, or substitute almond butter or sunflower butter for nut-free options.
- Liquid Sweetener (Agave, Honey, or Brown Rice Syrup) – Adds sweetness and moisture; opt for agave or brown rice syrup for vegan-friendly bars, adjusting thickness as necessary.
Optional Enhancements
- Optional Salt – Enhances flavor; consider it for variations, but it’s not necessary for every recipe.
- Optional Protein Powder – Increases nutritional content and can add unique flavors; feel free to omit if desired.
Whip up these delightful cereal bars in no time, and remember—each bite is a little piece of customizable heaven!
Step‑by‑Step Instructions for Homemade Cereal Bars
Step 1: Prepare the Pan
Begin by lining an 8-inch square pan with wax or parchment paper, ensuring the paper overhangs the edges for easy removal later. This lining will prevent the cereal bars from sticking, allowing for a smooth release once they are set. Set the pan aside as you move on to the next step.
Step 2: Warm the Nut Butter
If your chosen nut butter is too thick to stir easily, place it in a microwave-safe bowl and warm it in short bursts of about 10-15 seconds until it reaches a creamy consistency, but do not overheat. This warming process helps the nut butter blend seamlessly into the mixture, making the creation of your homemade cereal bars a breeze.
Step 3: Mix Ingredients Together
In a large mixing bowl, combine your cereal, warmed nut butter, and liquid sweetener of choice. If you’re adding optional ingredients like salt or protein powder, toss them in as well. Stir everything together using a spatula or your hands, mixing until there are no dry cereal pieces left and everything is well-coated, creating that delicious binding effect.
Step 4: Transfer to the Pan
Once your mixture is completely combined, carefully transfer it into the lined pan. With a rubber spatula, spread the mixture evenly across the pan, making sure to reach all corners for uniform bars. This spreading ensures that every bite of your homemade cereal bars is equally delicious and chewy.
Step 5: Press Down Firmly
To secure the mixture and prevent crumbling later, take a second piece of parchment paper and place it over the top. Firmly press down on the mixture, compressing it well to form a solid block. This step is crucial for achieving the perfect texture in your final cereal bars.
Step 6: Chill to Set
Place the pan in the freezer for about 30 minutes, allowing the cereal bars to firm up nicely. This chilling time helps the ingredients meld together and solidifies the texture, ensuring your homemade cereal bars hold their shape when sliced.
Step 7: Slice and Store
After 30 minutes, remove the pan from the freezer and carefully lift the bars out using the parchment overhang. Slice them into your desired sizes with a sharp knife. Store any leftover cereal bars in an airtight container in the refrigerator, at room temperature, or freeze them for longer freshness. Your tasty homemade cereal bars are now ready to enjoy!
Expert Tips for Homemade Cereal Bars
-
Firm Pressing: Ensure you press the mixture down very firmly; this helps the cereal bars hold together after slicing, preventing crumbling.
-
Cereal Choices: Experiment with different cereals for unique flavors and textures. Just remember that the choice of cereal impacts the overall taste and crunch of the cereal bars.
-
Warm Nut Butter: If your nut butter is on the thick side, gently warming it makes mixing easier. Avoid overheating, or it can become greasy and difficult to handle.
-
Adjust Sweetness: Taste the mixture before pressing it into the pan. You can add more liquid sweetener if you’d prefer a sweeter cereal bar.
-
Storage Tips: Store your cereal bars in an airtight container. Refrigerating them can enhance their chewiness, while freezing extends their shelf life, keeping them fresh for whenever hunger strikes!
Make Ahead Options
These 3-Ingredient Homemade Cereal Bars are perfect for meal prep! You can mix the ingredients and press the mixture into the pan up to 24 hours in advance—just refrigerate the uncooked mixture until you’re ready to set them. To maintain their chewy texture, ensure they are well-pressed to avoid crumbling. When you’re ready to enjoy your cereal bars, simply freeze for 30 minutes, slice into bars, and store them in an airtight container for up to 3 days. This way, you’ll always have a quick, healthy snack or breakfast option at hand without any last-minute fuss!
Cereal Bars: Endless Variations Await
Personalizing your homemade cereal bars is an exciting culinary adventure that invites creativity and exploration of flavors!
- Nut-Free Delight: Swap nut butter for sunflower seed butter for a creamy, nut-free alternative that’s equally delicious.
- Fruit and Nut Boost: Stir in chopped nuts and dried fruits like cranberries or raisins for added texture and natural sweetness.
- Cocoa Kick: For chocolate lovers, mix in cocoa powder or chocolate chips for a rich and indulgent twist.
- Spicy Cinnamon: Add a sprinkle of cinnamon or nutmeg to the mix for a warm, aromatic flavor that delights the senses.
- Savory Option: For a unique twist, incorporate herbs and cheese into the mixture for a savory snack bar experience that defies expectations.
- Protein-Packed Boost: Mix in protein powder or chia seeds to increase the nutritional value without compromising flavor – perfect for a post-workout snack.
- Tropical Flavor: Add shredded coconut and chopped pineapple for a delightful tropical vibe. It’s like a mini vacation in every bite!
- Decadent S’mores: Layer melted chocolate and mini marshmallows on top before refrigerating – who wouldn’t love that gooey treat?
Feel free to explore my Nut Free Bars recipe as another fun way to change up your snacking routine—it’s all about finding what tickles your taste buds!
What to Serve with 3-Ingredient Homemade Cereal Bars
As you prepare to indulge in these delightful cereal bars, consider complementing them with vibrant sides that elevate your snacking experience.
-
Fresh Fruit Salad: A mix of seasonal fruits adds a refreshing contrast to the chewy bars, enhancing both flavor and nutrition.
-
Creamy Yogurt Dip: Pairing with a honey or fruit-flavored yogurt dip creates a creamy texture that beautifully contrasts the crunchy bars. Each bite feels indulgent yet healthy!
-
Nutty Granola: Sprinkle some nutty granola on top or serve it alongside the bars for an extra crunch. It adds a delightful layer of flavor and texture, enticing your taste buds to explore.
-
Smoothie Bowl: Blend up a creamy smoothie and pour it into a bowl, topped with nuts and seeds. These bars serve as a perfect sidekick for a nutritious, on-the-go breakfast.
-
Chilled Almond Milk: A glass of chilled almond milk offers a creamy, nutty drink that perfectly balances the sweetness of the cereal bars while keeping them vegan-friendly.
-
Coconut Chia Pudding: Serve a small bowl of chia pudding topped with toasted coconut for a delightful textural contrast. This combination not only looks beautiful but also provides a boost of nutrients!
-
Dark Chocolate Drizzle: For those craving something sweet, drizzle melted dark chocolate over the bars before serving. It enhances their appeal and offers a decadent touch to your healthy treat.
How to Store and Freeze Cereal Bars
Room Temperature: Store your cereal bars in an airtight container at room temperature for up to 3 days to maintain their chewy texture and freshness.
Fridge: For extended freshness, keep the cereal bars in the refrigerator for up to a week. This also enhances their chewiness, making them a delightful snack anytime.
Freezer: You can freeze the cereal bars for up to 3 months. Wrap them individually or stack them in an airtight container for easy snacking later; let them thaw before enjoying.
Reheating: If desired, warm the bars in the microwave for a few seconds to enhance their texture. Enjoy them soft and comforting, perfect for quick breakfasts or snacks!
Homemade Cereal Bars Recipe FAQs
How do I select the best cereal for my bars?
Absolutely! For the best texture and flavor, choose small flake or shape cereals like Cheerios or Rice Krispies. Always check the ingredient list to avoid any brands with Vitamin D3 if you’re aiming for a vegan option.
How should I store my cereal bars?
You can keep your cereal bars in an airtight container at room temperature for up to 3 days. For longer freshness, I recommend storing them in the refrigerator for about a week, which also enhances their chewiness.
Can I freeze cereal bars for later use?
Yes, indeed! You can wrap your cereal bars individually or stack them in an airtight container and freeze for up to 3 months. When you’re ready to enjoy them, simply let the bars thaw at room temperature, and they’ll be as delicious as fresh!
What can I do if my bars are crumbly?
If you find your bars are crumbly, it could be due to not pressing them down firmly enough before chilling. Make sure to use a second piece of parchment to press the mixture down well—this helps them hold together. Also, double-check that you’ve used enough nut butter as it acts as the binder.
Are there any dietary considerations I should be aware of?
Very much so! If you’re preparing these cereal bars for someone with allergies, be mindful of the nut butter you choose. Consider substitutions like sunflower butter or a vegan protein powder, which can also cater to various dietary restrictions. Always check for gluten-free cereals if necessary!
How do I customize my cereal bars with different flavors?
The more the merrier! You can mix in cocoa powder for a chocolatey twist, or add freeze-dried fruits for a fruity flavor. Simply adjust the base ingredients as needed, and keep the mixing steps the same. For additional flavors like birthday cake or snickerdoodle, use different cereals or toppings to make it unique!
Homemade Cereal Bars: Quick, Chewy, and Totally Customizable
Ingredients
Equipment
Method
- Prepare the Pan: Line an 8-inch square pan with wax or parchment paper, overhanging the edges for easy removal.
- Warm the Nut Butter: If thick, warm nut butter in the microwave for 10-15 seconds until creamy.
- Mix Ingredients Together: In a large bowl, combine cereal, warmed nut butter, and liquid sweetener. Add optional ingredients if desired, and mix well.
- Transfer to the Pan: Spread the mixture evenly across the lined pan.
- Press Down Firmly: Use another piece of parchment paper to press the mixture firmly for a solid block.
- Chill to Set: Place in the freezer for about 30 minutes to firm up.
- Slice and Store: Remove from the pan, slice into bars, and store in an airtight container.
Leave a Reply