
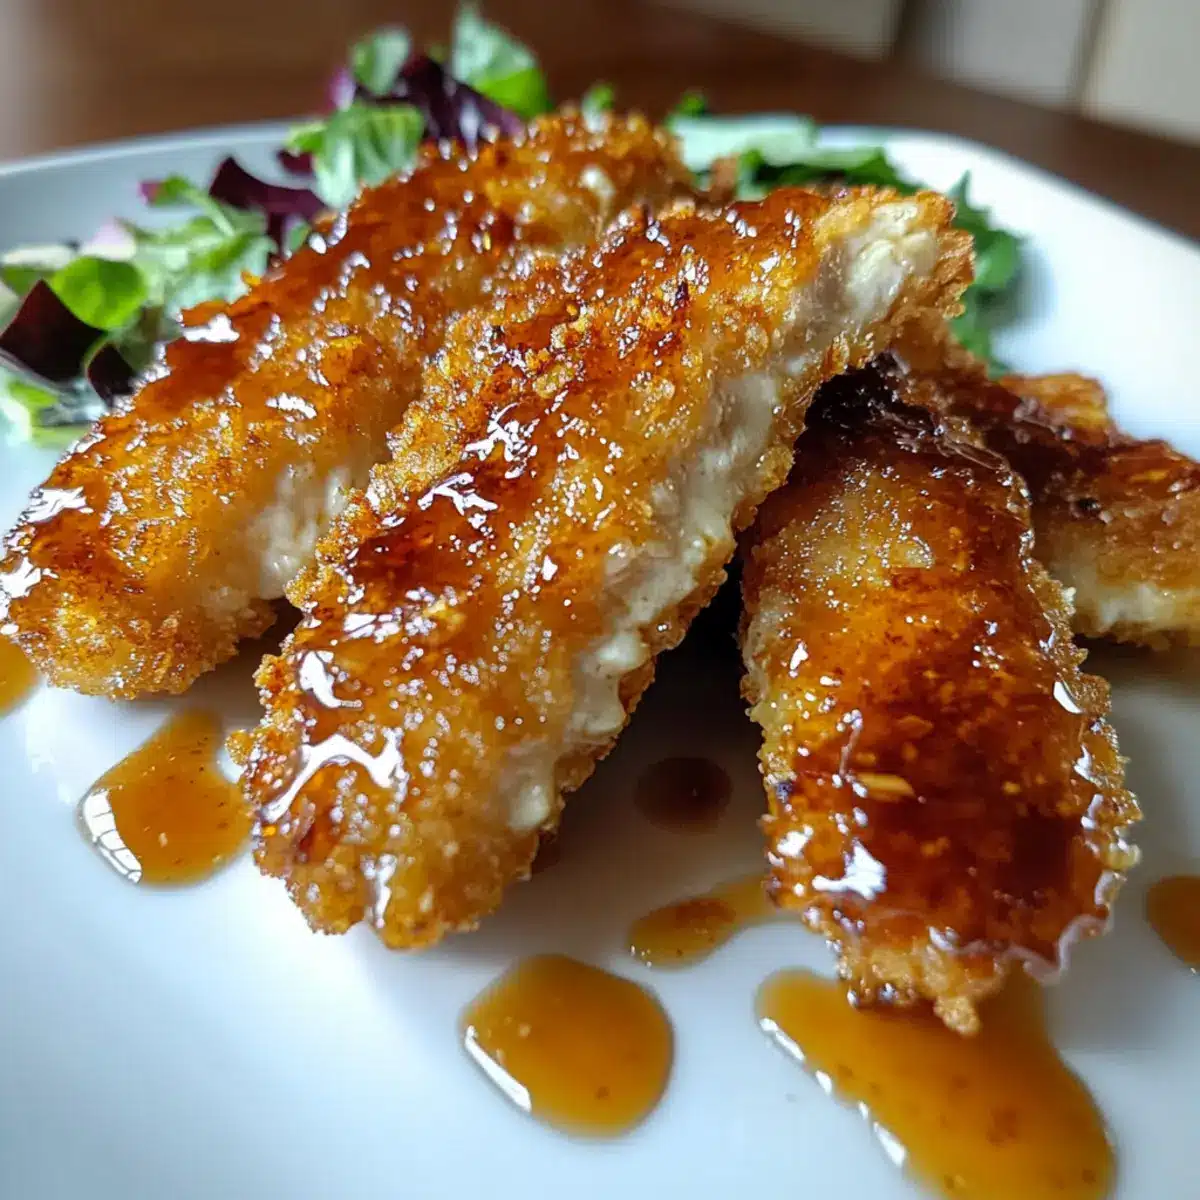
The mouthwatering scent of garlic and honey wafts through the air, making my heart race with excitement. These Crispy Air Fryer Honey Butter Garlic Chicken Tenders are not just another recipe; they’re a revelation for anyone craving a delicious homemade meal without the hassle of traditional frying. Whipping them up takes less than 30 minutes, making them an ideal choice for weeknight dinners or last-minute gatherings. The air fryer makes them crispy on the outside while keeping them tender and juicy within, all without the extra grease. Plus, the blend of sweet and savory in every bite is a guaranteed crowd-pleaser, perfect for the whole family. Are you ready to elevate your dinner routine with a twist on a classic favorite? Let’s dive into this delightful recipe that’s sure to become a staple in your kitchen!
Why are these chicken tenders a must-try?
Crispy perfection: These Honey Butter Garlic Chicken Tenders achieve an unbeatable crunch without deep-frying, courtesy of the air fryer.
Quick and easy: In just 30 minutes, you can have a delectable meal ready, perfect for busy families or spontaneous gatherings.
Flavor explosion: Each bite offers a deliciously balanced blend of sweet honey and savory garlic, making it hard to resist going back for more!
Customizable options: Want to adjust the sweetness or spice? Substitute honey with maple syrup or add cayenne for a spicy kick.
Family-friendly appeal: Everyone will adore these tenders, making them great companion dishes alongside Honey Garlic Roasted Brussels sprouts or Garlic Butter Steak bites!
Honey Butter Garlic Chicken Tenders Ingredients
For the Tenders
- Chicken Tenders – The main protein source; ensure they’re thawed and patted dry for optimal results.
- Salt – Enhances flavor; adjust to meet dietary needs.
- Black Pepper – Adds mild heat; can be substituted with cayenne if you’re craving spice.
For the Coating
- Melted Butter – Adds richness; use unsalted for better salt control.
- Honey – Provides sweetness and aids in caramelization; feel free to adjust based on your preference.
- Garlic (minced) – Brings aromatic flavor; garlic powder can substitute in a pinch (1 teaspoon).
- Breadcrumbs – Creates that irresistible crispy coating; use panko for maximum crunch or opt for gluten-free options.
For Flavor Enhancement
- Paprika – Adds depth and a pop of color; smoked paprika offers a unique twist.
Step‑by‑Step Instructions for Honey Butter Garlic Chicken Tenders
Step 1: Preheat the Air Fryer
Begin by preheating your air fryer to 375°F (190°C). This crucial step ensures that your Honey Butter Garlic Chicken Tenders will cook evenly and develop that beautiful golden-brown crust. Allow about 5 minutes for the air fryer to fully heat up, and keep an eye on the temperature display for accuracy.
Step 2: Prepare the Coating Mixture
In a shallow bowl, combine the breadcrumbs, salt, black pepper, and paprika. Mix these ingredients thoroughly to ensure an even coating for your chicken tenders. The mixture should resemble a dry, grainy sand. This flavorful coating will contribute to that irresistible crunch once the tenders are cooked in the air fryer.
Step 3: Dry and Coat the Chicken
Take your thawed chicken tenders and pat them dry with paper towels; this step is key to achieving the crisp texture you desire. Next, carefully coat each chicken tender in the breadcrumb mixture, pressing gently to ensure they adhere well. A thorough coating will provide a satisfying crunch and enhance the flavor of the Honey Butter Garlic Chicken Tenders.
Step 4: Arrange in the Air Fryer
Once all the tenders are coated, arrange them in a single layer in the air fryer basket. Be sure to leave space between each tender to allow hot air to circulate freely, promoting even cooking. Avoid overcrowding the basket, as this will prevent them from achieving that perfect crunch within the designated cooking time.
Step 5: Cook the Tenders
Cook the chicken tenders in the preheated air fryer for 10 minutes. Halfway through the cooking time, carefully flip each tender using tongs to ensure even browning on both sides. They should start to turn a beautiful golden color, signaling that the crispy texture is forming nicely.
Step 6: Prepare the Glaze
While the chicken is cooking, whisk together the melted butter, honey, and minced garlic in a separate bowl. This sweet and savory glaze is what sets your Honey Butter Garlic Chicken Tenders apart. Combine until smooth and creamy, allowing the flavors to meld together beautifully while you patiently wait for the tenders to cook through.
Step 7: Brush the Glaze
After the initial 10 minutes of cooking, carefully remove the partially cooked chicken tenders from the air fryer. Use a brush to generously coat each tender with the flavorful honey garlic glaze, ensuring an even distribution. This step adds richness and sweetness while creating a glossy finish that will enhance their appeal.
Step 8: Final Air Frying
Return the glazed chicken tenders to the air fryer and cook for an additional 2 minutes. Keep an eye on them as they cook; you’ll know they’re ready when they’re glistening, caramelized, and your kitchen is filled with an irresistible aroma. The brief extra cook time will ensure the glaze sets beautifully.
Step 9: Serve and Enjoy
Once cooked, carefully remove the Honey Butter Garlic Chicken Tenders from the air fryer, and allow them to rest for a moment. They should be golden, crispy, and delightfully sticky. Serve them warm alongside your favorite sides for a family-pleasing meal that everyone will crave!
What to Serve with Irresistible Air Fryer Honey Butter Garlic Chicken Tenders
Elevate your dinner experience with complementary dishes that perfectly balance flavors and textures with these scrumptious tenders.
-
Crispy Air Fryer Fries: The crunch of fresh fries pairs beautifully with the juicy chicken for a classic meal everyone loves. Add a sprinkle of sea salt for an extra flavor boost.
-
Fresh Green Salad: A vibrant salad with mixed greens and tangy vinaigrette provides a refreshing contrast to the rich flavors of the tenders, brightening each bite.
-
Creamy Coleslaw: This cool, crunchy side adds a delightful creaminess and a pop of color, balancing the savory sweetness of the honey garlic tenders.
-
Garlic Butter Roasted Vegetables: Roasted seasonal veggies drizzled in garlic butter echo the flavors of the tenders, creating a harmonious dish that looks as good as it tastes.
-
Sweet Potato Mash: Velvety sweet potatoes enhance the meal with their natural sweetness, making each mouthful layered with complementary flavors.
-
Honey-Mustard Dipping Sauce: A tangy sauce that perfectly contrasts the sweetness of the tenders, serving as a delightful companion for every bite.
-
Lemonade or Iced Tea: A refreshing beverage that balances the meal’s richness and quenches thirst, making it an ideal drink choice to accompany your dinner.
-
Chocolate Chip Cookies: End the meal on a sweet note with warm, gooey cookies. Their comforting flavors provide a delightful finish after the savory main course.
Expert Tips for Honey Butter Garlic Chicken Tenders
• Choose Fresh Tenders: Use fresh chicken tenders whenever possible; they yield the juiciest results. Thaw frozen ones completely and pat dry to avoid excess moisture.
• Perfectly Crunchy Coating: Opt for panko breadcrumbs for an ultimate crispy texture. Avoid overcrowding the air fryer basket to ensure even cooking and that perfect crunch for your Honey Butter Garlic Chicken Tenders.
• Monitor Cooking Time: Keep an eye on the cooking time. Flipping the tenders halfway through will help them brown evenly, preventing any soggy spots!
• Glaze Right: Brush on the glaze only during the last few minutes of cooking to prevent burning and ensure a beautifully sticky finish.
• Experiment with Flavors: Feel free to adjust the sweetness of the glaze or spice it up with cayenne or crushed red pepper flakes for a little heat!
Make Ahead Options
These Honey Butter Garlic Chicken Tenders are a fantastic choice for meal prep enthusiasts. You can prep the chicken tenders up to 24 hours in advance by coating them in the breadcrumb mixture, then refrigerate them in an airtight container to maintain their crispiness. For optimal quality, keep the glaze (melted butter, honey, and garlic) separate and store it in the fridge. When you’re ready to serve, simply brush the glaze over the tenders and air fry for about 12 minutes (10 minutes first, then 2 minutes after glazing). This way, you’ll have a delicious and hassle-free meal ready in no time, perfect for busy weeknights!
Honey Butter Garlic Chicken Tenders Variations
Feel free to mix things up and add your personal touch to these delectable chicken tenders!
-
Sweetness Adjustment: Vary the honey amount to balance the sweetness according to your family’s taste. If you prefer less sweetness, consider using a bit of apple cider vinegar for a tangy twist.
-
Gluten-Free Options: Swap the breadcrumbs with crushed cornflakes or substitute with almond flour for a gluten-free alternative that maintains the delightful crunch.
-
Spicy Kick: Add a pinch of cayenne or red pepper flakes to the breadcrumb mixture for those who love a little heat in their meals. A little spice can elevate the flavor profile and create an adventurous bite!
-
Herb Infusion: Fresh herbs like chopped parsley or dill can be sprinkled into the breadcrumb mixture for added freshness. Incorporating herbs will give your tenders a fragrant lift, bringing an extra layer of flavor.
-
Cheesy Coating: Experiment with adding grated Parmesan or cheddar cheese to the breadcrumb mixture for a cheesy, savory coating. The melted cheese will create a delightful flavor contrast and mouthwatering aroma.
-
Tangy Glaze: Replace honey with maple syrup or agave nectar for a different sweet profile. You can even mix in some Dijon mustard for a delightful tanginess that complements the garlic beautifully!
-
Asian Flair: Add soy sauce or sesame oil to the glaze to introduce an Asian-inspired twist. Pair these tenders with rice or a side of steamed vegetables for a complete meal reminiscent of your favorite take-out.
-
Classic Dipping Sauces: Serve with various dips like ranch dressing or a spicy chipotle mayo. These pairing options will offer a gourmet experience and add extra taste dimensions when enjoying your tender bites.
With all these alternatives, your Honey Butter Garlic Chicken Tenders can shine in countless ways. Enjoy crafting the perfect batch that fits your family’s cravings, and don’t forget to check out the delicious flavors in Garlic Butter Steak for your next meal idea!
How to Store and Freeze Honey Butter Garlic Chicken Tenders
Fridge: Store leftovers in an airtight container for up to 3 days to maintain freshness. Ensure the chicken is completely cooled before sealing.
Freezer: For longer storage, freeze cooked tenders in a single layer on a baking sheet for about 1 hour. Then transfer to a freezer-safe bag for up to 3 months.
Reheating: Reheat the chicken tenders in the air fryer at 350°F (175°C) for 2-3 minutes for best results. This method keeps them crispy and delicious.
Thawing: When ready to eat, thaw frozen tenders in the fridge overnight before reheating to ensure even warming without drying them out.
Honey Butter Garlic Chicken Tenders Recipe FAQs
How do I choose the perfect chicken tenders?
Absolutely! When selecting chicken tenders, look for those that are plump and moist, with no visible dark spots or excessive liquid packaging. Fresh tenders are always preferable, but if you opt for frozen, ensure they’re fully thawed and patted dry before cooking for optimal texture.
What is the best way to store leftovers?
Store any uneaten Honey Butter Garlic Chicken Tenders in an airtight container in the refrigerator. They’ll stay fresh for up to 3 days. Make sure to let them cool completely before sealing the container to avoid moisture buildup, which can make them soggy.
Can I freeze cooked chicken tenders?
Yes, you can freeze your Honey Butter Garlic Chicken Tenders! To do this, place the cooked tenders in a single layer on a baking sheet and freeze them for about 1 hour. Then, transfer them to a freezer-safe bag or container. They can be frozen for up to 3 months. Just remember to label it with the date for reference!
How do I reheat frozen chicken tenders?
Reheating frozen chicken tenders is easy! Simply take them out of the freezer and thaw them in your refrigerator overnight. Then, preheat your air fryer to 350°F (175°C) and reheat the tenders for about 2-3 minutes until they’re heated through and crispy again. This method restores their delightful crunch!
What if I have dietary restrictions?
Good question! If you’re looking for gluten-free options, substitute regular breadcrumbs with gluten-free breadcrumbs or crushed cornflakes. Additionally, ensure your condiments and any sides served are also gluten-free. If you’re dealing with allergies, always check ingredient labels for hidden allergens in the butter or other products you may use.

Crispy Honey Butter Garlic Chicken Tenders You’ll Crave
Ingredients
Equipment
Method
- Preheat your air fryer to 375°F (190°C) for about 5 minutes.
- In a shallow bowl, combine the breadcrumbs, salt, black pepper, and paprika. Mix thoroughly.
- Pat the chicken tenders dry with paper towels. Coat each chicken tender in the breadcrumb mixture, pressing gently.
- Arrange the coated tenders in a single layer in the air fryer basket, leaving space between each tender.
- Cook the chicken tenders in the preheated air fryer for 10 minutes, flipping halfway through for even browning.
- Whisk together the melted butter, honey, and minced garlic in a separate bowl to prepare the glaze.
- After 10 minutes, remove the tenders and brush generously with the honey garlic glaze.
- Return the glazed tenders to the air fryer and cook for an additional 2 minutes until they are caramelized.
- Carefully remove the tenders from the air fryer and let them rest for a moment before serving.
Leave a Reply