
As the golden butter sizzles and fills the kitchen with a nutty aroma, you’ll find yourself transported to a cozy baker’s haven. I’m thrilled to share my recipe for Brown Butter Biscoff Blondies, where rich flavors collide in the most delightful way. These chewy, fudgy treats are not only incredibly quick to prepare but are also perfect for satisfying that sweet craving without hours spent in the kitchen. The unique twist of brown butter, combined with the velvety richness of Biscoff cookie butter, creates an unforgettable dessert experience. Plus, with just a handful of ingredients, you can whip up a batch in under 30 minutes! Are you ready to indulge your taste buds and impress your friends with this irresistible treat? Let’s dive in!
Why Are These Blondies a Must-Try?
Irresistible Flavor: The blend of brown butter and Biscoff elevates these blondies with a rich, caramelized taste that’s simply unforgettable.
Quick to Make: In just 25 minutes, you can enjoy these fudgy delights, making them perfect for last-minute cravings or unexpected guests.
Chewy Texture: Thanks to the brown sugar and just the right baking time, you’ll be treated to a wonderfully chewy and gooey texture that melts in your mouth.
Perfectly Pairing: Serve them warm with a scoop of ice cream for an indulgent dessert or a drizzle of your favorite sauce.
Easily Adjustable: Feel free to mix things up by adding your choice of chocolate or nuts! For more tasty ideas, check out my recipes for Peanut Butter Banana and Bacon Brown Sugar.
Make these blondies the centerpiece of your next gathering, and watch them disappear in no time!
Brown Butter Biscoff Blondies Ingredients
For the Batter
• Unsalted Butter (10 tablespoons / 140 g) – Brown it for a nutty flavor that deepens the overall taste; regular melted butter can be substituted but will alter the flavor.
• Brown Sugar (1 cup / 200 g, packed) – Provides sweetness and moisture, essential for achieving that chewy texture; consider using coconut sugar for a hint of caramel.
• Egg (1) + Egg Yolk (1) – Binds the mixture and crafts a denser texture; using room temperature eggs ensures better blending.
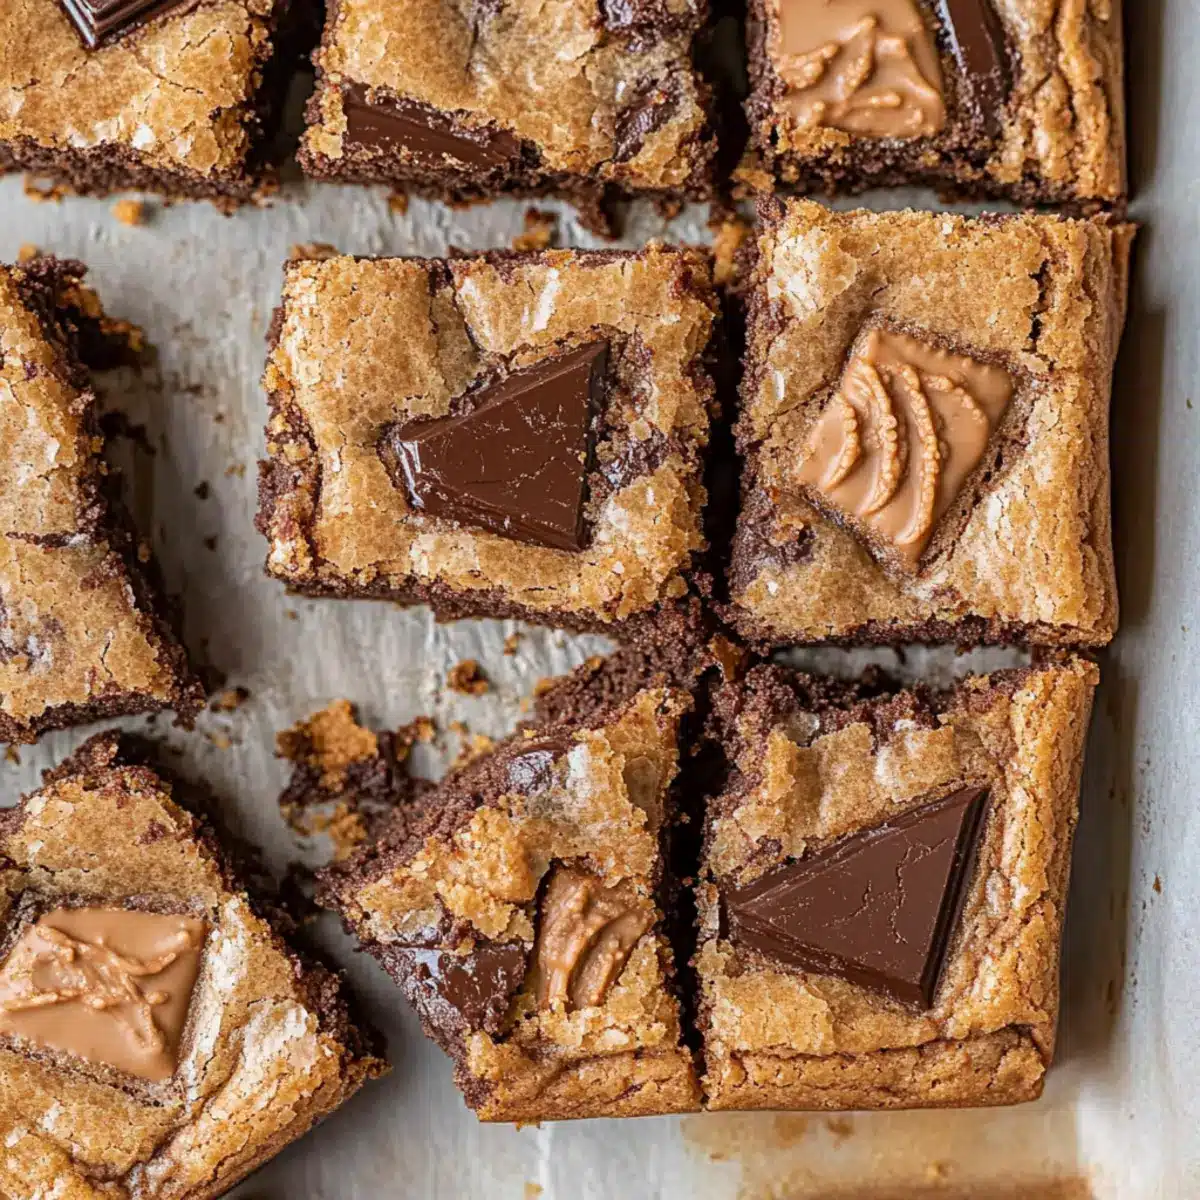
• Biscoff Cookie Butter (⅓ cup / 95 g) – Intensifies the Biscoff flavor with creaminess; any nut butter can work, but it will change the overall taste.
• Salt (½ teaspoon) – Enhances all flavors and balances the sweetness; feel free to use kosher or sea salt.
• All-Purpose Flour (1¼ cups / 150 g) – Offers structural integrity to the blondies; for a gluten-free alternative, swap in a 1:1 gluten-free baking blend.
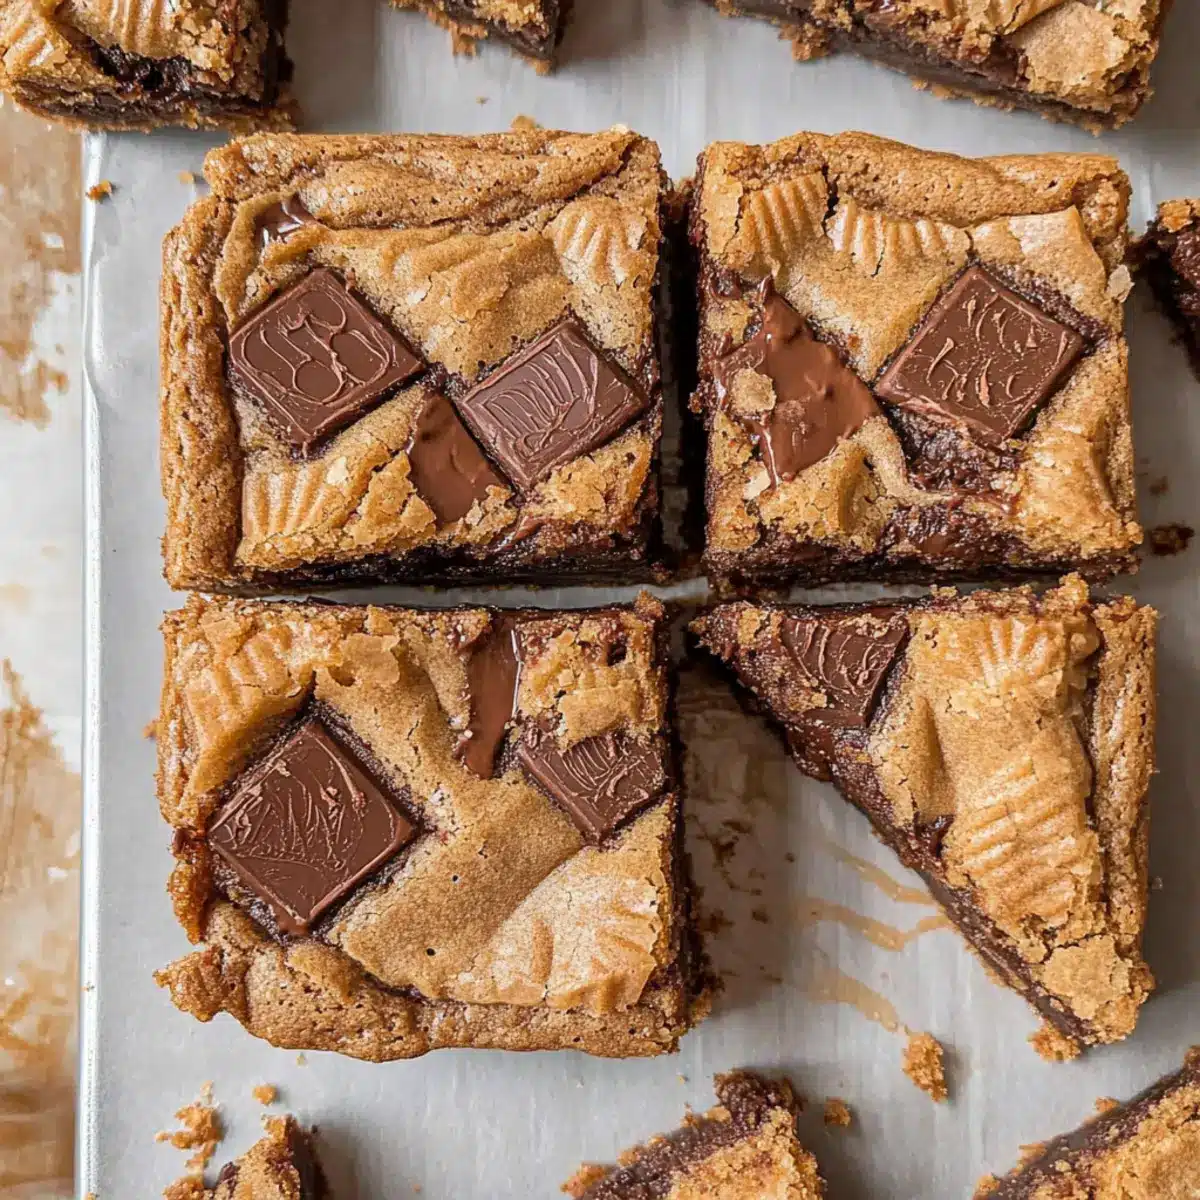
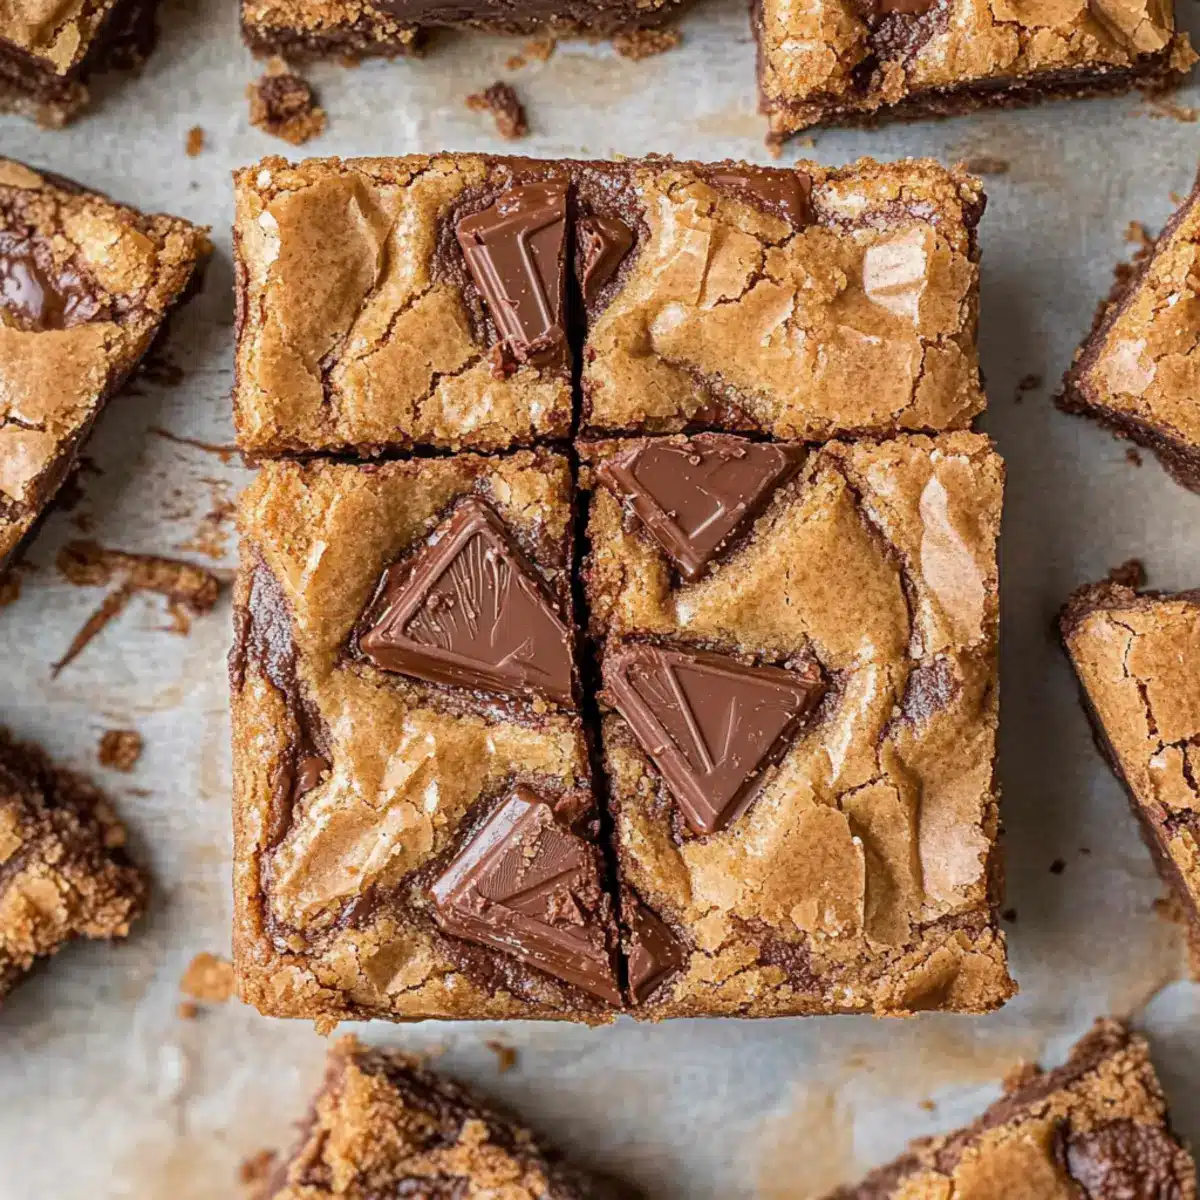
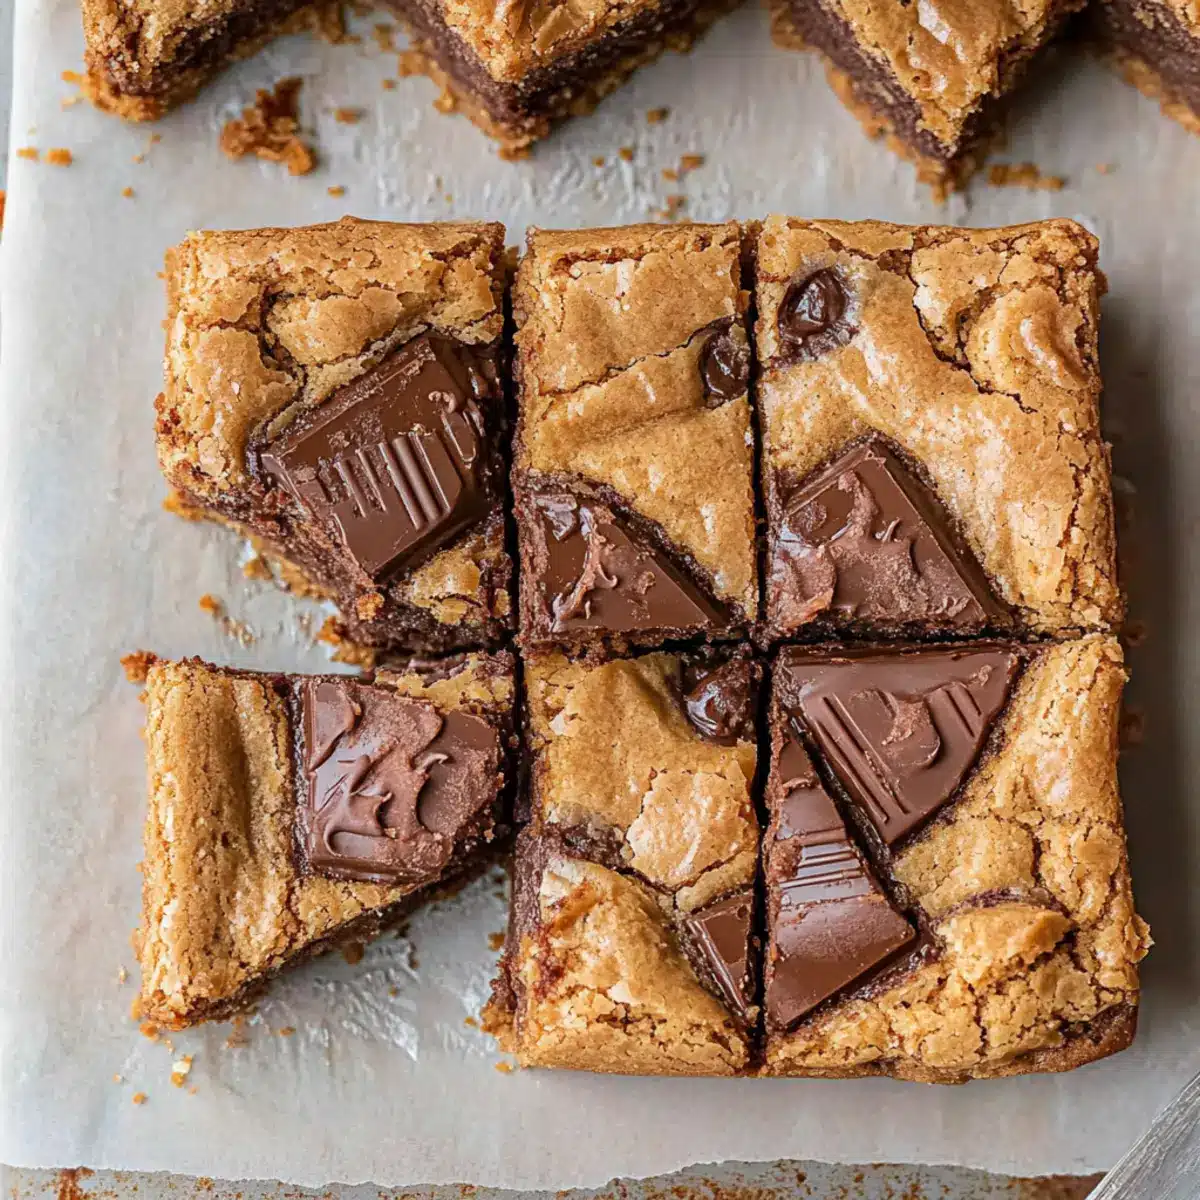
• Chocolate, chopped (3.5 oz / 100 g) – Provides rich pockets of chocolate throughout; using dark or semi-sweet chocolate elevates the indulgence.
For Topping
• Biscoff Cookies (for topping) – Adds a crunchy texture and attractive finish; optional, but it enhances the delightful Biscoff experience.
Get ready to create these Brown Butter Biscoff Blondies that are sure to become a favorite in your home!
Step‑by‑Step Instructions for Brown Butter Biscoff Blondies
Step 1: Preheat and Prepare
Begin by preheating your oven to 350°F (175°C). Line an 8×8-inch baking dish with parchment paper, allowing some overhang to facilitate easy removal later. This will ensure your Brown Butter Biscoff Blondies come out perfectly and allow for even baking, setting the stage for a delicious dessert.
Step 2: Brown the Butter
In a medium saucepan, melt 10 tablespoons of unsalted butter over medium heat. Stir continuously for about 6-10 minutes until the butter turns a deep golden color and emits a rich, nutty aroma. Keep a close eye to prevent burning, as this step is crucial to develop the signature depth of flavor in your blondies.
Step 3: Mix Butter and Sugar
Once the brown butter has cooled slightly, pour it into a mixing bowl along with 1 cup of packed brown sugar. Use a whisk or spatula to mix them together until the mixture is smooth and well combined, creating a luscious base for your Brown Butter Biscoff Blondies.
Step 4: Incorporate Eggs and Biscoff
Add 1 whole egg and 1 egg yolk to the bowl, mixing thoroughly until fully incorporated. Then, stir in ⅓ cup of Biscoff cookie butter, blending until the mixture is creamy and homogeneous. This will infuse the batter with that delightful Biscoff flavor that makes these blondies so enticing.
Step 5: Add Dry Ingredients
Next, gently fold in ½ teaspoon of salt and 1¼ cups of all-purpose flour using a spatula. Mix just until the flour disappears; overmixing can lead to a denser texture. Your batter should be thick and slightly sticky, a hallmark of the perfect Brown Butter Biscoff Blondies.
Step 6: Mix in Chocolate
Now, incorporate 3.5 ounces of chopped chocolate into the batter, stirring carefully to distribute the chocolate pieces evenly. This addition will create gooey pockets of melted chocolate throughout your blondies, enhancing both the flavor and texture with each delicious bite.
Step 7: Prepare to Bake
Pour the batter into the prepared baking dish, using a spatula to spread it evenly. For a touch of flair, you can sprinkle additional chocolate on top or arrange Biscoff cookies for an attractive finish. This step will not only make your blondies pretty but will add even more of that irresistible Biscoff crunch.
Step 8: Bake to Perfection
Place the baking dish in the preheated oven and bake for 20-25 minutes. Check for doneness by inserting a toothpick in the center; it should come out clean or with a few moist crumbs. This ensures your Brown Butter Biscoff Blondies are perfectly chewy and fudgy in the center.
Step 9: Cool and Slice
Once baked, remove the pan from the oven and allow the blondies to cool completely in the pan. This process can take a couple of hours but is key to achieving the ideal gooey texture. After cooling, lift the blondies out using the parchment overhang, slice them into squares, and revel in the deliciousness!
Expert Tips for Brown Butter Biscoff Blondies
-
Correct Butter Browning: Ensure you watch the unsalted butter closely while browning to avoid burning, which can lead to a bitter taste in your Brown Butter Biscoff Blondies.
-
Egg Temperature Matters: Use room temperature eggs for better mixing into the batter, leading to a smooth, creamy consistency that enhances the overall texture.
-
Gentle Mixing: Fold in the flour gently to maintain that perfect chewy texture; overmixing can make the blondies dense and cake-like instead of fudgy.
-
Cool Completely: Resist the urge to slice the blondies right away! Let them cool completely in the pan to achieve optimal gooiness and ease of cutting.
-
Use the Right Pan: Opt for a light-colored metal pan for even baking, ensuring your blondies cook perfectly without burning on the edges.
Make Ahead Options
These Brown Butter Biscoff Blondies are ideal for meal prep, allowing you to enjoy a delicious treat with minimal fuss during busy weeks! You can prepare the batter up to 24 hours in advance by mixing all the ingredients (excluding the chocolate and toppings). Store the batter in an airtight container in the refrigerator to keep it fresh. When you’re ready to bake, simply add the chopped chocolate, pour it into the prepared baking dish, and bake as directed. This not only saves time but also ensures your blondies are just as gooey and flavorful when fresh out of the oven!
How to Store and Freeze Brown Butter Biscoff Blondies
Airtight Container: Store your Brown Butter Biscoff Blondies in an airtight container at room temperature for up to 4-5 days to maintain their delicious freshness.
Fridge: If you prefer, you can refrigerate the blondies for up to a week. Just be sure to wrap them tightly in plastic wrap or place them in a sealed container to prevent them from drying out.
Freezer: For longer storage, freeze the blondies wrapped individually in plastic wrap and then place them in a freezer bag. They will keep well for up to 3 months—perfect for a sweet treat on demand!
Reheating: To enjoy them warm again, simply microwave the blondies for 10-15 seconds. This brings back their fudgy gooeyness and makes them even more indulgent!
What to Serve with Brown Butter Biscoff Blondies
As you prepare to indulge in these soft, fudgy treats, let’s explore delightful companions that heighten your dessert experience.
- Vanilla Ice Cream: A scoop of creamy vanilla ice cream offers a refreshing contrast to the warm blondies, making each bite a heavenly combination.
- Caramel Sauce: Drizzling warm caramel over the blondies enhances their rich, buttery flavor while adding a luscious sweetness that’s hard to resist.
- Fresh Berries: Juicy raspberries or strawberries bring a tart freshness, cutting through the sweetness and creating a balanced dessert.
- Coffee or Espresso: A cup of rich coffee complements the blondies beautifully, highlighting the deep flavors of brown butter and Biscoff.
- Chopped Nuts: Crunchy walnuts or pecans provide a delightful textural contrast, adding nuttiness that pairs perfectly with the soft blondies.
- Milkshake: Blend vanilla ice cream and milk for a thick milkshake that makes for an indulgent pairing, perfect for special occasions.
- Chocolate Drizzle: A simple drizzle of melted chocolate adds an extra layer of sweetness and complements the chocolate chunks interspersed within the blondies.
- Coconut Whipped Cream: Light and airy coconut whipped cream enhances the flavors, offering a tropical twist that surprises and delights.
Each of these delightful accompaniments amplifies the experience of your Brown Butter Biscoff Blondies, making every moment oh-so-memorable!
Brown Butter Biscoff Blondies Variations
Feel free to get creative with your Brown Butter Biscoff Blondies and customize them according to your cravings!
- Nutty Addition: Toss in some chopped walnuts or pecans for a delightful crunch and flavor contrast.
- White Chocolate Swirl: Substitute the dark chocolate with white chocolate chips for a sweeter and creamier treat.
- Spiced Bliss: Add a teaspoon of cinnamon or nutmeg to the batter for a warm, cozy twist that evokes the flavors of the season.
- Fruity Twist: Incorporate dried fruits like cranberries or cherries for a chewy texture and a pop of tartness.
- Cookie Crumble Top: Crumble extra Biscoff cookies over the batter before baking for an added texture and extra cookie love.
- Dairy-Free Delight: Swap the butter for a dairy-free alternative, such as coconut oil, and use a plant-based egg substitute, perfect for your vegan friends!
- Coffee Kick: Mix in a tablespoon of instant coffee or espresso powder to heighten the caramel flavors and give your blondies a boost.
- Drizzle of Decadence: Finish your blondies with a drizzle of caramel or additional Biscoff spread for that over-the-top indulgence.
These variations can transform your classic blondies into a variety of exciting treats. And if you’re looking for more inspiration, check out my recipes for Garlic Butter Steak and Peanut Butter Jelly. Happy baking!
Brown Butter Biscoff Blondies Recipe FAQs
What is the best way to choose ripe ingredients for my Brown Butter Biscoff Blondies?
Absolutely! For the best flavor and texture, ensure your unsalted butter is fresh, as old butter can affect the taste. When selecting eggs, opt for those that have been stored at room temperature as they blend better with the batter. A good quality Biscoff cookie butter will significantly enhance the richness of your blondies, so choose a brand that you trust and enjoy.
How should I store Brown Butter Biscoff Blondies to keep them fresh?
To keep your Brown Butter Biscoff Blondies at their best, store them in an airtight container at room temperature for up to 4-5 days. Be sure to place a piece of parchment paper between layers if you stack them to prevent sticking. If you want to enjoy them longer, wrapping them individually and placing them in a sealed container in the fridge can keep them fresh for up to a week.
Can I freeze my Brown Butter Biscoff Blondies? If so, how?
Absolutely! Freezing is a fantastic option for these blondies. To do this effectively, allow the blondies to cool completely. Wrap each one tightly in plastic wrap, then place them in a freezer-safe bag. This way, they will be protected from freezer burn and stay delicious for up to 3 months. When you’re ready to enjoy them, just pull one out and microwave it for 10-15 seconds for that gooey, warm comfort again!
What should I do if my blondies turn out too dry?
If you find your Brown Butter Biscoff Blondies are on the dry side, it often means they may have been overbaked. Be sure to keep an eye on them towards the end of the baking time—when a toothpick inserted comes out with a few moist crumbs, it’s time to take them out. Also, remember that letting them cool completely in the pan will help them retain moisture and create that irresistibly fudgy texture.
Are there any dietary considerations for pets or allergies with this recipe?
Yes, it’s important to note that chocolate can be toxic to dogs, so be sure to keep these blondies out of reach of your furry friends. Additionally, those with nut allergies should avoid using Biscoff cookie butter if you substitute it with a nut butter, as that could introduce allergens. Always check ingredient labels for any potential allergens when cooking for yourself or others!
Can I make any substitutions if I don’t have all the ingredients?
Very much so! If you find you don’t have Biscoff cookie butter, you can substitute it with any nut butter, but keep in mind the flavor will change. You can also swap the all-purpose flour with a 1:1 gluten-free baking blend if needed. Lastly, feel free to experiment with different chocolates or omitting them entirely for a lighter treat!
Brown Butter Biscoff Blondies that Melt in Your Mouth
Ingredients
Equipment
Method
- Preheat your oven to 350°F (175°C). Line an 8x8-inch baking dish with parchment paper.

- Melt 10 tablespoons of unsalted butter over medium heat until it turns a deep golden color.
- Pour the brown butter into a mixing bowl and mix with 1 cup of packed brown sugar until smooth.
- Add 1 whole egg and 1 egg yolk, mixing thoroughly, then stir in ⅓ cup of Biscoff cookie butter.
- Gently fold in ½ teaspoon of salt and 1¼ cups of all-purpose flour until just combined.
- Incorporate 3.5 ounces of chopped chocolate into the batter.
- Pour the batter into the prepared baking dish and spread evenly.
- Bake for 20-25 minutes, checking for doneness with a toothpick.
- Allow to cool completely in the pan before slicing into squares.
Leave a Reply