
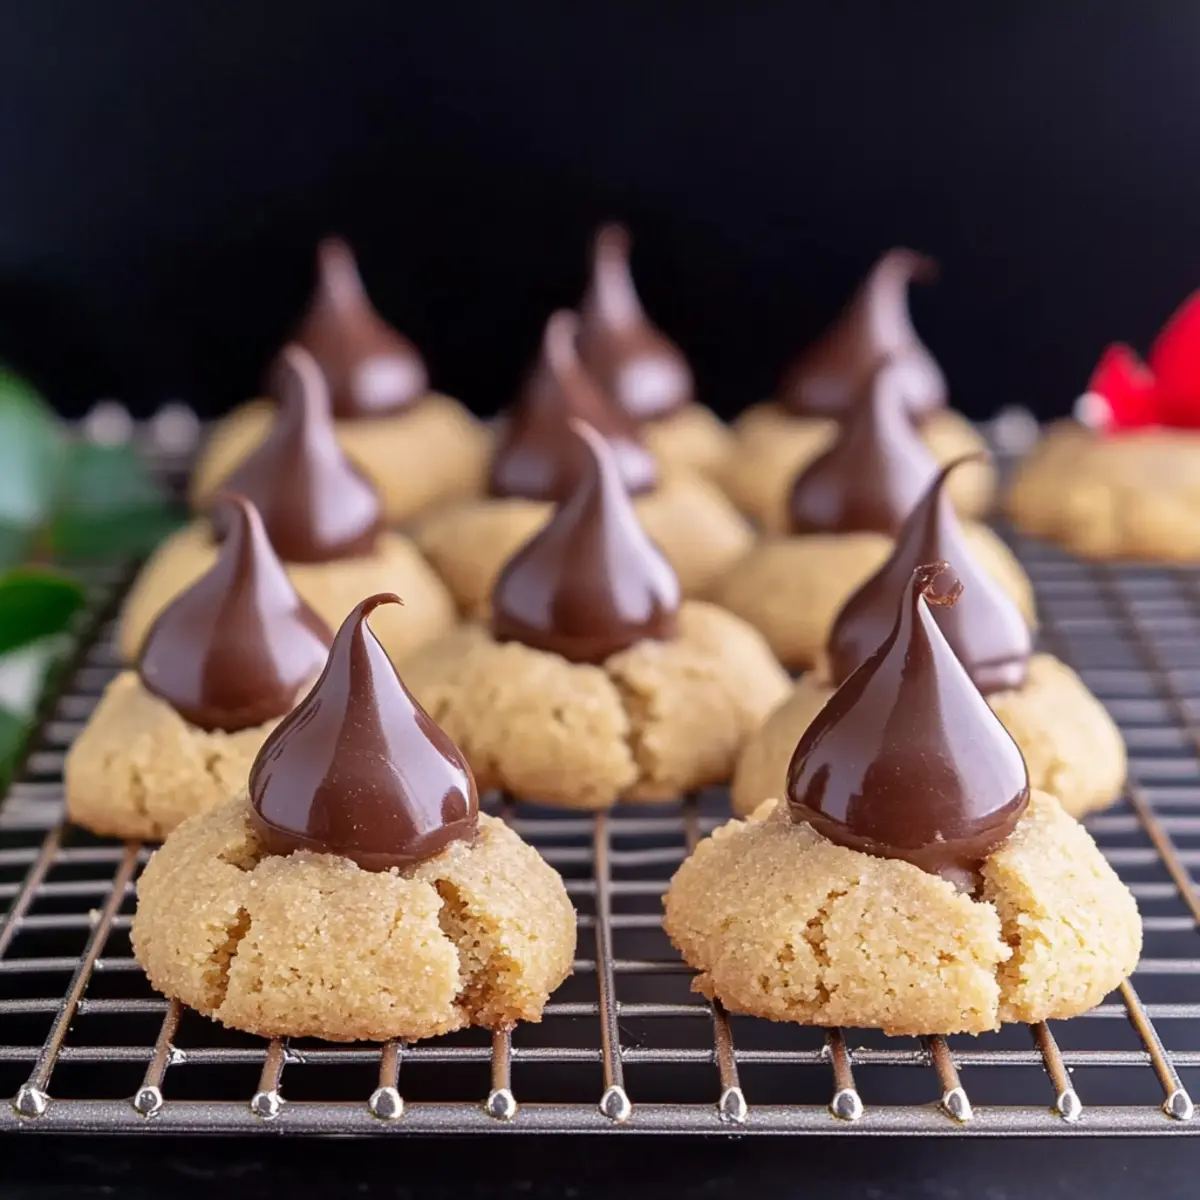
As I sifted flour and measured out creamy peanut butter, the familiar warmth of nostalgia wrapped around me like a cozy blanket. Classic Peanut Butter Blossoms have a magical way of evoking fond memories of baking with family during the holidays. These delightful cookies, topped with a chocolate kiss, strike the perfect balance between soft-baked comfort and indulgent sweetness, making them an instant crowd-pleaser. Not only are they simple to prepare, but their versatility allows you to get creative— whether you opt for crinkle cookies or thumbprints filled with your favorite jam, the possibilities are endless. Ready to bring a taste of tradition to your kitchen? Let’s get those ovens preheating and dive into the world of Peanut Butter Blossoms that will fill your home with love and laughter!
Why are Peanut Butter Blossoms a must-try?
Nostalgic Delight: These cookies are more than just a treat; they bring back treasured memories of holiday baking with loved ones.
Versatile Variations: Whether you want crinkle cookies or jam-filled thumbprints, this recipe adapts beautifully to suit your cravings.
Easy to Make: With simple ingredients and straightforward steps, even novice bakers can achieve delicious results.
Crowd-Pleasing Treat: They’re always a hit, perfect for parties or cozy family gatherings alongside a glass of milk or coffee.
Time-Saving Option: Prep time is quick, and the dough can be refrigerated or frozen, making it a breeze to whip up these sweets anytime!
Peanut Butter Blossoms Ingredients
For the Cookie Base
• All-purpose flour – Provides structure; you can substitute with a higher protein flour to prevent spreading.
• Baking soda – Acts as a leavening agent, helping your Peanut Butter Blossoms rise.
• Salt – Enhances flavor; if using unsalted butter, add ¼ teaspoon for balance.
• Butter (softened) – Adds richness and moisture; ensure it’s room temperature for easy creaming.
• Peanut butter (creamy) – The star ingredient that brings a delightful, nutty flavor; substitute with almond butter for a nut-free option.
• Brown sugar – Contributes moisture and a rich flavor; lightly pack it for accurate measurement.
• Powdered sugar – Prevents cookies from spreading during baking; sifting ensures a smooth texture.
• Egg (large, room temperature) – Binds ingredients together into a cohesive dough.
• Vanilla extract – Adds aromatic depth to the cookies.
• Granulated sugar – Used for rolling the cookie balls before baking, giving them a sweet crunch.
For the Topping
• Chocolate kisses – The classic topping that adds a sweet, chocolatey essence to your Peanut Butter Blossoms.
• Jam or favorite filling (for thumbprint cookies) – An optional ingredient that allows for a creative twist!
Step‑by‑Step Instructions for Peanut Butter Blossoms
Step 1: Prepare Dry Ingredients
In a medium mixing bowl, whisk together 2 cups of all-purpose flour, 1 teaspoon of baking soda, and ½ teaspoon of salt until well combined. This crucial step helps ensure that the leavening agent is evenly dispersed. Set your bowl aside as we prepare the wet ingredients, giving you a solid foundation for your delicious Peanut Butter Blossoms.
Step 2: Cream Mixture
In a large mixing bowl, use an electric mixer to cream together ¾ cup softened butter and ¾ cup creamy peanut butter until fluffy and light in color, about 2-3 minutes. Gradually add in ½ cup brown sugar and ½ cup powdered sugar, beating until fully incorporated. Then, crack in 1 large room-temperature egg and pour in 1 teaspoon of vanilla extract, mixing until everything is well combined and smooth.
Step 3: Combine Mixtures
Slowly add the dry ingredients from your first bowl into the wet mixture, stirring gently with a spatula until just combined. Be careful not to overmix, as this could affect the tenderness of your Peanut Butter Blossoms. You want a soft dough that holds together but isn’t too sticky—perfect for shaping into cookie balls.
Step 4: Chill Dough
Cover the bowl with plastic wrap or a clean kitchen towel and refrigerate the dough for at least 1 hour. Chilling helps to prevent the cookies from spreading too much during baking, ensuring they maintain that perfect, soft-baked texture. While you wait, you can preheat your oven and prepare your baking sheets.
Step 5: Form Cookies
Once the dough is chilled, preheat your oven to 350°F (180°C). Scoop the dough and shape it into 1-inch balls. Roll each ball in granulated sugar, coating them evenly, then place them on baking sheets lined with parchment paper, ensuring you leave about 2 inches of space between each cookie for the Peanut Butter Blossoms to expand while baking.
Step 6: Bake Cookies
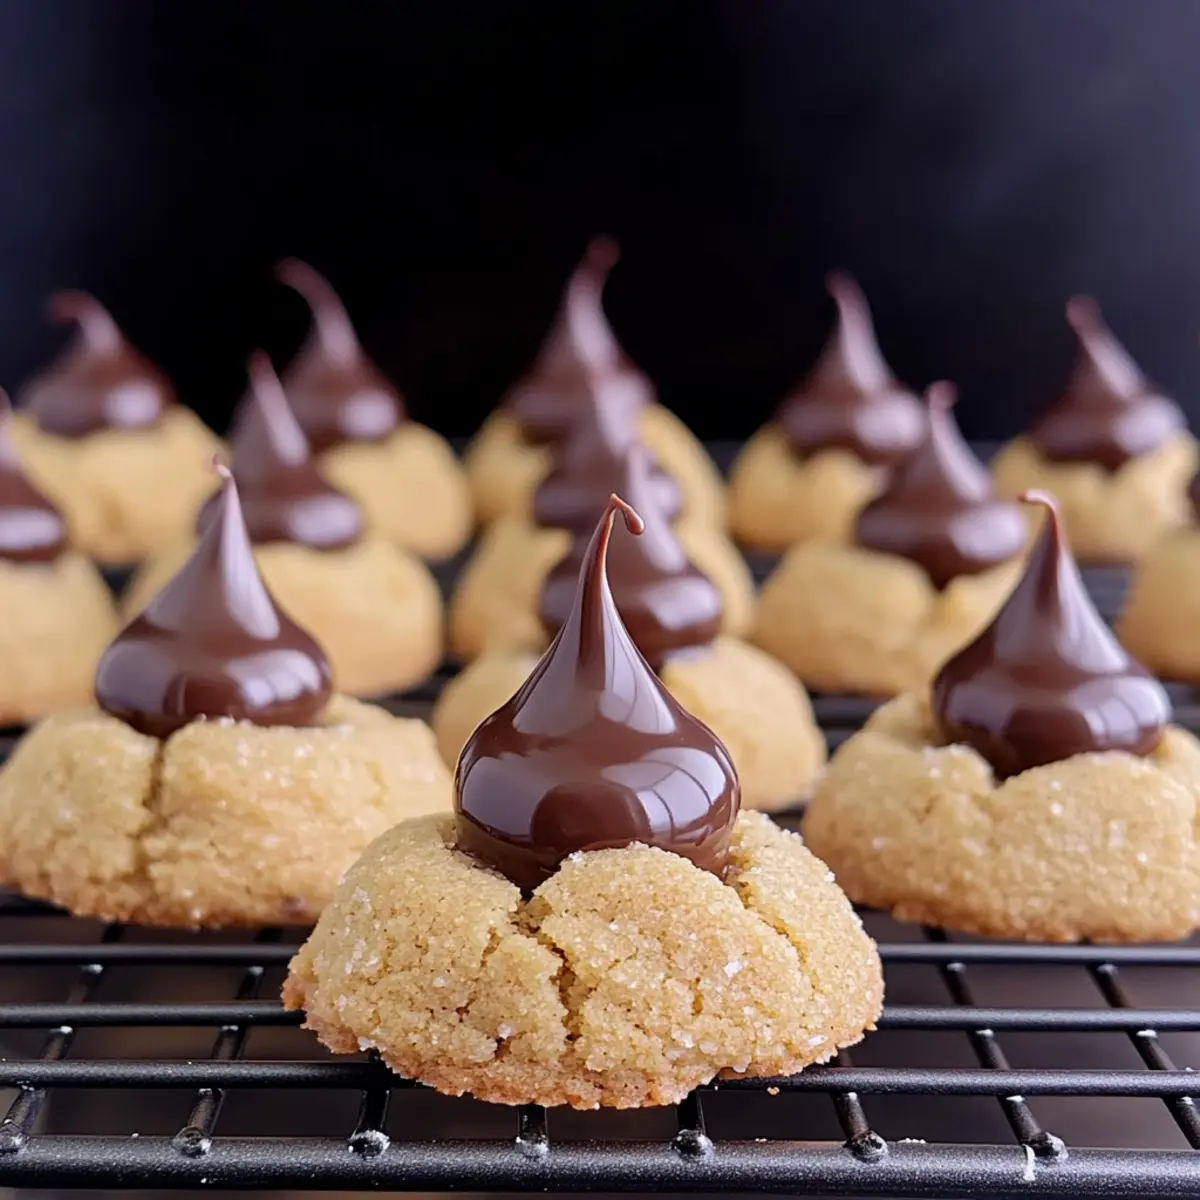
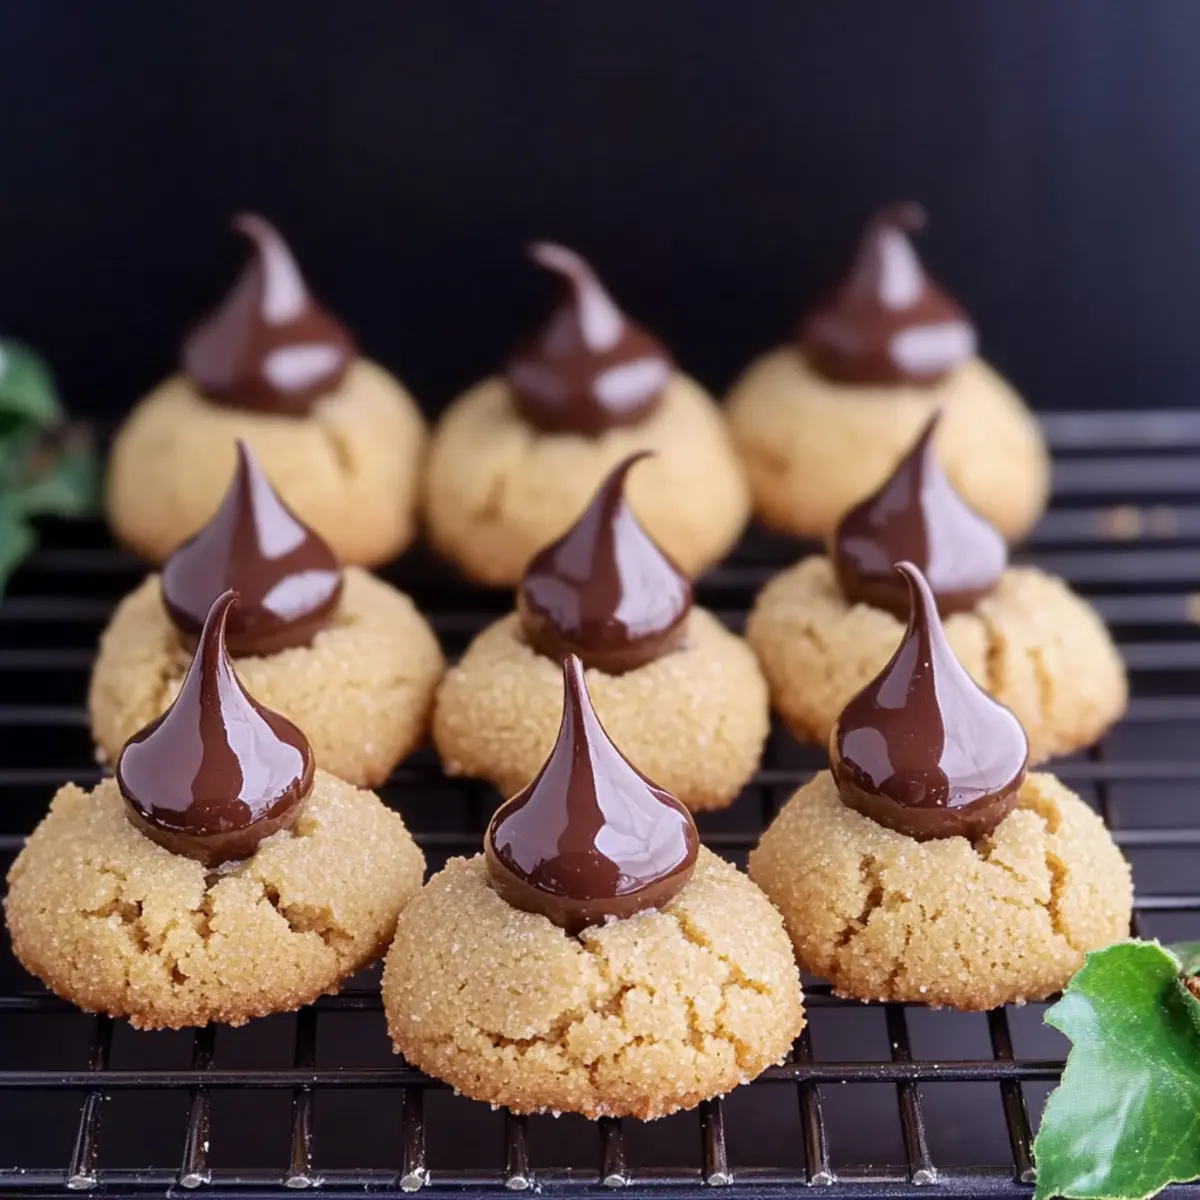
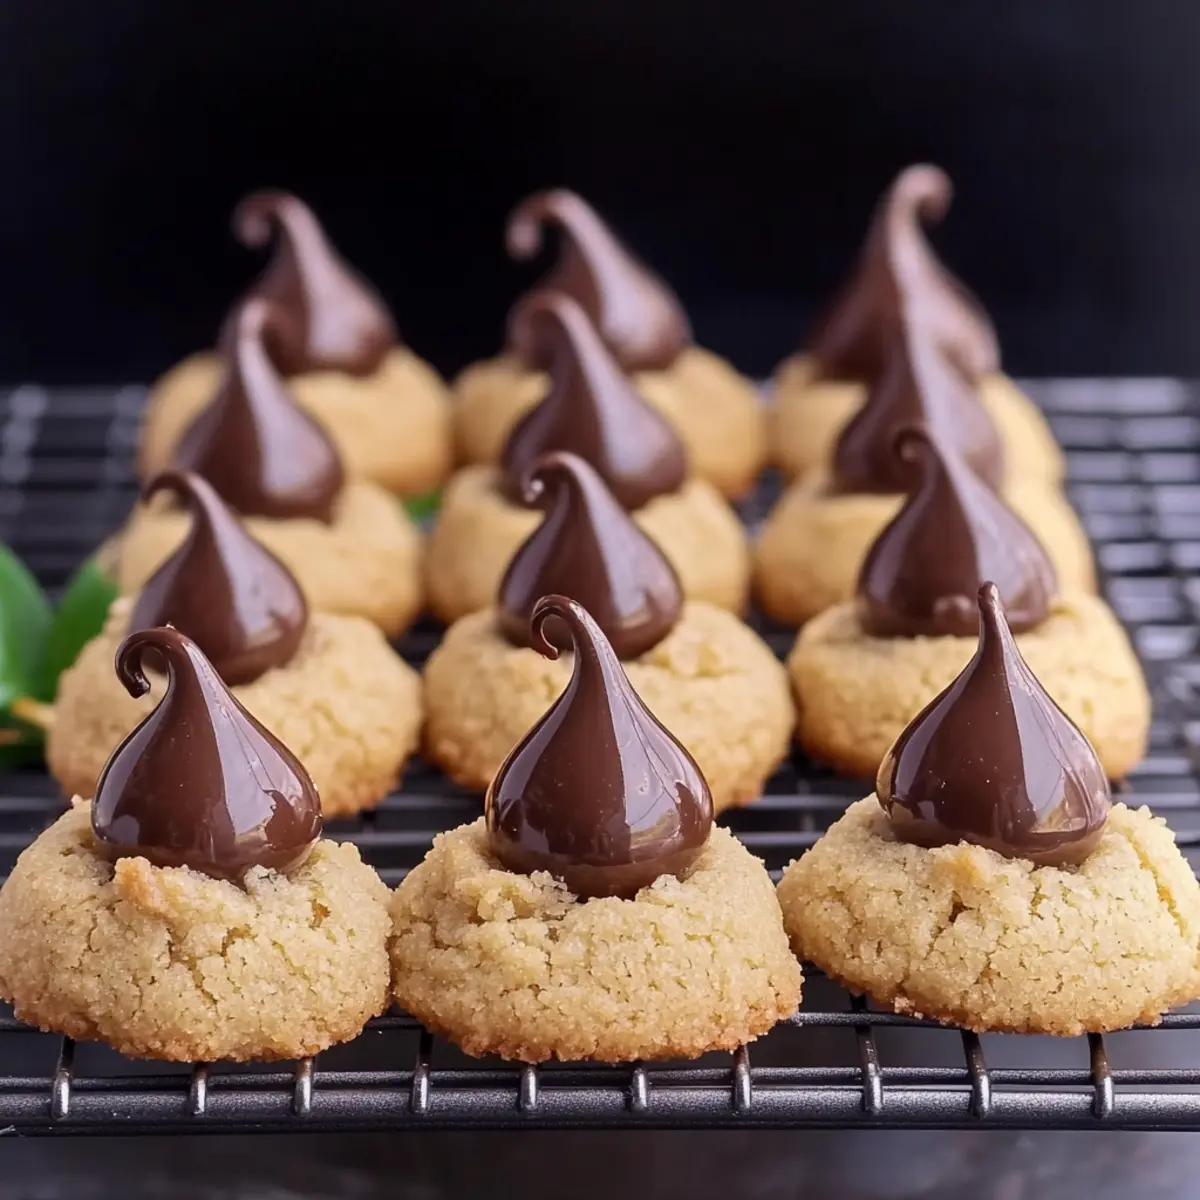
Slide the baking sheets into your preheated oven and bake the cookies for approximately 10-12 minutes. Keep an eye on them; you’ll know they’re done when the edges are slightly golden and the centers look set but still soft. As soon as they come out of the oven, gently press a chocolate kiss into the center of each cookie while they are still warm for that signature Peanut Butter Blossom look.
Step 7: Cool Down
Allow the cookies to cool on the baking sheets for about 10 minutes. This resting period helps the cookies firm up slightly while still being wonderfully warm. After cooling, you can carefully transfer them to a wire rack to cool completely.
Step 8: Finish Thumbprints
If you opted for the thumbprint variation with jam, once the Peanut Butter Blossoms have cooled, gently re-indent the center if it has puffed up. Fill each indention with your favorite jam or filling, creating a delightful option within the classic recipe, and enjoy the versatility of your baking adventure!
Expert Tips for Perfect Peanut Butter Blossoms
-
Chill the Dough: Remember to refrigerate the dough for at least an hour; chilling helps your Peanut Butter Blossoms maintain their shape and prevents spreading.
-
Avoid Overmixing: Once the dry ingredients are combined with the wet, mix just until incorporated. Overmixing can lead to tough cookies instead of the tender texture you crave.
-
Oven Temperature Matters: Keep an eye on your oven’s temperature; using an oven thermometer can help ensure consistent results, as variations can affect baking times and textures.
-
Use Standard Peanut Butter: Opt for regular, creamy peanut butter rather than natural brands, which can alter the dough and texture of your cookies.
-
Room Temperature Ingredients: Make sure your butter and egg are at room temperature before mixing. This helps create a smoother dough and ensures even baking for your Peanut Butter Blossoms.
Make Ahead Options
These Peanut Butter Blossoms are an excellent choice for busy bakers looking to save time without sacrificing flavor! You can prepare the dough up to 24 hours in advance by mixing the ingredients and then refrigerating it. This chilling not only helps to enhance the flavors but also maintains the ideal texture. For even longer storage, you can freeze the formed cookie balls for up to 3 months; just roll them in sugar before baking straight from the freezer! When you’re ready to enjoy your Peanut Butter Blossoms, simply bake the cookies from the chilled or frozen state and press the chocolate kisses into the center right after baking for that signature touch—just as delicious as if they were made fresh that day!
What to Serve with Classic Peanut Butter Blossoms?
Indulging in the warm, nutty goodness of these cookies is just the beginning; let’s create a cozy, delightful meal experience.
- Cold Glass of Milk: Nothing beats the classic pairing; the creaminess of milk complements the sweetness and nuttiness perfectly.
- Rich Hot Chocolate: Enhance the chocolate flavor with a cup of hot cocoa, adding a splash of peppermint or orange for a festive twist.
- Creamy Vanilla Ice Cream: Serve a scoop alongside for a delightful contrast to the chewy texture; it creates a heavenly combination.
- Fresh Fruit Salad: A vibrant mix of berries or citrus adds a refreshing zing, balancing the sweetness of your cookies.
- Spiced Chai Tea: The warmth and spices in chai elevate your cookie experience, wrapping you in cozy comfort during chilly evenings.
- Homemade Whipped Cream: Top your cookies with a dollop of whipped cream for extra indulgence—simple yet decadently satisfying!
- Nutty Granola Parfait: Layer granola with yogurt and berries; the crunch pairs beautifully with the soft Peanut Butter Blossoms.
- Gingerbread cookies: For a festive touch, these spiced cookies create a delightful medley alongside your holiday favorites.
Peanut Butter Blossoms Variations
Feel free to customize these delightful cookies to suit your taste or dietary preferences, unleashing culinary creativity in your kitchen!
-
Nut-Free: Substitute peanut butter with almond butter for a nut-free twist while still maintaining that creamy texture.
-
Crinkle Cookies: Transform your dough into crinkle cookies by rolling the balls in granulated sugar, then in powdered sugar for a lovely snowy effect. These cookie variations look as good as they taste!
-
Jam-Filled Thumbprints: For a fun variation, create thumbprint cookies and fill them with your favorite jam. It adds a sweet surprise that pairs perfectly with the peanut butter flavor.
-
Dark Chocolate Kiss: Swap regular chocolate kisses for dark chocolate ones to elevate the flavor profile with a richer cocoa experience that satisfies even the fiercest chocolate cravings.
-
Spice It Up: Add a pinch of cinnamon to the dough for a warm, cozy flavor that contrasts beautifully with the sweetness of the cookies. You could even experiment with some ground ginger for an exotic twist.
-
Chewy Variation: For a chewier texture, try adding an extra egg yolk, which helps keep the cookie moist and soft. It’s a small change that makes a delightful difference!
-
Sprinkle of Sea Salt: Top each cookie with a sprinkle of flaky sea salt right before baking. This added touch can bring out the flavors in your Peanut Butter Blossoms in the most scrumptious way.
-
Chocolate Swirl: Mix in mini chocolate chips or swirl melted chocolate into the dough for extra chocolatey goodness. For those who can’t resist, this is a small indulgence that takes these cookies over the top!
Each variation invites you to personalize your recipe, so don’t hesitate to explore flavors that resonate with your palate. And if you love the combination of peanut butter and chocolate, why not check out other recipes like Peanut Butter Jelly or Homemade Nutter Butters? Happy baking!
How to Store and Freeze Peanut Butter Blossoms
Airtight Container: Store cooled Peanut Butter Blossoms in an airtight container at room temperature for up to one week to keep them fresh and delicious.
Refrigeration: For longer freshness, you can refrigerate the cookies in the airtight container for up to two weeks if you prefer a slightly firmer texture.
Freezer Storage: Freeze Peanut Butter Blossoms in a single layer on a baking sheet for about an hour, then transfer them to a freezer-safe bag or container for up to three months.
Reheating: When ready to enjoy, thaw cookies at room temperature or reheat in the microwave for 10-15 seconds for that fresh-baked warmth.
Peanut Butter Blossoms Recipe FAQs
How do I choose the right peanut butter?
Absolutely! For the best results, opt for classic creamy peanut butter instead of natural brands. This ensures your dough has the right texture and consistency for those melt-in-your-mouth Peanut Butter Blossoms. Look for brands that have minimal added ingredients, ideally just peanuts and salt.
How should I store my Peanut Butter Blossoms?
I recommend storing your cooled Peanut Butter Blossoms in an airtight container at room temperature, where they’ll stay fresh for about one week. This method retains their soft texture and delightful flavor. If you’d like to keep them longer, consider refrigerating them in the same container for up to two weeks.
Can I freeze my Peanut Butter Blossoms?
Yes, you can! To freeze your cookies, place them in a single layer on a baking sheet and freeze for about an hour. Once solid, transfer them to a freezer-safe bag or container for up to three months. When you’re ready to enjoy, simply thaw them at room temperature or warm them in the microwave for 10-15 seconds for that fresh-baked taste.
What should I do if my cookies spread too much while baking?
Don’t worry—it happens to the best of us! If your Peanut Butter Blossoms spread too much, it might be due to warm dough or not enough chilling time. In the future, ensure you chill the dough for at least an hour before baking, and consider using a higher protein flour for better structure, which can help your cookies hold their shape.
Can I make these cookies nut-free?
Absolutely! If you need a nut-free version, you can easily swap out the peanut butter for almond butter or sunflower seed butter. Just make sure to follow the same measurements and techniques to achieve the same yummy texture and flavor.
What if I want to change the toppings?
The more the merrier! You can definitely get creative with the toppings. Instead of chocolate kisses, try filling thumbprint cookies with your favorite jam or even a chocolate ganache. Just remember to gently re-indent the cookies for even filling. Enjoy experimenting!
Melt-in-Your-Mouth Peanut Butter Blossoms You’ll Crave
Ingredients
Equipment
Method
- In a medium mixing bowl, whisk together 2 cups of all-purpose flour, 1 teaspoon of baking soda, and ½ teaspoon of salt until well combined.
- In a large mixing bowl, cream together ¾ cup softened butter and ¾ cup creamy peanut butter until fluffy, about 2-3 minutes. Gradually add ½ cup brown sugar and ½ cup powdered sugar, beating until smooth. Then add 1 large egg and 1 teaspoon vanilla extract.
- Slowly add the dry ingredients to the wet mixture, stirring gently until just combined to form a soft dough.
- Cover the bowl with plastic wrap and refrigerate the dough for at least 1 hour.
- Preheat your oven to 350°F (180°C). Scoop the dough into 1-inch balls and roll in granulated sugar, then place on parchment-lined baking sheets.
- Bake for approximately 10-12 minutes. Gently press a chocolate kiss into the center of each cookie while warm.
- Allow the cookies to cool on the sheets for about 10 minutes before transferring to a wire rack.
- For thumbprint variation, re-indent the center of cooled cookies and fill with jam.
Leave a Reply