
As I stood in my kitchen, the summer sun streaming in and the scent of fresh limes filling the air, I felt a wave of nostalgia wash over me. That’s when I knew it was time to whip up a batch of my beloved Key Lime Pie Bars. These easy-to-make treats combine a luscious creamy filling with a delightful, crunchy cookie crust, delivering the perfect balance of tangy and sweet. They’re not just a crowd-pleaser; they also come together quickly, making them an ideal companion for those lazy summer afternoons spent with friends and family. Plus, they can be made ahead of time and stored in the fridge, so they’re always ready to impress. Are you ready to make your summer gatherings even sweeter with these delightful Key Lime Pie Bars?

Why are Key Lime Pie Bars a must-try?
Easy Preparation: Whipping up these bars is a breeze! With minimal steps, anyone can master this delightful dessert without the fuss.
Refreshing Flavor: Packed with citrus zing, each bite bursts with refreshing lime goodness that invigorates the senses.
Versatile Treat: Perfect for summer picnics, barbecues, or simply a cozy night in, these bars cater to all occasions.
Make-Ahead Magic: Prep them in advance and keep them chilled—this makes hosting effortless and the flavors even better. If you’re looking for more easy and crowd-pleasing recipes, check out my Cereal Bars Homemade or Nut Free Bars.
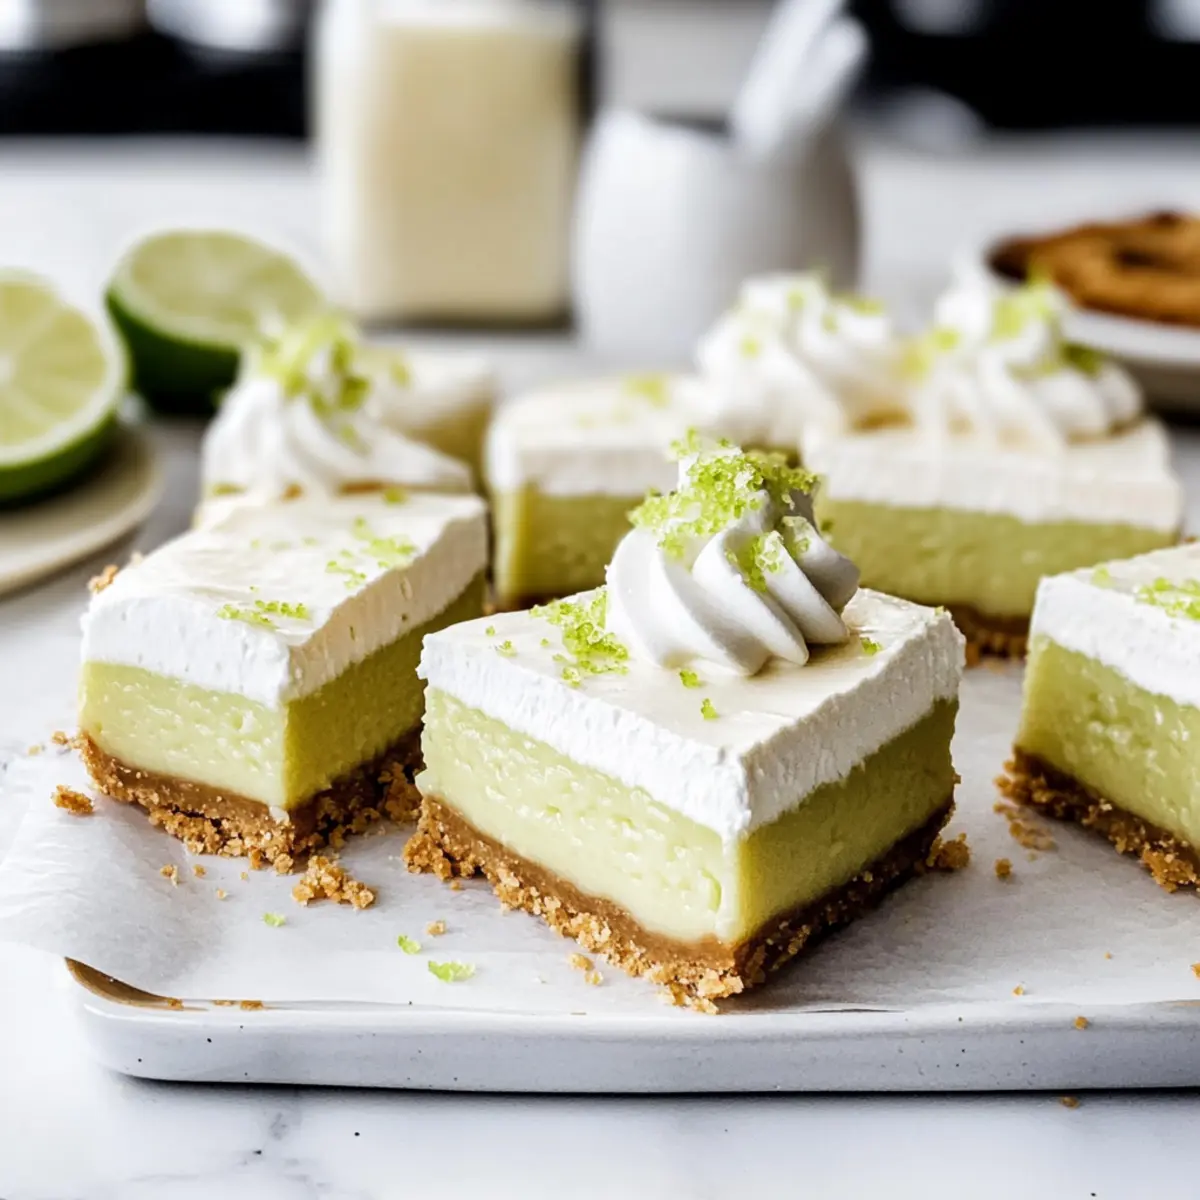
Impressive Presentation: With vibrant colors and a smooth texture, these Key Lime Pie Bars not only taste amazing but also look stunning on any dessert table!
Key Lime Pie Bars Ingredients
• Get ready to create these delightful bars!
For the Crust
- Vanilla Wafer Cookies – These provide a sweet, crunchy base; graham crackers can be used as a delicious alternative.
- Brown Sugar – Adds a rich sweetness that enhances the crust’s flavor profile.
- Butter – Unsalted butter is best for binding the crumbs together while keeping flavors balanced.
For the Filling
- Egg Yolks – They give the filling a rich, creamy consistency that helps bind everything together.
- Lime Zest – For aromatic, citrusy goodness; always opt for fresh lime for peak flavor.
- Sweetened Condensed Milk – This secret ingredient brings luscious sweetness and essential creaminess to the filling.
- Lime Juice – The star of the show! Freshly squeezed lime juice ensures that signature tart flavor shines through.
For the Topping
- Heavy Whipping Cream – It adds lightness and creaminess as a topping; sweeten lightly to taste for balance.
Now that you have the Key Lime Pie Bars ingredients, you’re all set to make a stunning summer dessert that will impress everyone!
Step‑by‑Step Instructions for Key Lime Pie Bars
Step 1: Prepare the Crust
Preheat your oven to 350°F (175°C). Crush the vanilla wafer cookies into fine crumbs using a food processor or by placing them in a zip-top bag and rolling over them with a rolling pin. In a bowl, combine the crumbs with brown sugar and melted unsalted butter until the mixture resembles wet sand. Press this mixture firmly into the bottom of an 8×8 inch pan to form an even layer. Bake for 13-15 minutes until golden, then cool for 30 minutes on a wire rack.
Step 2: Make the Filling
While the crust cools, whisk together the egg yolks and fresh lime zest in a medium bowl until well combined and slightly thickened. Gradually add the sweetened condensed milk, mixing thoroughly to achieve a smooth, creamy texture. Next, pour in the fresh lime juice, continuing to whisk until the filling is a brilliant light green and fully blended, ensuring the key lime flavor shines through in your filling.
Step 3: Combine and Bake
Once the crust is cooled, pour the luscious key lime filling over it, spreading it evenly with a spatula. Return the pan to the oven and bake for 15-17 minutes, or until the filling is set but still has a slight jiggle in the center. Keep a close eye on it to avoid overbaking, which could alter the creamy texture of your Key Lime Pie Bars. After baking, remove from the oven and cool the pan on a wire rack for another 30 minutes.
Step 4: Chill and Serve
Once cooled, cover the dish and refrigerate for at least 3 hours, allowing the flavors to meld and the filling to firm up. After chilling, whip the heavy cream until soft peaks form and sweeten lightly to taste. Spread the whipped cream over the set Key Lime Pie Bars for a delightful finishing touch. Slice them into squares, serve cold, and enjoy the refreshing burst of key lime goodness!

Expert Tips for Key Lime Pie Bars
-
Fresh Limes Only: Always use fresh lime juice and zest instead of bottled. The flavor is significantly brighter and more vibrant in your Key Lime Pie Bars.
-
Check for Jiggle: When baking, the bars should jiggle slightly in the center when done. Overbaking will lead to a firmer, less creamy texture.
-
Hot Knife Slicing: To achieve clean slices, run a sharp knife under hot water before cutting the bars. This helps maintain their beautiful presentation.
-
Chill for Perfect Texture: Ensure the bars chill for at least 3 hours before serving. This allows them to set perfectly and intensifies the flavors.
-
Crust Options: For a different twist, swap the vanilla wafer crust for a traditional graham cracker crust to elevate your Key Lime Pie Bars!
What to Serve with Key Lime Pie Bars
These deliciously refreshing treats pair well with vibrant sides and drinks, creating a delightful summer meal experience.
-
Fresh Fruit Salad: A medley of seasonal fruits brings a burst of color and natural sweetness, balancing the tartness of the bars.
-
Grilled Shrimp Tacos: Light, zesty tacos complement the tangy flavor of the Key Lime Pie Bars, making for a festive pairing.
-
Coconut Rice: The subtle sweetness and creamy texture of coconut rice provide a lovely contrast, enhancing the overall meal harmony.
-
Iced Tea with Mint: A refreshing glass of iced tea infused with mint creates a cooling effect, perfect for sunny days spent outdoors.
-
Crisp Green Salad: A simple salad with lemon vinaigrette offers a fresh, crunchy counterpart, with acidity that echoes the key lime’s zing.
-
Berry Sorbet: Light and fruity, this frozen treat adds a sweet and tart experience that aligns perfectly with a summer vibe.
-
Pineapple Upside-Down Cake: Rich, buttery cake topped with caramelized pineapples creates a comforting, nostalgic dessert that adds depth to the meal.
Pair these suggestions for a delightful culinary journey that captures the essence of summer!
How to Store and Freeze Key Lime Pie Bars
Fridge: Keep the Key Lime Pie Bars tightly covered in the refrigerator for up to 4 days to maintain their freshness and vibrant flavor.
Freezer: For longer storage, freeze the bars without the whipped cream. Wrap them in plastic wrap and then in aluminum foil for up to 2 months.
Thawing: To enjoy, simply thaw in the fridge overnight. Before serving, you can top with freshly whipped cream to revive that delightful creaminess.
Serving Tips: Always serve the bars cold for the best texture and flavor experience; the chilled tartness is simply irresistible!
Make Ahead Options
These Key Lime Pie Bars are a fantastic choice for meal prep enthusiasts looking to save time during busy summer weeks! You can prepare the crust and filling up to 24 hours in advance. Simply make the crust, cool it, and then prepare the filling, pouring it over the crust before refrigerating. Once combined, cover the dish tightly and chill in the refrigerator until you’re ready to bake, allowing it to set into perfect creamy bars. This not only enhances the flavor but also makes sure they remain just as delicious when served. When you’re ready to enjoy them, simply bake, cool, and top with whipped cream before serving. Enjoy the effortless refreshing goodness of your homemade Key Lime Pie Bars!
Key Lime Pie Bars Variations & Substitutions
Feel free to get creative with these Key Lime Pie Bars; each twist brings its own delightful flavor and texture!
- Regular Limes: Swap key limes for regular limes if key limes aren’t available; they still deliver a refreshing taste.
- Graham Cracker Crust: Use a classic graham cracker crust instead of vanilla wafers for a richer, traditional experience.
- Coconut Cream: For extra creaminess, consider incorporating coconut cream into the filling for a tropical twist. The coconut flavor pairs beautifully with the lime!
- Reduced Sugar: If you’re watching your sugar intake, try using a sugar substitute in both the filling and crust for a lighter version without sacrificing flavor.
- Shortbread Crust: Replace the vanilla wafer crust with a buttery shortbread crust for a refined, crumbly texture. You’ll love the decadent contrast with the creamy filling!
- Spicy Kick: Add a hint of jalapeño or a few red pepper flakes to the filling for an unexpected, spicy kick that elevates your dessert experience.
- Fruit Toppings: Top with fresh berries like strawberries or blueberries for a splash of color; their sweetness complements the tart lime perfectly!
- Vegan Option: Substitute the egg yolks with silken tofu in the filling and use coconut milk or almond milk instead of sweetened condensed milk for a vegan alternative.
For more variations that are equally delightful, consider creating your own spin on classics like Slow Cooker Pie or exploring my delicious Nut Free Bars. Enjoy the vibrant flavors!

Key Lime Pie Bars Recipe FAQs
What type of limes should I use for Key Lime Pie Bars?
Absolutely, fresh key limes are the best choice for those vibrant, tart flavors that define this dessert! If they’re not available, regular limes work well as a substitute. Just remember to use fresh juice for optimum taste.
How should I store Key Lime Pie Bars?
To keep your Key Lime Pie Bars fresh, cover them tightly and store in the refrigerator for up to 4 days. This way, they remain deliciously cool and ready to enjoy!
Can I freeze Key Lime Pie Bars?
Yes! For longer storage, you can freeze Key Lime Pie Bars without the whipped cream topping. Wrap each bar in plastic wrap and then in aluminum foil to prevent freezer burn. They’ll stay fresh for up to 2 months!
What if my filling doesn’t set during baking?
If your Key Lime Pie Bars are not setting as expected, it may be due to overbaking. Keep an eye out for that slight jiggle in the center when baking, which means they’re just right. Also, ensure you’ve included the correct amount of eggs and fresh lime juice for a creamy texture.
Can pets safely eat Key Lime Pie Bars?
No, it’s best to keep these bars away from pets, particularly because of the sugar and heavy cream content, which aren’t suitable for their diets. Additionally, some pets can be sensitive to citrus flavors.
What’s the best way to whip the cream for topping?
To whip the cream effectively, ensure your heavy whipping cream is cold and your mixing bowl is chilled. Start beating at a low speed, gradually increasing, until soft peaks form. A light touch of sugar can enhance the sweetness!
Zesty Key Lime Pie Bars That Will Wow Your Summer Guests
Ingredients
Equipment
Method
- Preheat your oven to 350°F (175°C). Crush the vanilla wafer cookies into fine crumbs using a food processor or a rolling pin.
- In a bowl, combine the crumbs with brown sugar and melted unsalted butter until the mixture resembles wet sand. Press this mixture firmly into the bottom of an 8x8 inch pan.
- Bake for 13-15 minutes until golden, then cool for 30 minutes on a wire rack.
- While the crust cools, whisk together the egg yolks and fresh lime zest in a medium bowl until well combined. Gradually add the sweetened condensed milk and mix thoroughly.
- Pour in the fresh lime juice, whisking until the filling is light green and fully blended.
- Once the crust is cooled, pour the filling over it and spread it evenly. Bake for 15-17 minutes.
- Remove from the oven and cool on a wire rack for another 30 minutes.
- Once cooled, cover and refrigerate for at least 3 hours. Whip the heavy cream until soft peaks form.
- Spread the whipped cream over the set Key Lime Pie Bars, slice into squares and serve cold.
Leave a Reply