
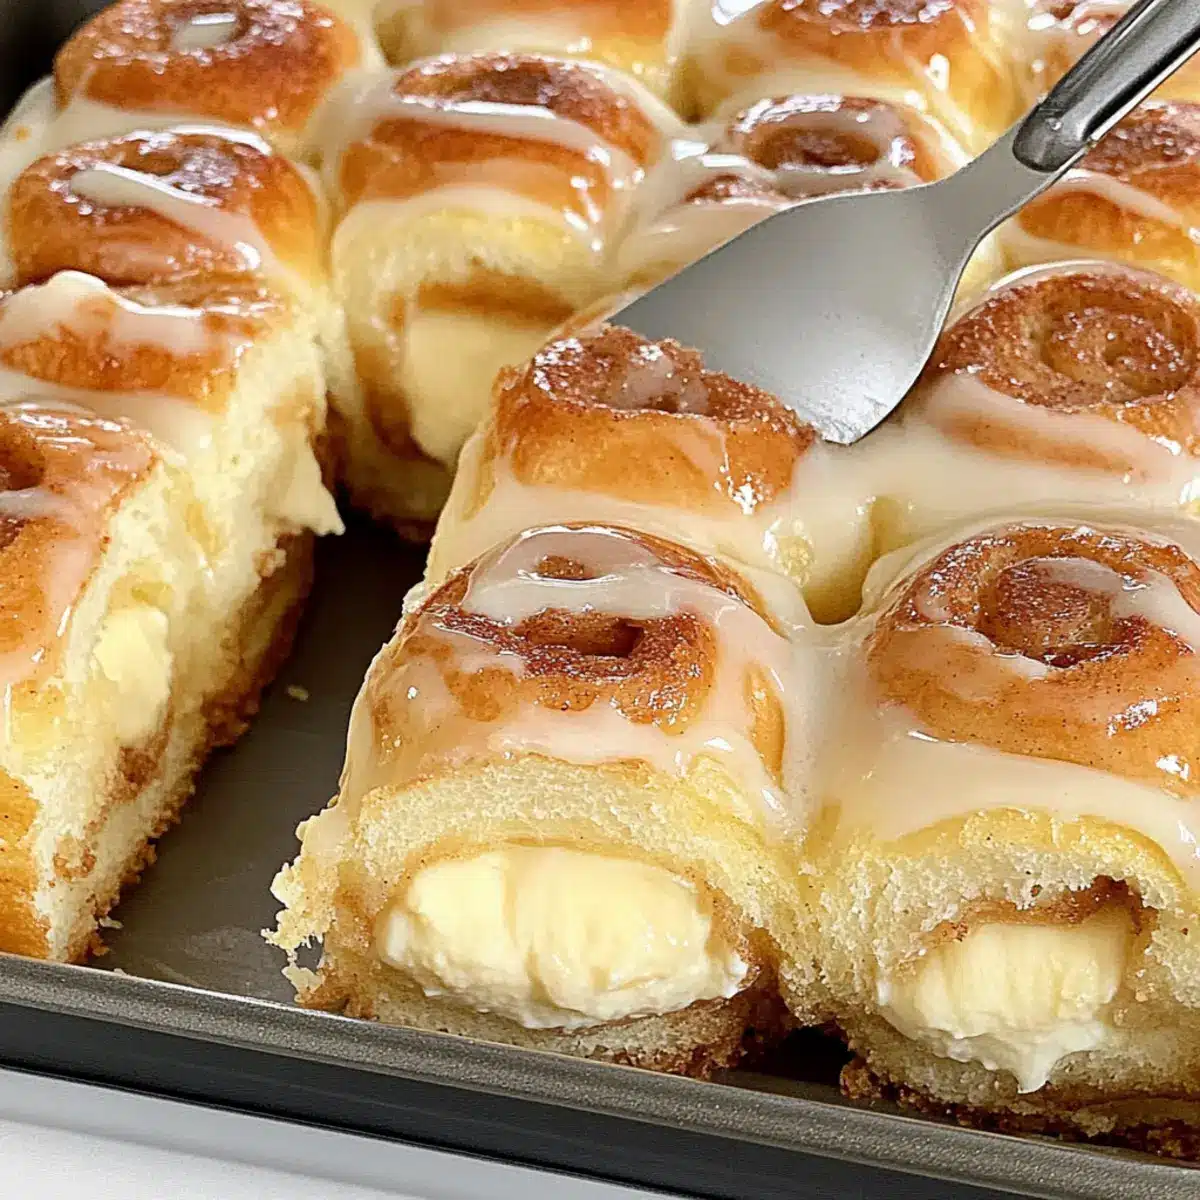
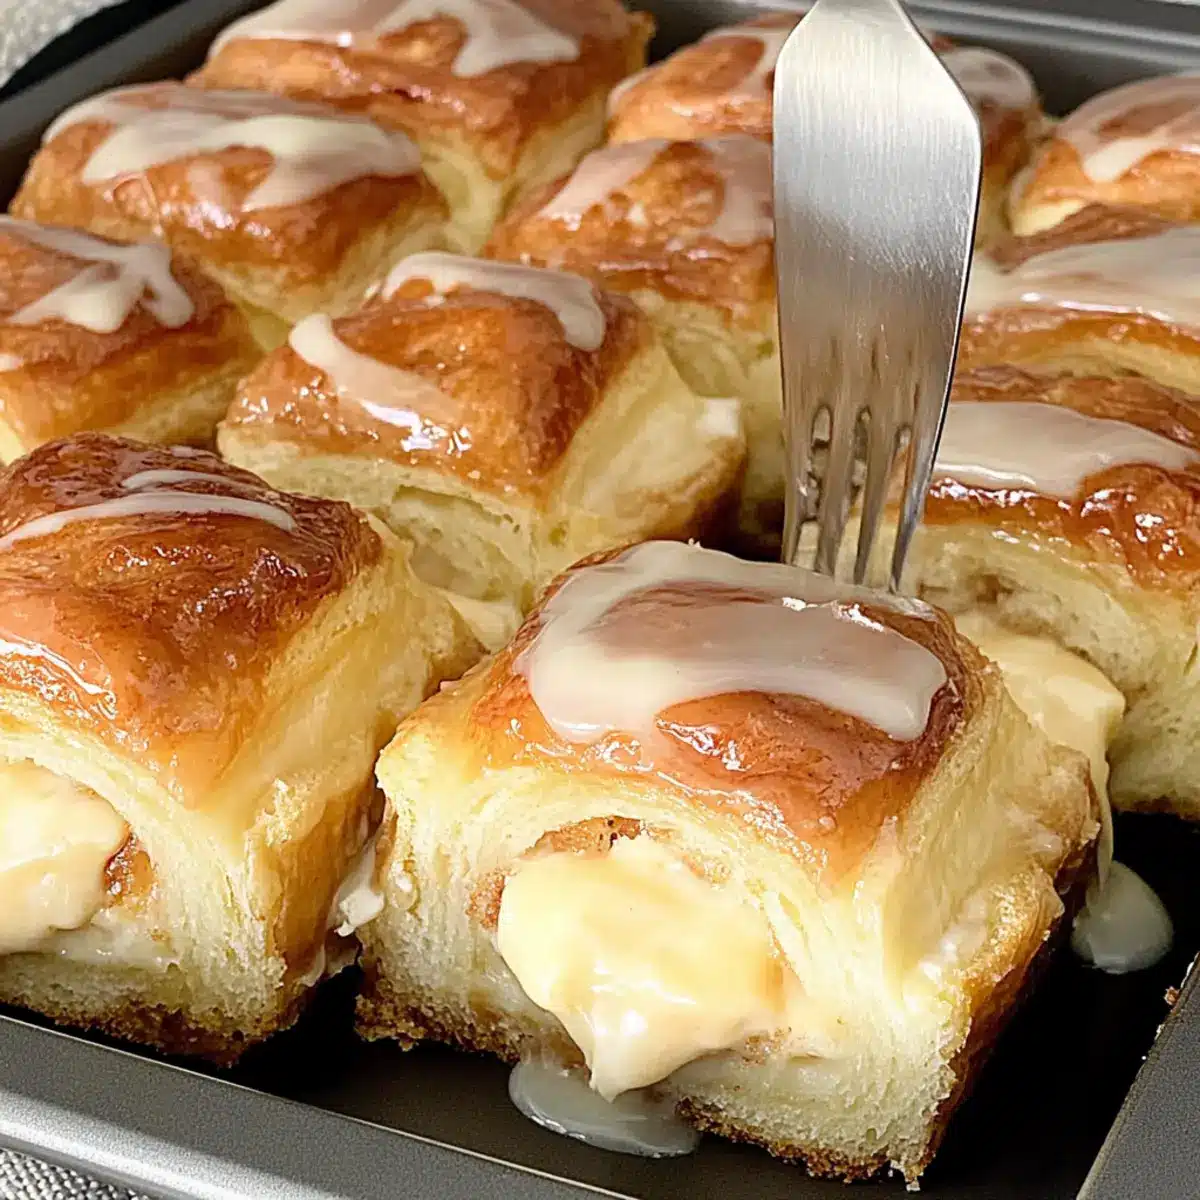
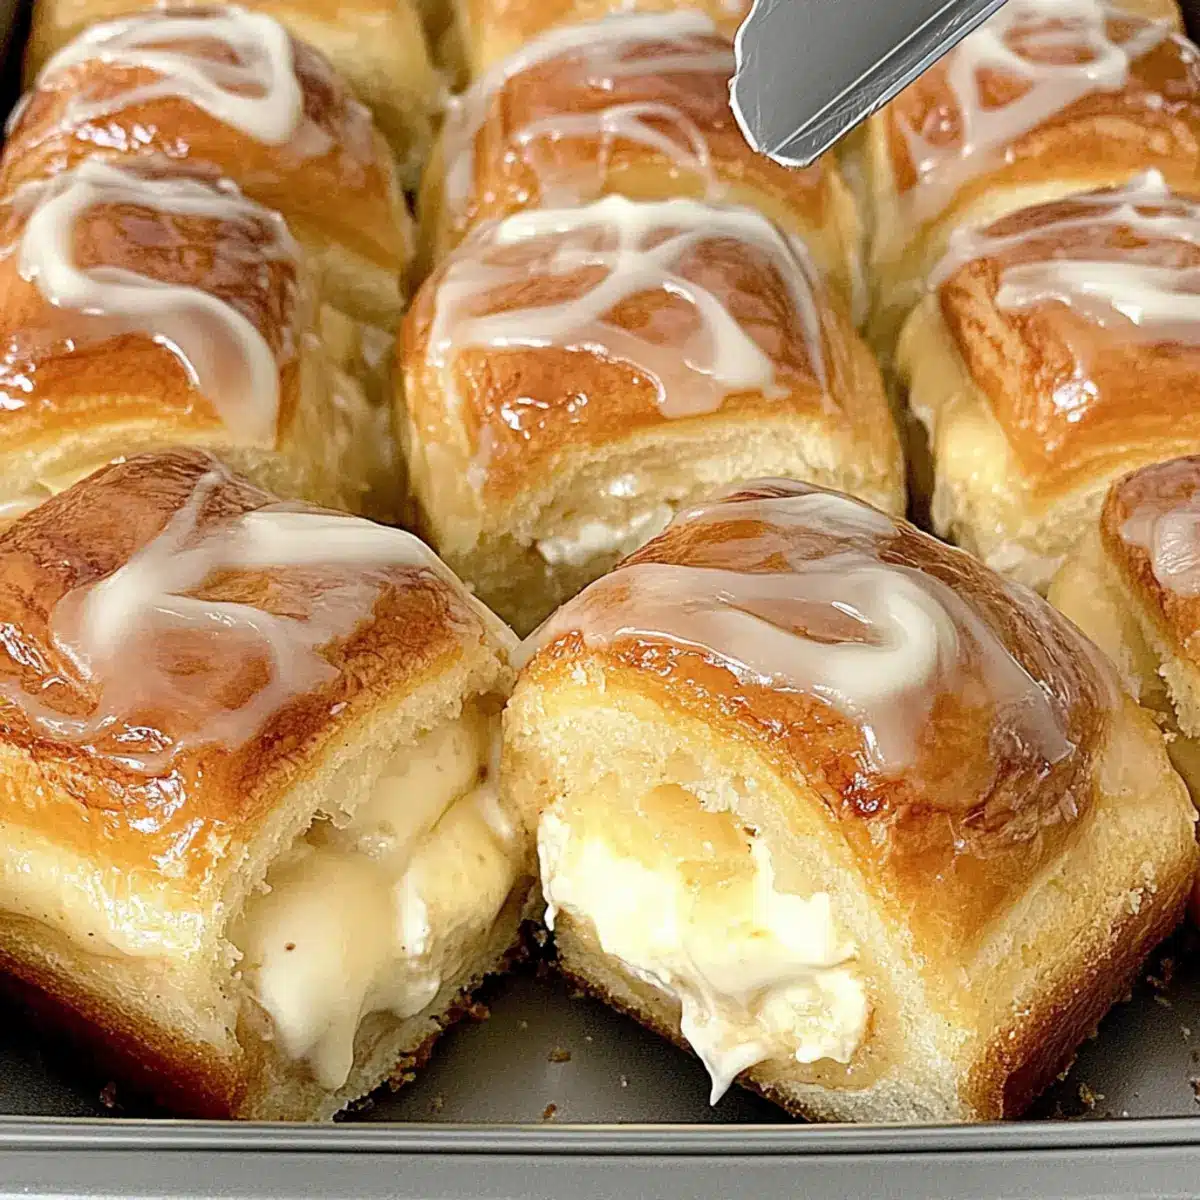
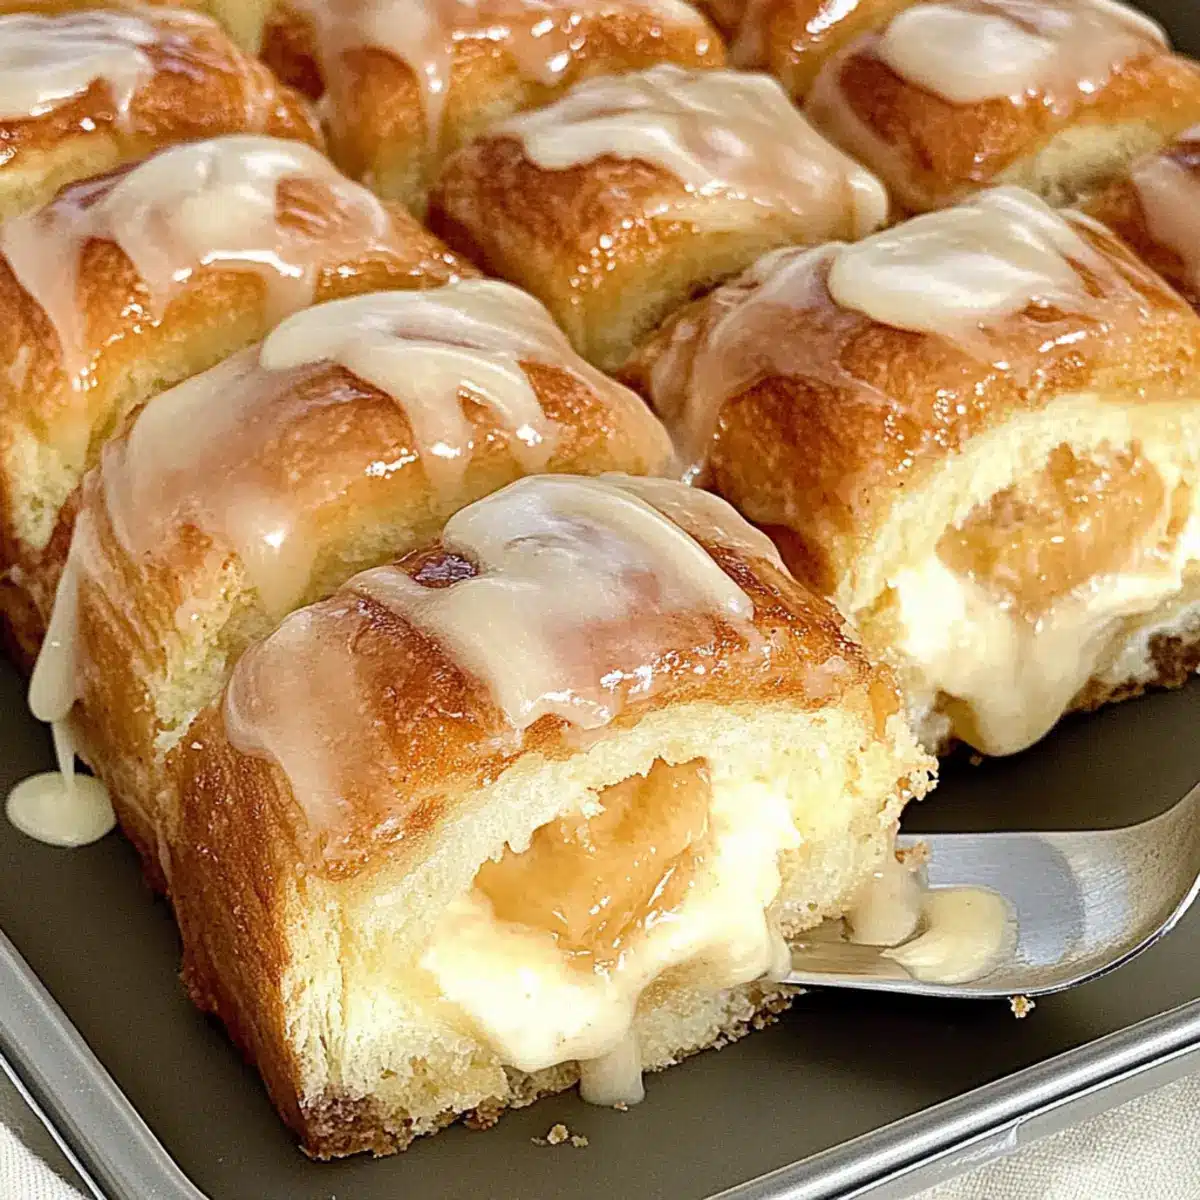
As I strolled through my local bakery the other day, the sweet scent of freshly baked pastries momentarily transported me to a dream world of comfort and joy. Inspired by the childhood favorites we all love, I couldn’t resist recreating that magic at home with my King’s Hawaiian Cheesecake Danish. This easy-to-make breakfast treat combines the soft sweetness of Hawaiian rolls with a creamy no-bake cheesecake filling, finished off with a luscious brown sugar cinnamon glaze. Not only is this recipe a breeze to whip together, but it also adds that bakery-style flair to your brunch table without the fuss. Perfect for lazy weekends or special occasions, these danishes are sure to impress your family and friends. Ready to indulge in a slice of homemade happiness? Let’s get baking!
Why is This Danish So Irresistible?
Ease of Preparation: This Hawaiian Cheesecake Danish is a breeze to make, with minimal steps and no baking required for the filling. Perfect for busy mornings!
Deliciously Indulgent: The combination of fluffy Hawaiian rolls with a creamy cheesecake filling and a sweet glaze creates a heavenly flavor explosion that will have everyone coming back for seconds.
Versatile Dessert: Feel free to customize the filling! Try using fruit preserves or even flavored cream cheese for a fun twist.
Crowd-Pleaser: These danishes are ideal for brunch gatherings or family breakfasts, delighting both kids and adults alike—imagine everyone’s smiles around the table!
Store and Enjoy: Made ahead? You can easily store leftovers for quick, satisfying breakfasts throughout the week. Check out my Japanese Cheesecake Light for another no-bake dessert that’s sure to please!
Hawaiian Cheesecake Danish Ingredients
For the Danish Base
• Hawaiian Rolls – Serve as the base, bringing sweet, soft goodness; any sweet dinner roll can substitute.
• Butter (½ cup, melted) – Adds richness and flavor; margarine can be used for a dairy-free version.
For the Glaze
• Brown Sugar (2 tablespoons) – Infuses sweetness and a caramelized flavor; coconut sugar is a healthier alternative.
• Cinnamon (½ teaspoon) – Enhances flavor with a warm touch; can be omitted if you prefer.
• Powdered Sugar (1 cup) – Sweetens the glaze beautifully; consider a sugar alternative for a lighter option.
• Milk (2 tablespoons) – Provides the right consistency for the glaze; alternative milk like almond or soy works well.
• Vanilla Extract (½ teaspoon) – Adds depth and richness; almond extract could be an exciting alternative.
For the Filling
• Philadelphia No Bake Cheesecake (½ tub, ~6 oz.) – Delivers a creamy texture that makes this Hawaiian Cheesecake Danish irresistible; dairy-free cream cheese can replace it if needed.
Step‑by‑Step Instructions for Hawaiian Cheesecake Danish
Step 1: Preheat the Oven
Begin by preheating your oven to 375°F (190°C). This temperature is perfect for achieving the desired golden-brown finish on your Hawaiian Cheesecake Danish. While the oven heats up, gather your ingredients and baking dish to stay organized as you create this delicious treat.
Step 2: Prepare the Baking Dish
Next, brush the bottom and sides of a baking dish with melted butter to prevent sticking. Arrange the King’s Hawaiian rolls snugly in the dish, ensuring they touch each other. Carefully cut out the centers of the rolls, creating a well to hold the creamy filling, which will give your danish that delightful look and texture.
Step 3: Make the Glaze Mixture
In a small bowl, mix the remaining melted butter with brown sugar and cinnamon until well combined. This mixture will create a rich, flavorful glaze for your Hawaiian Cheesecake Danish. Gently brush it over the tops and sides of the rolls, allowing the sweet goodness to soak in, bringing extra warmth to your morning.
Step 4: Bake the Rolls
Place the prepared baking dish in the preheated oven and bake for 10 minutes. Keep an eye on the rolls, watching for the sugar to caramelize and the tops to turn golden brown. This step is crucial for achieving that irresistible bakery-style finish, tantalizing anyone who walks by!
Step 5: Cool the Rolls
Once baked, remove the rolls from the oven and allow them to cool for about 10 minutes. This brief cooling period is essential to prevent melting the filling when you add it later. As the rolls cool, savor the wonderful aroma wafting through your kitchen—it’s a taste of paradise!
Step 6: Prepare the Glaze
While the rolls cool, whisk together powdered sugar, milk, and vanilla extract in a separate bowl until the mixture is smooth and glossy. This sweet glaze will beautifully complement the filling and the fluffy Hawaiian rolls. Adjust the consistency by adding more milk if needed, ensuring your glaze is drizzle-ready!
Step 7: Fill the Rolls
Once the rolls have cooled, it’s time to bring your Hawaiian Cheesecake Danish to life! Use a spoon to fill each center with the no-bake cheesecake mixture, ensuring each roll gets its share of the creamy delight. This step is the highlight, as the luscious filling makes every bite irresistible.
Step 8: Drizzle the Glaze
Finally, take your prepared glaze and generously drizzle it over the filled danishes. Make sure to cover each roll to add that perfect finishing touch. The glaze not only enhances the visual appeal but also provides that sweet, caramelized goodness you and your loved ones will savor every time!
Make Ahead Options
These King’s Hawaiian Cheesecake Danishes are ideal for meal prep, ensuring your mornings run smoothly. You can prepare the danish base (without filling) up to 24 hours in advance. Simply bake the rolls, allow them to cool completely, and then store them in an airtight container at room temperature to maintain their soft texture. The no-bake cheesecake filling can also be made up to 3 days ahead; just refrigerate it in a sealed container. When ready to serve, fill the cooled rolls with the cheesecake mixture and drizzle them with the glaze just before enjoying. This way, you’ll have a delicious breakfast ready to impress with minimal morning effort!
Expert Tips for Hawaiian Cheesecake Danish
Cool Time Matters: Allow the rolls to cool completely before filling with cheesecake to prevent melting that creamy goodness.
Watch the Bake: Keep an eye on the danishes while baking; a few extra minutes can enhance caramelization, but avoid burning!
Customize Your Filling: Don’t hesitate to switch up the cheesecake filling—fruit preserves or flavored cream cheese make delicious variations for your Hawaiian Cheesecake Danish.
Store Smartly: Always store leftovers in an airtight container and reheat them in the microwave for optimal taste.
Perfect Glaze Consistency: If your glaze is too thick, add a splash of milk to achieve that dreamy drizzle that enhances the flavor.
What to Serve with Hawaiian Cheesecake Danish
These delightful danishes make for a perfect breakfast centerpiece, inviting your loved ones to indulge in a cozy and satisfying meal.
-
Fresh Berries: The bright acidity of strawberries, blueberries, or raspberries brightens up the rich danish, adding a refreshing burst of flavor.
-
Greek Yogurt Parfait: The creaminess of Greek yogurt layered with granola and fruits provides a contrast in texture, balancing the sweetness of the danish perfectly.
-
Scrambled Eggs: Fluffy scrambled eggs lend a savory element to your breakfast spread, creating a delightful balance to the sweet, indulgent danish.
-
Crispy Bacon: The crunchy, salty goodness of crispy bacon pairs brilliantly, adding an irresistible savory contrast that everyone desires.
-
Cinnamon Coffee: Sip on a warm cup of cinnamon-infused coffee, complementing the danish’s flavor profile and boosting your mood for the day.
-
Honey Glazed Ham: Serve thin slices of honey glazed ham for a touch of elegance; its mildly sweet and savory notes pair wonderfully with the danish.
-
Chai Tea Latte: Enjoy a creamy chai tea latte beside your danish for a warm, spiced beverage that enhances the flavors of your breakfast table.
-
Fruit Smoothie: A vibrant fruit smoothie brings a refreshing element, blending up seasonal fruits to brighten your morning and add nutritional value.
-
Caramel Drizzle: Drizzle extra caramel sauce over the danish for those who crave an extra touch of sweetness; it’s the ultimate indulgence!
-
Milk or Almond Milk: A glass of cold milk or almond milk serves as a classic pairing, keeping your breakfast deliciously comforting and nostalgic.
Storage Tips for Hawaiian Cheesecake Danish
Fridge: Store your Hawaiian Cheesecake Danishes in an airtight container for up to 3 days to maintain their freshness and flavor.
Freezer: For longer storage, freeze the danishes for up to 1 month. Wrap each one tightly in plastic wrap and place them in a freezer-safe bag.
Reheating: To enjoy, simply defrost overnight in the fridge and reheat in the microwave for about 15-30 seconds for optimal taste.
Avoid Staleness: Keep leftover danishes away from direct light or strong odors to prevent any staleness while stored in the fridge or freezer.
Hawaiian Cheesecake Danish Variations
Feel free to put your own spin on this delightful recipe and create your perfect version!
-
Fruit Filling: Swap the cheesecake filling for your favorite fruit preserves, like raspberry or apricot. A delightful burst of flavor adds a refreshing touch!
-
Nutty Crunch: Add a sprinkle of crushed nuts on top of the cheesecake filling before drizzling the glaze. Walnuts or pecans complement the sweetness beautifully, adding texture and depth.
-
Dairy-Free Delight: Use a dairy-free cream cheese alternative for a vegan twist. Your danish will still be creamy and delightful, without the dairy!
-
Spiced Up: Mix in a pinch of nutmeg or pumpkin spice into the cheesecake filling for a warm, cozy flavor. This is especially perfect for fall mornings!
-
Chocolate Drizzle: After glazing, melt some chocolate and drizzle it over the danish. Every bite becomes a decadent treat that chocolate lovers won’t resist!
-
Caramel Sauce: Top the danishes with a swirl of caramel sauce instead of glaze for a richer, sweeter experience. Imagine the gooey goodness mixed with the rolls—pure bliss!
-
Coconut Flakes: Incorporate toasted coconut flakes into the filling for a tropical twist. The combination of coconut and Hawaiian rolls is simply heavenly!
Feel inspired? Don’t forget to check out my Cheesecake Decadent Indulgence for another scrumptious dessert idea that’s perfect for any sweet tooth!
Hawaiian Cheesecake Danish Recipe FAQs
How do I choose the best Hawaiian rolls?
Absolutely! When selecting Hawaiian rolls, look for those that are soft, fluffy, and free from dark spots or hard edges. Freshly baked rolls will always give the best texture for your danish. If you can, check the expiration date to ensure maximum freshness; the closer to the date, the fresher they are likely to be.
How should I store leftover danishes?
Very! Store your Hawaiian Cheesecake Danishes in an airtight container in the refrigerator for up to 3 days. To reheat, pop them in the microwave for about 15-30 seconds to enjoy that warm, gooey goodness again.
Can I freeze these danishes?
Absolutely! You can freeze the danishes for up to 1 month. Here’s how: wrap each danish tightly in plastic wrap to avoid freezer burn, then place them in a freezer-safe bag. When you’re ready to indulge, defrost them overnight in the fridge and reheat in the microwave for a delightful treat!
What if my glaze is too thick?
Not a problem! If your glaze is too thick, simply add a splash of milk to the mixture. Whisk until you reach the desired drizzling consistency. Remember, the glaze should easily coat the danishes, enhancing their sweetness without overpowering the flavors.
Are there any dietary considerations for this recipe?
Yes! For those with dietary restrictions, you can make this Hawaiian Cheesecake Danish dairy-free by using margarine instead of butter and opting for dairy-free cream cheese. If you’re concerned about allergies, always double-check all product labels to ensure they meet your requirements.
Can I customize the filling?
Absolutely! If you’re looking for variations, consider using fruit preserves or flavored cream cheese instead of no-bake cheesecake. For a nutty crunch, sprinkle crushed nuts over the filling before drizzling the glaze. The more the merrier when it comes to personalizing your danish!
Hawaiian Cheesecake Danish: A Sweet & Easy Breakfast Treat
Ingredients
Equipment
Method
- Preheat your oven to 375°F (190°C).
- Brush the bottom and sides of a baking dish with melted butter and arrange the Hawaiian rolls in the dish, cutting out the centers to create wells.
- Mix melted butter with brown sugar and cinnamon, then brush over the tops and sides of the rolls.
- Bake the rolls in the preheated oven for 10 minutes.
- Cool the rolls for about 10 minutes once baked.
- Whisk together powdered sugar, milk, and vanilla extract until smooth.
- Fill each roll with the no-bake cheesecake mixture.
- Drizzle the prepared glaze over the filled danishes.
Leave a Reply