
As I prepared to whip up these Bakery-Style Molten Chocolate Lava Muffins, the aroma of rich cocoa enveloped my kitchen, instantly transporting me to the cozy corners of a quaint Parisian bakery. This recipe offers a delightful twist, featuring that irresistible gooey center that chocolate lovers crave. These muffins are not only a showstopper, but they also come together effortlessly, making them perfect for both novice bakers and seasoned pros. Whether you’re craving a decadent dessert or a warm snack to brighten your day, these molten chocolate muffins are sure to please everyone at your table. Curious about how to capture that perfect molten middle? Let’s dive into this delicious recipe!
Why are Molten Chocolate Muffins so special?
Decadent Indulgence: These molten chocolate muffins offer a luxurious experience with each bite, thanks to their rich gooey center that flows like a chocolate lava cake.
Simple to Make: With easy-to-follow steps, even beginner bakers can master this recipe quickly, making it accessible for everyone.
Versatile Options: You can customize these muffins by using different kinds of chocolate chips or even a sourdough starter for a deliciously unique twist.
Perfect for Any Occasion: Whether served warm after dinner or enjoyed as an afternoon snack, these muffins are a guaranteed crowd-pleaser, pleasing both family and friends alike.
Make-Ahead Convenience: You can bake them in advance and reheat, ensuring the gooey goodness is just as delightful when served later. Enjoy them with a scoop of ice cream or alongside a cup of coffee for the ultimate treat.
Molten Chocolate Muffin Ingredients
For the Muffins
• Brown Sugar – Provides sweetness and moisture; opt for light brown sugar for the best results.
• Large Eggs – Essential for structure and moisture; flax eggs can work for a vegan version.
• Whole Milk – Adds richness; substitute with almond or oat milk for a dairy-free choice.
• Vegetable Oil – Ensures moisture and tenderness; melted coconut oil makes a great alternative.
• Vanilla Extract – Enhances the flavor profile; use pure vanilla extract for the best taste.
• Apple Cider Vinegar – Reacts with baking soda for rise; it’s crucial for proper texture, so don’t skip it!
• All-Purpose Flour – Forms the base structure of your muffins; feel free to substitute with a gluten-free blend.
• Dutch-Processed Cocoa Powder – Infuses deep chocolate flavor; avoid natural cocoa as it won’t yield the same results.
• Baking Powder and Baking Soda – Leavening agents that create fluffiness; make sure they’re fresh.
• Instant Espresso Powder (optional) – Intensifies the chocolate flavor; skip it if you don’t have it on hand.
• Salt – Balances sweetness and elevates the overall flavor.
• Chocolate Chips – Adds richness and texture; use semi-sweet or dark chocolate chips to suit your preference.
• Coarse Sugar (optional) – For topping; it adds a delightful texture and crunch.
For the Filling
• Granulated Sugar – Sweetness for the molten center.
• Heavy Cream – Adds creaminess; coconut cream can be used for a dairy-free filling.
• Unsweetened Cocoa Powder – Provides chocolate flavor in the filling.
• Butter – Contributes richness; substitute with margarine for a dairy-free option.
• Salt – Enhances the overall flavor.
These molten chocolate muffins are sure to become a cherished favorite in your kitchen!
Step‑by‑Step Instructions for Molten Chocolate Muffins
Step 1: Preheat and Prepare
Begin by preheating your oven to 350°F (175°C). Line a 12-cup muffin pan with paper liners, then lightly spray them with nonstick spray. This step ensures that your molten chocolate muffins release easily after baking, and helps achieve that perfect bakery-style dome.
Step 2: Whisk Wet Ingredients
In a large mixing bowl, combine the brown sugar, large eggs, milk, vegetable oil, vanilla extract, and apple cider vinegar. Whisk these ingredients together until the mixture is smooth and well combined, taking about 2–3 minutes. This wet base will provide the moist, rich texture essential for your muffins.
Step 3: Combine Dry Ingredients
Sift together the all-purpose flour, Dutch-processed cocoa powder, baking powder, baking soda, espresso powder, and salt into the bowl of wet ingredients. Mix gently until just combined; it’s okay if there are a few lumps. Overmixing can lead to tough muffins, so handle the batter lightly for that tender crumb we’re after in our molten chocolate muffins.
Step 4: Add Chocolate Chips
Fold in the chocolate chips, carefully mixing them through the batter. This will add delightful bursts of chocolate in every bite. Once incorporated, use a spatula to fill each muffin cup nearly to the top, leaving just a bit of space for rising. If you’d like, sprinkle coarse sugar over the tops for an added crunch.
Step 5: Bake Muffins
Place the muffin pan in the preheated oven and bake for 20-25 minutes. Check for doneness by inserting a toothpick; it should come out with a few moist crumbs, not completely clean. Keep an eye on them, as we want that perfect gooey center characteristic of molten chocolate muffins.
Step 6: Prepare the Filling
While the muffins bake, prepare the luscious filling. In a saucepan, combine granulated sugar, heavy cream, unsweetened cocoa powder, butter, and a pinch of salt. Heat over medium-low, stirring continuously until smooth and glossy, which should take about 3-5 minutes. Set aside while the muffins cool slightly.
Step 7: Create the Tunnel
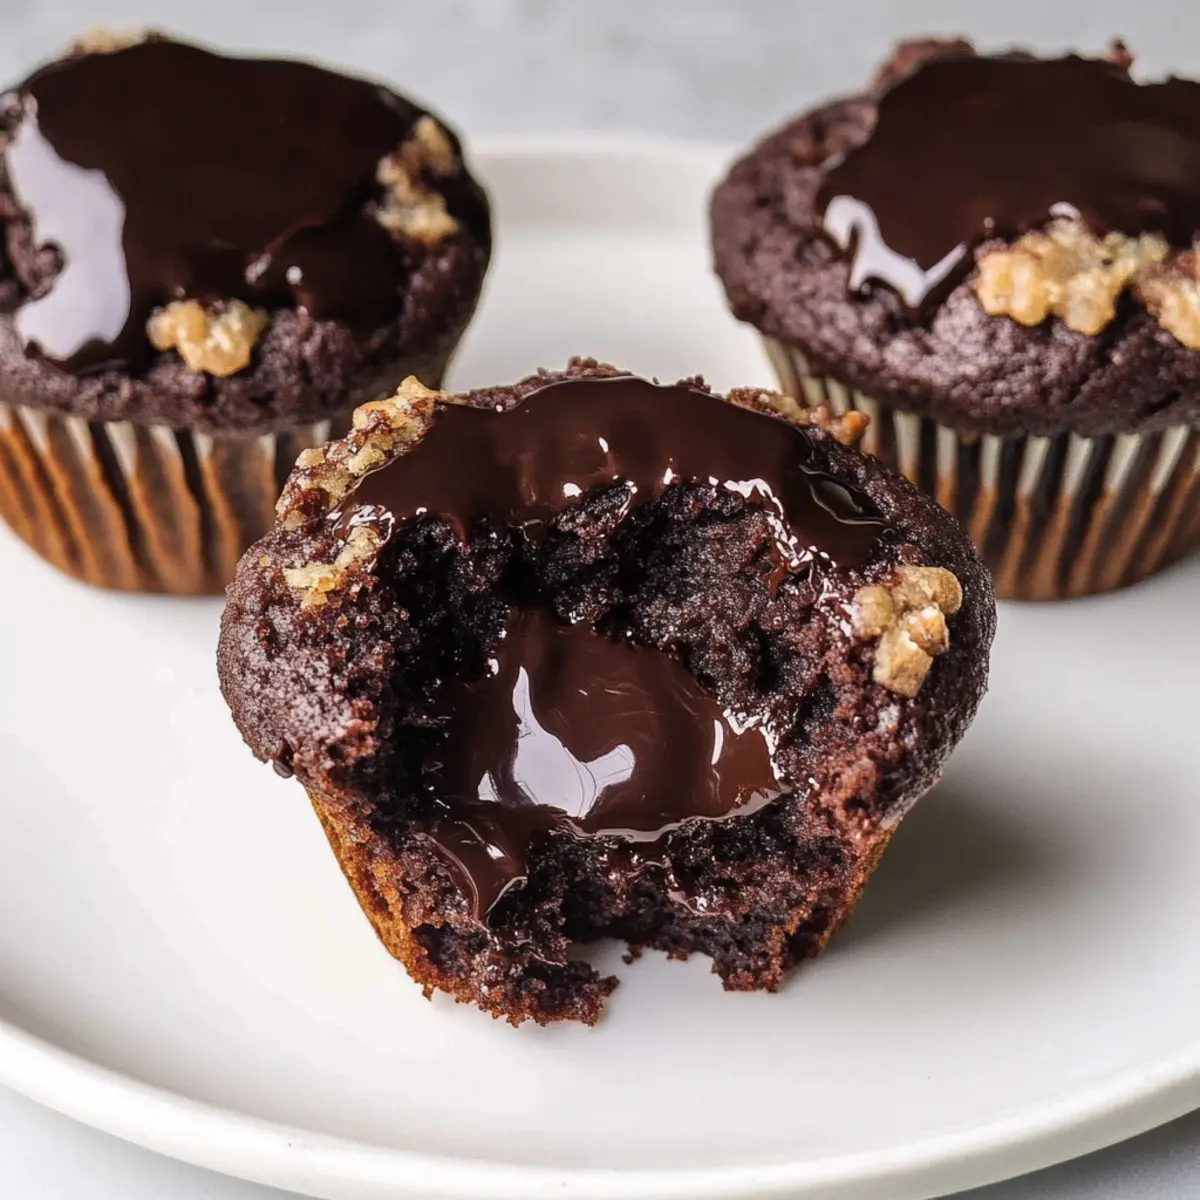
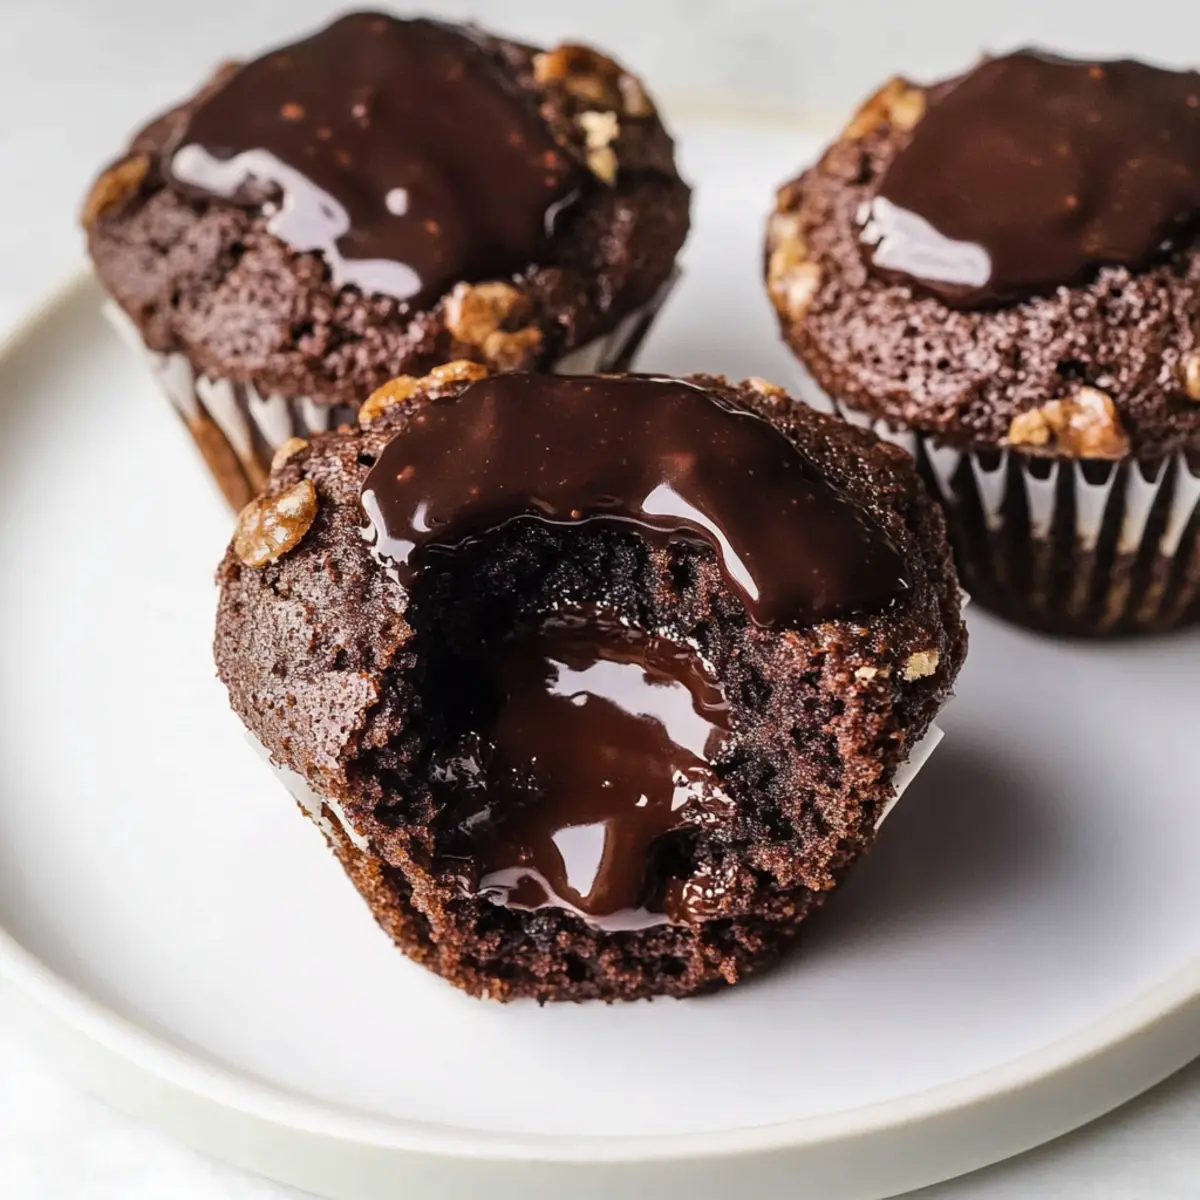
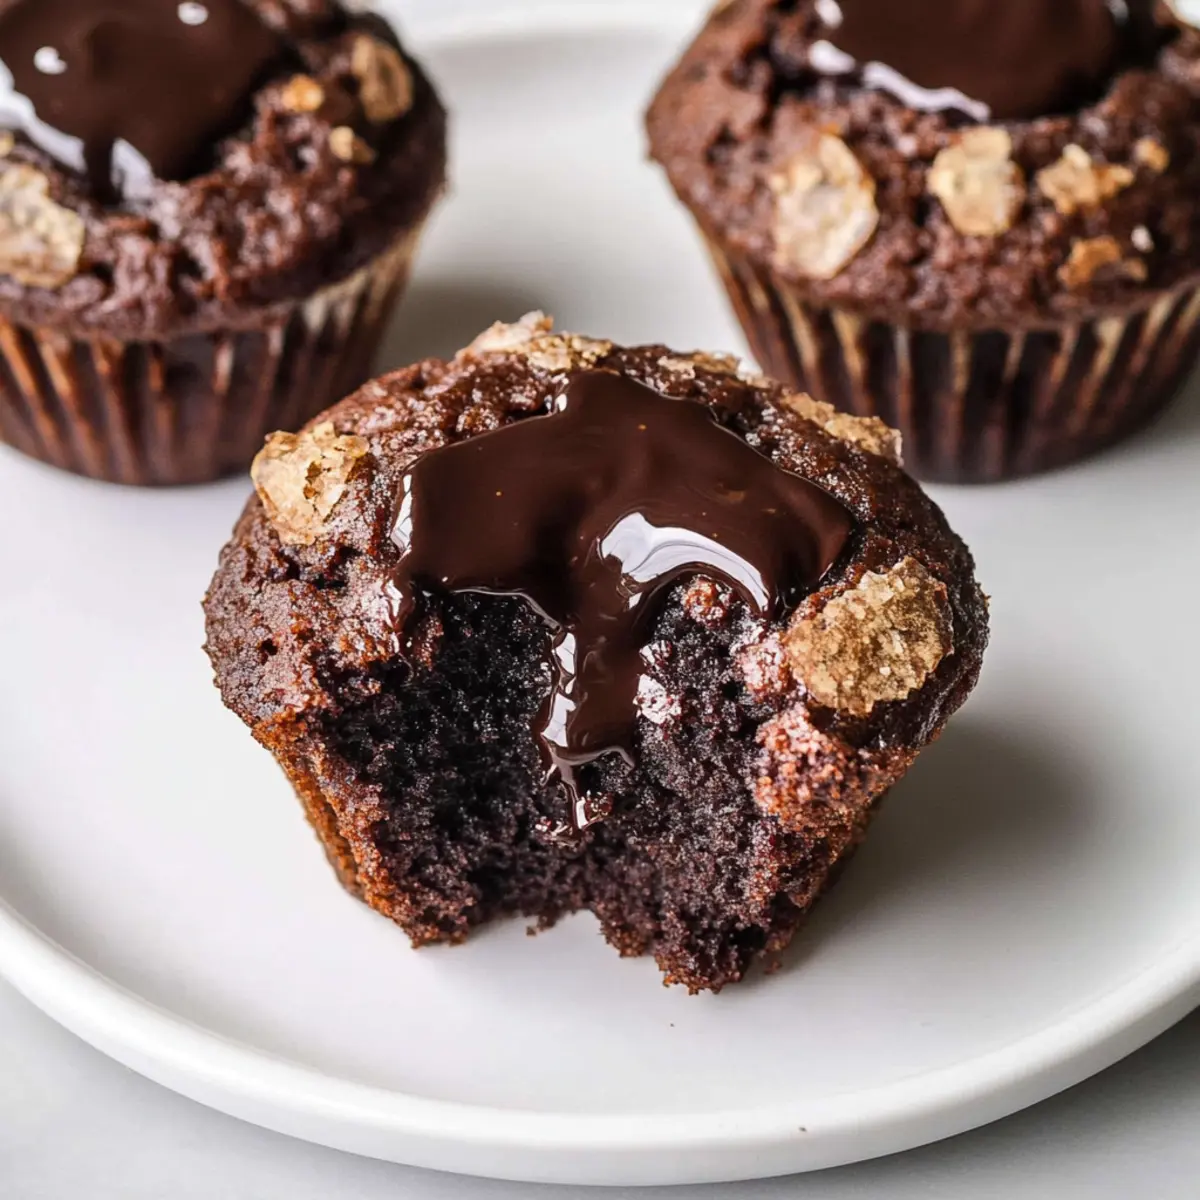
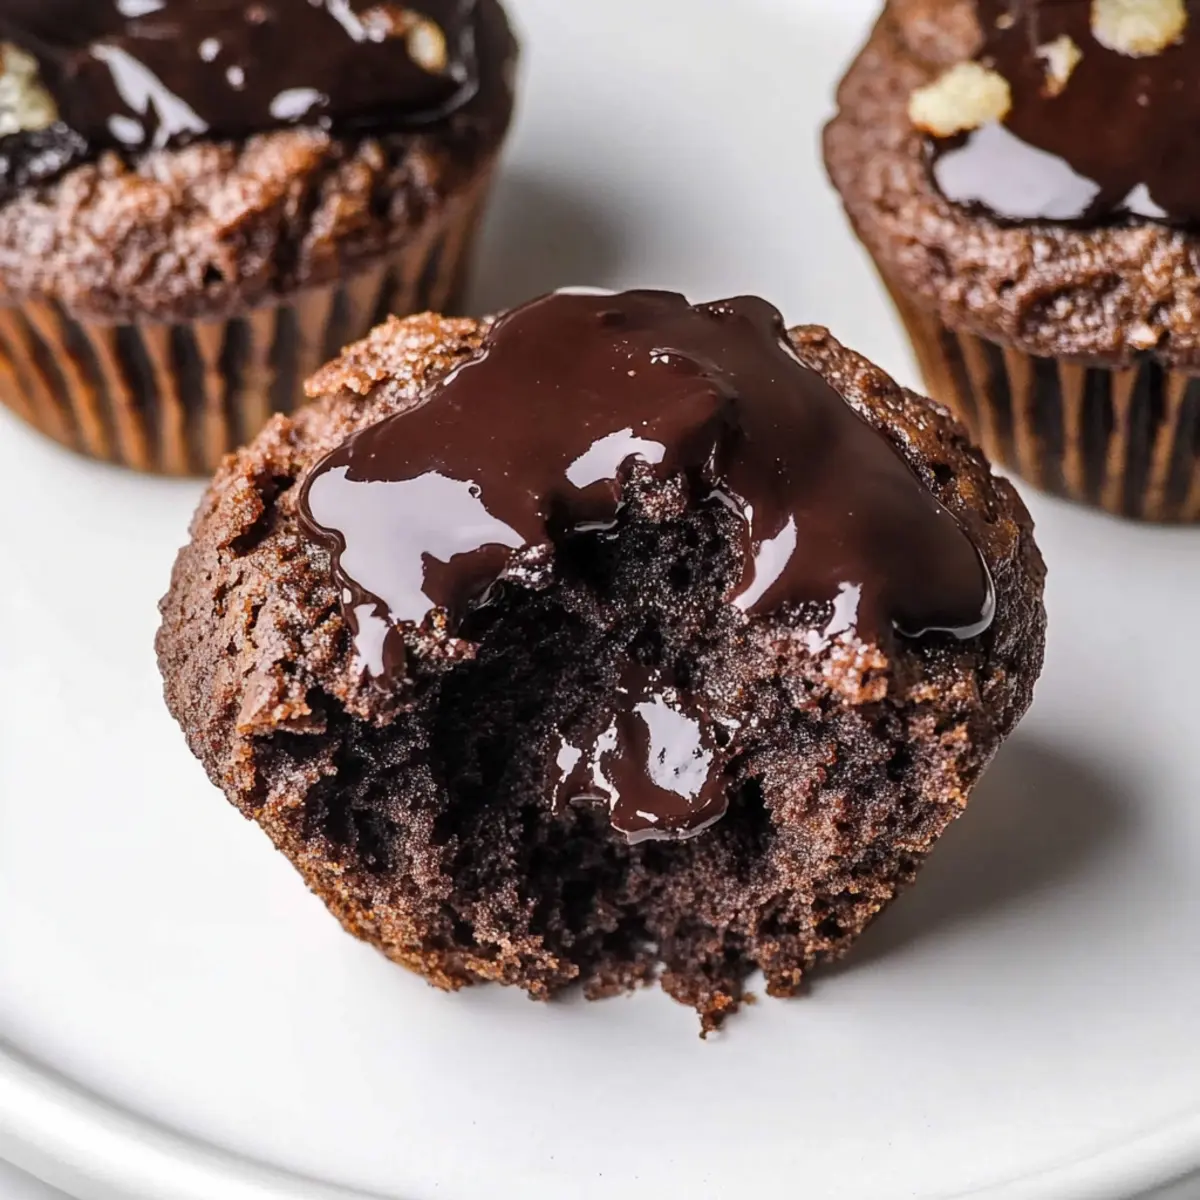
Once the muffins have cooled for about 5 minutes, take a paring knife and gently cut a tunnel into the center of each muffin. This step is crucial for holding our heavenly filling. Be careful not to cut all the way through to the bottom so that the rich chocolate center stays contained.
Step 8: Fill and Serve
Using a spoon or piping bag, fill each tunnel with the prepared chocolate filling until it begins to ooze slightly from the top. For the best experience, serve your molten chocolate muffins warm, allowing the gooey centers to shine. Enjoy this decadent treat straight from the oven for ultimate delight!
Expert Tips for Molten Chocolate Muffins
-
Use Quality Cocoa: Choose high-quality Dutch-processed cocoa powder for a deeper chocolate flavor that pairs perfectly with your molten chocolate muffins.
-
Don’t Overmix: Gently fold the batter to keep it tender. Overmixing can lead to dense muffins, and you want that soft, gooey texture.
-
Check Muffin Doneness Carefully: Aim for a toothpick that comes out with moist crumbs—fully clean indicates they might be overbaked, compromising that gooey center.
-
Fill Muffins Warm: For the best melting effect, add the filling while muffins are still warm; it ensures the luscious center oozes beautifully when bitten into.
-
Vegan Variations: Substitute the eggs with flax eggs and use dairy-free cream to make these molten chocolate muffins suitable for vegan diets.
-
Storage Tips: Keep muffins in an airtight container, but reheat in the microwave for a few seconds before serving to restore that gooey goodness!
Make Ahead Options
These Molten Chocolate Muffins are perfect for busy home cooks looking to save time! You can prepare the muffin batter up to 24 hours in advance by mixing the wet and dry ingredients separately and storing each in the refrigerator. When you’re ready to bake, simply combine the mixtures and fill your muffin cups. Alternatively, you can bake the muffins and refrigerate them for up to 3 days. To maintain their gooey centers, be sure to store them in an airtight container. When it’s time to enjoy, just reheat the muffins in the microwave for 15-20 seconds for that freshly baked taste and texture. This way, you can indulge in these delightful treats anytime with minimal effort!
How to Store and Freeze Molten Chocolate Muffins
Room Temperature: Store muffins in an airtight container at room temperature for up to 3 days. This keeps them fresh and ready for indulgence.
Fridge: For longer storage, place them in the refrigerator for up to 1 week, ensuring they are sealed tightly to prevent drying out.
Freezer: These muffins freeze beautifully! Wrap each muffin individually in plastic wrap and place them in a freezer-safe bag for up to 3 months.
Reheating: To enjoy that gooey center again, microwave the muffins for 15-20 seconds after thawing, bringing back the delightful molten experience.
Molten Chocolate Muffins Variations
Elevate your baking experience by exploring these delectable twists, adding exciting flavors and textures to your molten chocolate muffins!
-
Sourdough Twist: Use a chocolate sourdough starter for a slightly tangy flavor that contrasts beautifully with the sweet chocolate.
-
Nutty Crunch: Fold in chopped walnuts or pecans for a delightful crunch that complements the gooey center perfectly.
-
Spicy Kick: Add a pinch of cayenne pepper or chili powder to the batter to create a surprisingly pleasing heat that contrasts with the rich chocolate.
-
Dairy-Free Delight: Substitute almond or oat milk for the whole milk, and use coconut cream in the filling for a creamy, dairy-free experience.
-
Fruit Infusion: Incorporate mashed bananas or applesauce into the batter for added moisture and a hint of fruity sweetness.
-
Flavorful Extracts: Try adding almond or orange extract instead of vanilla for a unique flavor profile that enhances the chocolate.
-
Different Chocolate Chips: Experiment with white chocolate or peanut butter chips for a tasty surprise in each bite.
-
Tropical Escape: Add shredded coconut to the batter for a hint of the tropics, creating a delightful contrast with the molten chocolate filling.
Feel free to mix and match these ideas, and make this recipe your own! For more delicious chocolate treats, why not try some Chocolate Chip Cookies or bake a batch of Butter Toffee Chocolate Chip Cookies? Enjoy your baking adventure!
What to Serve with Molten Chocolate Muffins
The ultimate chocolate indulgence deserves some delightful companions to create a memorable meal experience.
-
Vanilla Ice Cream: The creamy, cold texture beautifully contrasts the warm, gooey muffins, creating a heavenly dessert combination. Top your muffins with a scoop and let the gooey chocolate mingle with the melting ice cream for a decadent treat.
-
Fresh Berries: Juicy strawberries or tart raspberries add a refreshing burst that cuts through the richness. Their vibrant color on the plate brings an inviting flair, making each bite even more delightful.
-
Whipped Cream: Light and airy, a dollop of freshly whipped cream enhances the muffins’ decadence. Drizzle a little chocolate or caramel sauce over the top to elevate your dessert presentation.
-
Espresso or Coffee: A strong cup of coffee or a shot of espresso pairs perfectly with the deep chocolate flavors. The robust notes complement the sweetness and enhance the overall experience.
-
Caramel Sauce: Drizzling warm caramel sauce over the molten center creates a delightful sweetness. It adds a rich layer of flavor that cradles the chocolate, providing even more indulgence with each bite.
-
Mint Leaves: Bright green mint leaves offer a refreshing palate cleanser. Adding a sprig of mint to your plate introduces a lovely aroma that complements the rich chocolate.
-
Chocolate Fondue: For an extra treat, serve your muffins with a side of chocolate fondue. Guests can dip their muffins into the warm chocolate for an indulgent experience that’s sure to captivate their taste buds.
-
Hot Chocolate: Embark on a chocolate lover’s dream by pairing your muffins with a rich cup of hot chocolate. The combination of flavors creates a cozy atmosphere perfect for sharing with loved ones.
Molten Chocolate Muffins Recipe FAQs
How do I select the right cocoa powder for the muffins?
Using Dutch-processed cocoa powder is essential for achieving that deep chocolate flavor. Avoid natural cocoa as it may not react correctly with the baking soda, resulting in an off texture. Always check the expiration date to ensure freshness for the best results!
What’s the best way to store leftover molten chocolate muffins?
For room temperature storage, place muffins in an airtight container where they’ll stay fresh for up to 3 days. If you prefer to keep them longer, transfer to the refrigerator and seal tightly for up to a week. Just remember that storing in the fridge can affect texture slightly.
Can I freeze these muffins, and if so, how?
Absolutely! To freeze your molten chocolate muffins, individually wrap each one in plastic wrap, ensuring no air pockets inside. Then place them in a freezer-safe bag or container for up to 3 months. When you’re ready to enjoy, just thaw at room temperature and microwave for 15-20 seconds for that gooey center!
What if my muffins don’t rise properly?
If your muffins don’t rise, check the freshness of your baking powder and baking soda, as expired leavening agents are a common culprit. Additionally, ensure you’ve mixed the wet and dry ingredients just enough—overmixing can lead to dense muffins. If you still have issues, consider baking at a slightly lower oven temperature to avoid rapid cooking.
Can I make any substitutions for dietary restrictions?
Certainly! For a vegan version, use flax eggs (1 tablespoon of flaxseed meal mixed with 2.5 tablespoons of water per egg) and substitute heavy cream with coconut cream. For gluten-free variations, a gluten-free flour blend works well. Always read labels, especially for chocolate chips, to ensure they fit your dietary needs.
How do I maintain that gooey center?
Ensuring your muffins are slightly underbaked is crucial for that melty center. The toothpick test is your friend here; it should come out with moist crumbs instead of being completely clean. Also, filling the muffins while they are warm helps the chocolate filling stay liquidy and delicious.
Decadent Molten Chocolate Muffins with Gooey Centers
Ingredients
Equipment
Method
- Preheat your oven to 350°F (175°C). Line a 12-cup muffin pan with paper liners and spray with nonstick spray.
- In a mixing bowl, whisk together brown sugar, eggs, milk, vegetable oil, vanilla extract, and apple cider vinegar until smooth.
- Sift together flour, cocoa powder, baking powder, baking soda, espresso powder, and salt into the wet ingredients and mix gently.
- Fold in chocolate chips and fill each muffin cup nearly to the top. Sprinkle coarse sugar on top if desired.
- Bake for 20-25 minutes or until a toothpick inserted comes out with a few moist crumbs.
- Prepare the filling by combining granulated sugar, heavy cream, cocoa powder, butter, and salt in a saucepan over medium-low heat until smooth.
- Cut a tunnel in the center of each muffin after cooling slightly to hold the filling.
- Fill each tunnel with the chocolate filling until it oozes slightly from the top and serve warm.
Leave a Reply