
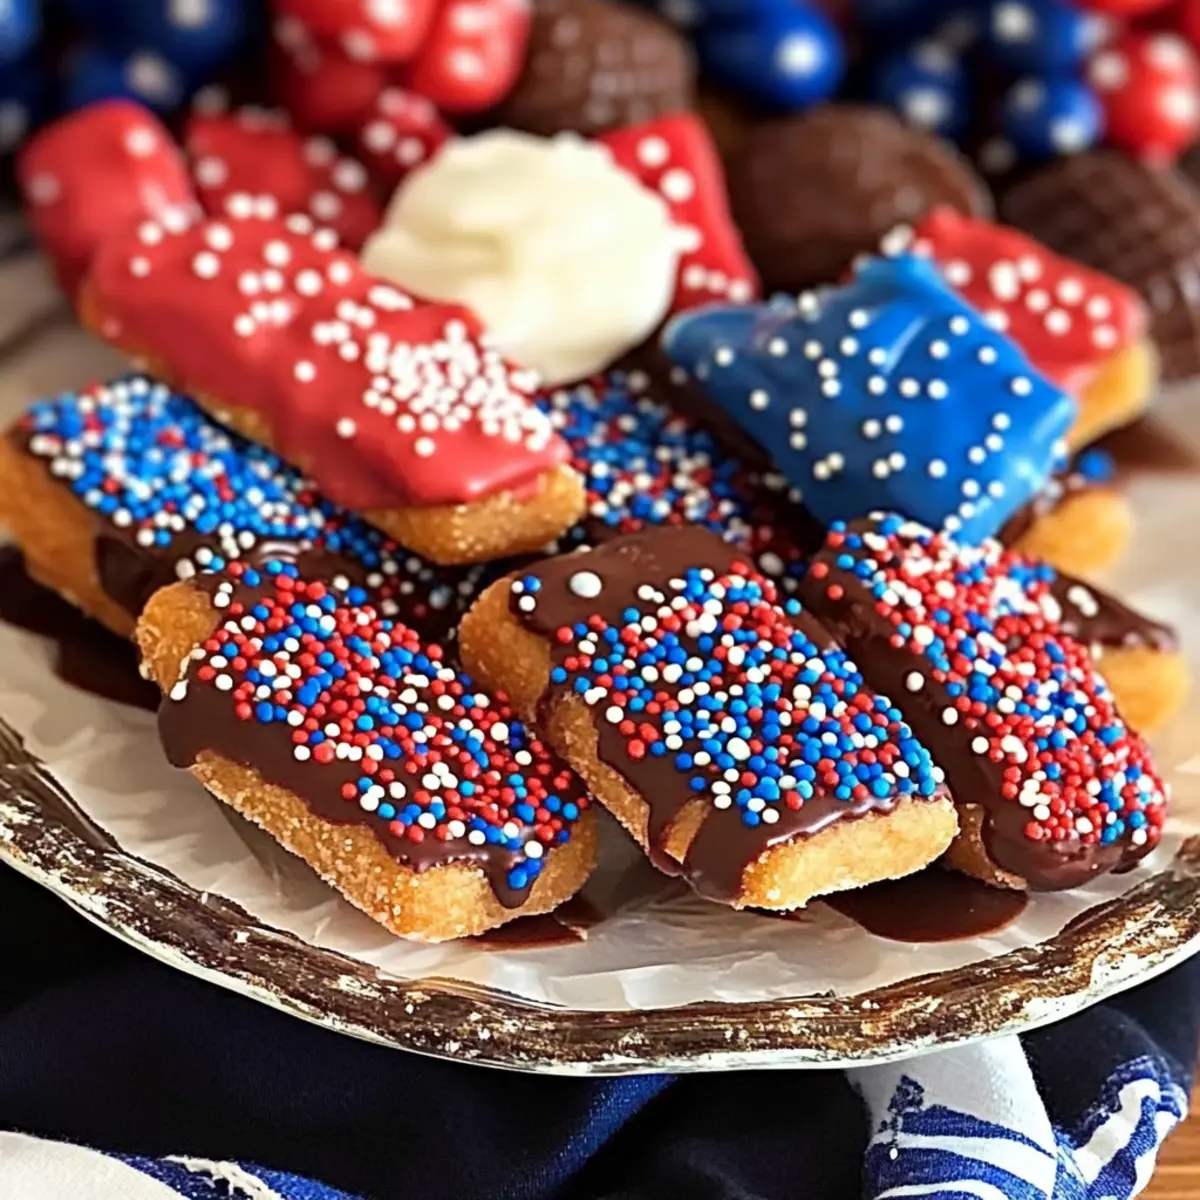
As I stood in my kitchen, the scent of melting chocolate wafted through the air, instantly transporting me to sun-soaked July 4th picnics filled with laughter and fireworks. It’s here that I discovered my new favorite way to celebrate—Red White & Blue Chocolate-Dipped Sugar Wafers! These delightfully crisp treats are not only a breeze to whip up but are guaranteed to bring smiles to kids and adults alike. The perfect festive dessert, they add a splash of color to your gathering while delivering sweet, creamy goodness that’s hard to resist. Imagine how excited your guests will be as they indulge in these patriotic delights. Are you ready to transform your summer celebrations with this simple, yet crowd-pleasing recipe? Let’s dive in!
Why Are These Wafers a Must-Try?
Easy to Make: These Red White & Blue Chocolate-Dipped Sugar Wafers only require a few simple steps, making them perfect for beginner bakers and busy parents alike. Kid-Friendly Fun: Watch the joy on your little ones’ faces as they help dip and decorate these festive treats. Versatile Ideas: Customize them based on your theme—swap colors or toppings to fit any celebration! For some delicious variety, check out my Bacon Brown Sugar or Skinny White Chicken. Perfect for Gatherings: These eye-catching cookies will be the star of your dessert table, captivating guests of all ages. Get ready to impress with a recipe that’s as fun to make as it is to eat.
Red White & Blue Chocolate-Dipped Sugar Wafers Ingredients
For the Cookies
- Sugar Wafers – A delightful base for these treats; you can substitute with other crisp cookies if needed.
For the Chocolate Coating
- White Chocolate – Provides a creamy sweet coat; feel free to switch to dark chocolate for a richer experience.
- Red and Blue Food Coloring – Essential for achieving that festive look; if you prefer, sprinkles can be used instead.
For the Decorations
- Sprinkles (optional) – These add an extra pop of color and fun; choose red, white, and blue varieties to match the festive theme.
These Red White & Blue Chocolate-Dipped Sugar Wafers are a go-to for patriotic celebrations, combining crunch and sweetness that everyone will love!
Step‑by‑Step Instructions for Red White & Blue Chocolate-Dipped Sugar Wafers
Step 1: Melt Chocolate
Start by placing white chocolate chips in a microwave-safe bowl. Microwave on high for 30 seconds and stir. Continue heating in 20-second intervals, stirring frequently, until the chocolate is fully melted and smooth, about 60–90 seconds total. Be careful to avoid burning; the chocolate should be glossy and pourable, ready for dipping your sugar wafers.
Step 2: Color the Chocolate
Once your white chocolate is melted, carefully divide it into two separate bowls. Add a few drops of red food coloring to one bowl and blue to the other, mixing thoroughly until you achieve vibrant colors. These colorful chocolates will create the festive appeal of your Red White & Blue Chocolate-Dipped Sugar Wafers, so make sure the hues are bright and evenly distributed.
Step 3: Dip Wafer Cookies
With the chocolate colored, it’s time to dip! Take a sugar wafer, holding it by one end, and dip the other half into the colored chocolate. Gently swirl it around to coat, then lift it out, allowing the excess chocolate to drip back into the bowl. Repeat this process with all wafers, placing them on a sheet of parchment paper afterward for easy cooling.
Step 4: Sprinkle Decoration
Before the chocolate sets, sprinkle your festive toppings generously over the dipped area of each cookie. Use red, white, and blue sprinkles to enhance the celebration theme of your Red White & Blue Chocolate-Dipped Sugar Wafers. Work quickly to ensure the sprinkles adhere well to the melted chocolate for a vibrant, eye-catching finish.
Step 5: Cool
Now it’s time to let your creations set! Place the baking sheet with the decorated wafers in the refrigerator for about 15-20 minutes, or until the chocolate coating is completely firm. Ensure they are thoroughly hardened to create that delightful crisp texture that complements the sugar wafer base perfectly. Enjoy the anticipation as you wait!
Storage Tips for Red White & Blue Chocolate-Dipped Sugar Wafers
- Room Temperature: Keep the wafers in an airtight container at room temperature for up to 1 week to maintain their delightful crunch and freshness.
- Fridge: If your kitchen is particularly warm, you can store them in the fridge; just remember to let them come to room temperature before serving for the best texture.
- Freezer: For longer storage, freeze the undecorated sugar wafers in a single layer on a baking sheet, then transfer to a freezer bag for up to 2 months.
- Reheating: If you’ve frozen them, allow them to thaw in the fridge overnight before decorating. Enjoy these Red White & Blue Chocolate-Dipped Sugar Wafers at their best!
Expert Tips for Red White & Blue Chocolate-Dipped Sugar Wafers
- Melt Carefully: Avoid burning the chocolate by stirring frequently; heat in short intervals and watch for a smooth, glossy texture.
- Color Vibrancy: Achieve the brightest colors by adding food coloring gradually, mixing thoroughly until you reach your desired shade for the festive look.
- Work Efficiently: Since chocolate sets quickly, have your sprinkles ready before dipping to ensure they stick while the chocolate is still wet.
- Cooling Time: For best results, refrigerate the dipped wafers briefly to ensure the chocolate hardens completely, creating a delightful crunch.
- Customizable Toppings: Get creative with varieties of sprinkles or crushed nuts to add unique flavors and textures to your Red White & Blue Chocolate-Dipped Sugar Wafers.
Make Ahead Options
These Red White & Blue Chocolate-Dipped Sugar Wafers are perfect for busy home cooks looking to save time during festive celebrations! You can prepare the sugar wafers and dip them in colored chocolate up to 24 hours before serving; just allow them to cool completely and store them in an airtight container at room temperature to maintain their crispness. If you’d like to decorate them with sprinkles, do that right before serving to prevent any moisture from making the toppings soggy. When ready to impress your guests, simply arrange these vibrant treats on a platter, and you’ll have a stunning dessert that’s just as delicious as it was the day you made them!
Red White & Blue Chocolate-Dipped Sugar Wafers Variations
Feel free to unleash your creativity and customize these festive treats to suit your taste preferences!
- Dairy-Free: Use dairy-free chocolate for a lactose-free version that’s just as delicious.
- Nutty Crunch: Incorporate crushed almonds or walnuts in place of sprinkles for a delightful crunch. Imagine the harmony of flavors as the nuttiness blends with the sweetness.
- Coconut Delight: Add shredded coconut to the topping for a tropical twist that complements the chocolate beautifully. The texture of toasted coconut adds an exquisite crunch with every bite.
- Spice it Up: Sprinkle a touch of sea salt on top before the chocolate sets for a decadent sweet and savory flavor contrast. This slight saltiness can elevate the deliciousness to a whole new level!
- Flavorful Swaps: Experiment with flavored chocolate, such as raspberry or mint, to create unique flavor profiles that surprise and delight your guests.
- Sprinkle Variety: Go beyond the traditional and use themed sprinkles like stars or stripes to really celebrate the season. They not only look festive but also spark joy in every bite.
- Shortcut with Candy Melts: For an easier option, use red and blue candy melts instead of food coloring, ensuring an ultra-vibrant aesthetic. The convenience of candy melts can make this even more manageable!
- Serving Suggestions: Try pairing your Red White & Blue Chocolate-Dipped Sugar Wafers with a side of creamy whipped dip or fruit salad for a refreshing contrast. These combos can enhance the overall experience, making the flavors pop even more.
These variations not only bring fun twists but invite endless creativity! Don’t forget to check out my Red Potato Salad for a perfect side dish to complement these treats during your festive gatherings!
What to Serve with Red White & Blue Chocolate-Dipped Sugar Wafers
These delightful treats invite creativity and enhance any festive gathering, making it easy to build a complete meal around them.
- Fresh Fruit Salad: Bursting with vibrant colors and sweet flavors, fruit salad adds a refreshing contrast to the sweet wafers, balancing the dessert perfectly.
- Grilled Burgers: Juicy, flavorful burgers create a satisfying main course; their smoky goodness pairs wonderfully with the sweetness of the wafers.
- Potato Salad: Creamy and hearty, potato salad is a classic picnic dish that complements the lightness of the chocolate-dipped wafers while keeping the meal rooted in tradition.
- Sparkling Lemonade: This effervescent drink is both refreshing and celebratory, making it a festive choice to quench the thirst after enjoying your sweet treats.
- Mini Hot Dogs: Easy to prepare and fun to eat, mini hot dogs are a perfect finger food choice alongside these cookies, played up by their festive colors.
- Pasta Salad: A chilled pasta salad filled with colorful veggies adds a crisp texture and refreshing taste, enhancing the overall flavor profile of your gathering.
- Ice Cream Sundaes: Create an indulgent dessert bar where guests can top their favorite ice cream with sprinkles and chocolate drizzle, echoing the festive spirit of the wafers.
- Vegetable Platter: Crisp veggies with a zesty dip provide a crunchy, healthy contrast to the sweet wafers, creating balance within your meal.
- S’mores Bars: For an extra touch of sweetness, serve s’mores bars that mix chocolate, marshmallows, and graham crackers, extending the dessert theme in a fun way.
Red White & Blue Chocolate-Dipped Sugar Wafers Recipe FAQs
What type of sugar wafers should I use?
Absolutely! You can use traditional sugar wafers for this recipe, but feel free to substitute them with similar crisp cookies like vanilla or almond wafers if you can’t find sugar wafers. Just ensure that they are crunchy enough to hold up to the chocolate coating.
How should I store the chocolate-dipped sugar wafers?
Store your Red White & Blue Chocolate-Dipped Sugar Wafers in an airtight container at room temperature for up to 1 week. This will help them stay fresh and maintain their delightful crunch. If you live in a warm climate, you can refrigerate them, but remember to let them sit at room temperature before serving to enjoy the best texture!
Can I freeze these chocolate-dipped wafers?
Yes, you can! I recommend freezing the undecorated sugar wafers. Lay them out in a single layer on a baking sheet and freeze until firm, about 1-2 hours. Then, transfer them to a freezer bag for up to 2 months. When you’re ready to enjoy, simply thaw in the fridge overnight and then dip and decorate as usual!
What if the chocolate isn’t melting properly?
If your chocolate isn’t melting smoothly, try reheating it in shorter intervals, stirring thoroughly after each interval. If the chocolate is too thick, adding a tiny bit of vegetable oil can help achieve a pourable consistency. Just remember to be patient while melting to prevent it from burning!
Are these treats safe for kids with allergies?
Be sure to check the ingredient labels on your chocolate and wafers for potential allergens. Many chocolate brands have nut warnings, so if there are nut allergies in the house, select allergy-friendly chocolate brands. You can also use sprinkles that are specifically labeled as allergen-free to keep your treats safe for all little ones.
Can I customize colors and decorations?
Very! Feel free to switch up the colors of the food coloring or use different sprinkles based on your celebration theme. You can get creative with colored candy melts instead of traditional food coloring for vibrant hues, and toss on nuts, coconut flakes, or any festive toppings you like!

Red White & Blue Chocolate-Dipped Sugar Wafers for Festive Fun
Ingredients
Equipment
Method
- Start by placing white chocolate chips in a microwave-safe bowl. Microwave on high for 30 seconds and stir. Continue heating in 20-second intervals, stirring frequently, until fully melted and smooth, about 60–90 seconds.
- Once melted, divide the chocolate into two bowls. Add red food coloring to one and blue to the other, mixing thoroughly for vibrant colors.
- Dip each sugar wafer by holding one end and swirling the other half into the colored chocolate. Allow excess to drip back into the bowl and place on parchment paper.
- Before the chocolate sets, sprinkle festive toppings over the melted chocolate.
- Let the decorated wafers cool in the refrigerator for 15-20 minutes until the chocolate is firm.
Leave a Reply