
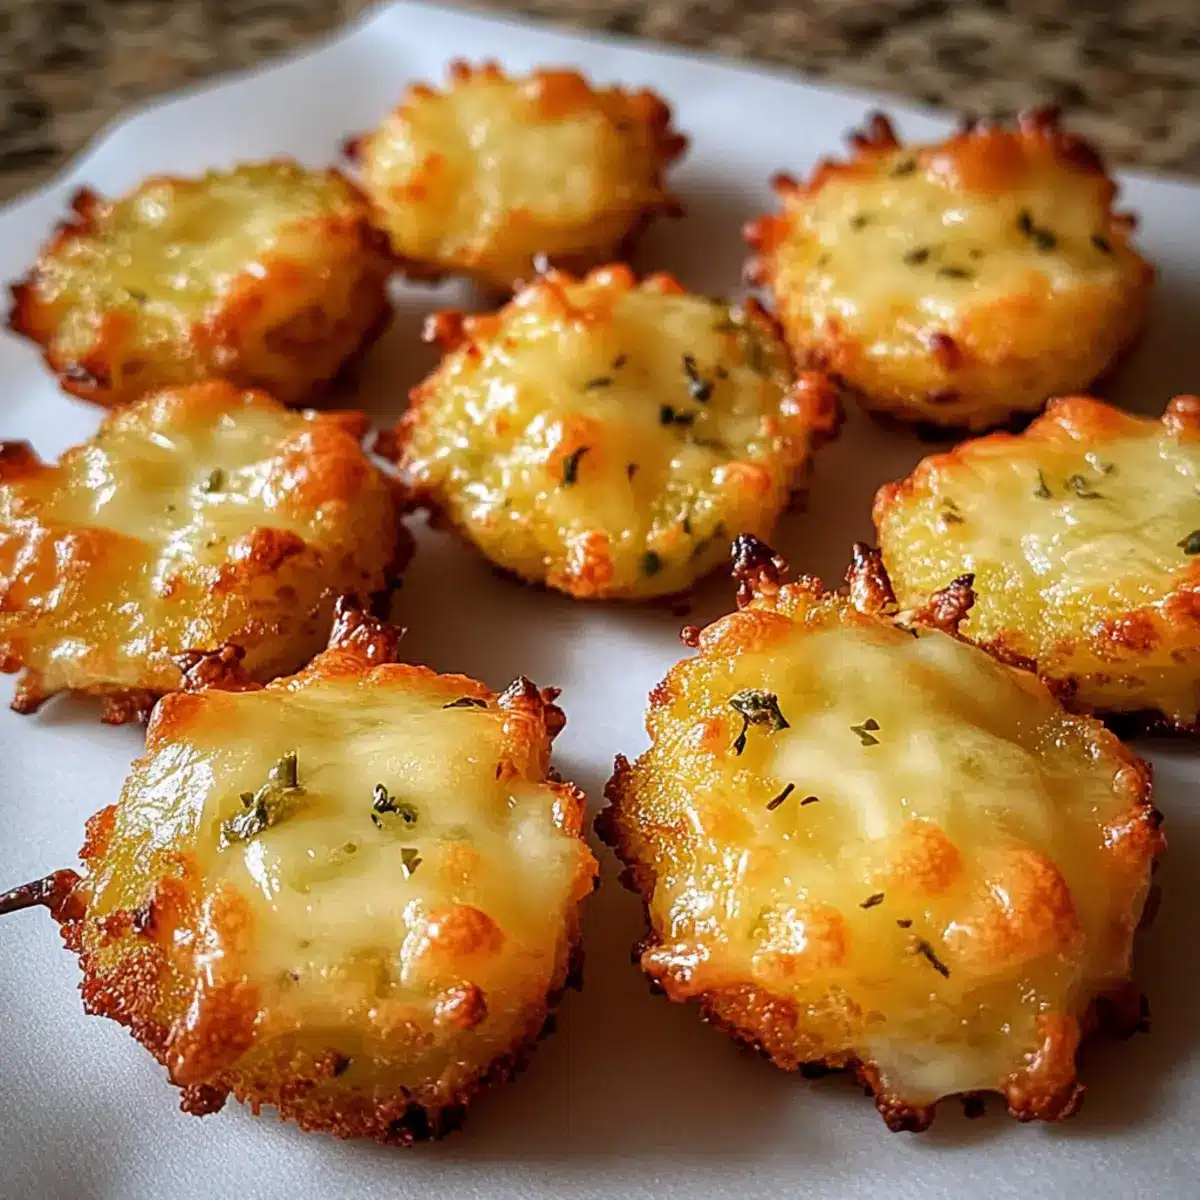
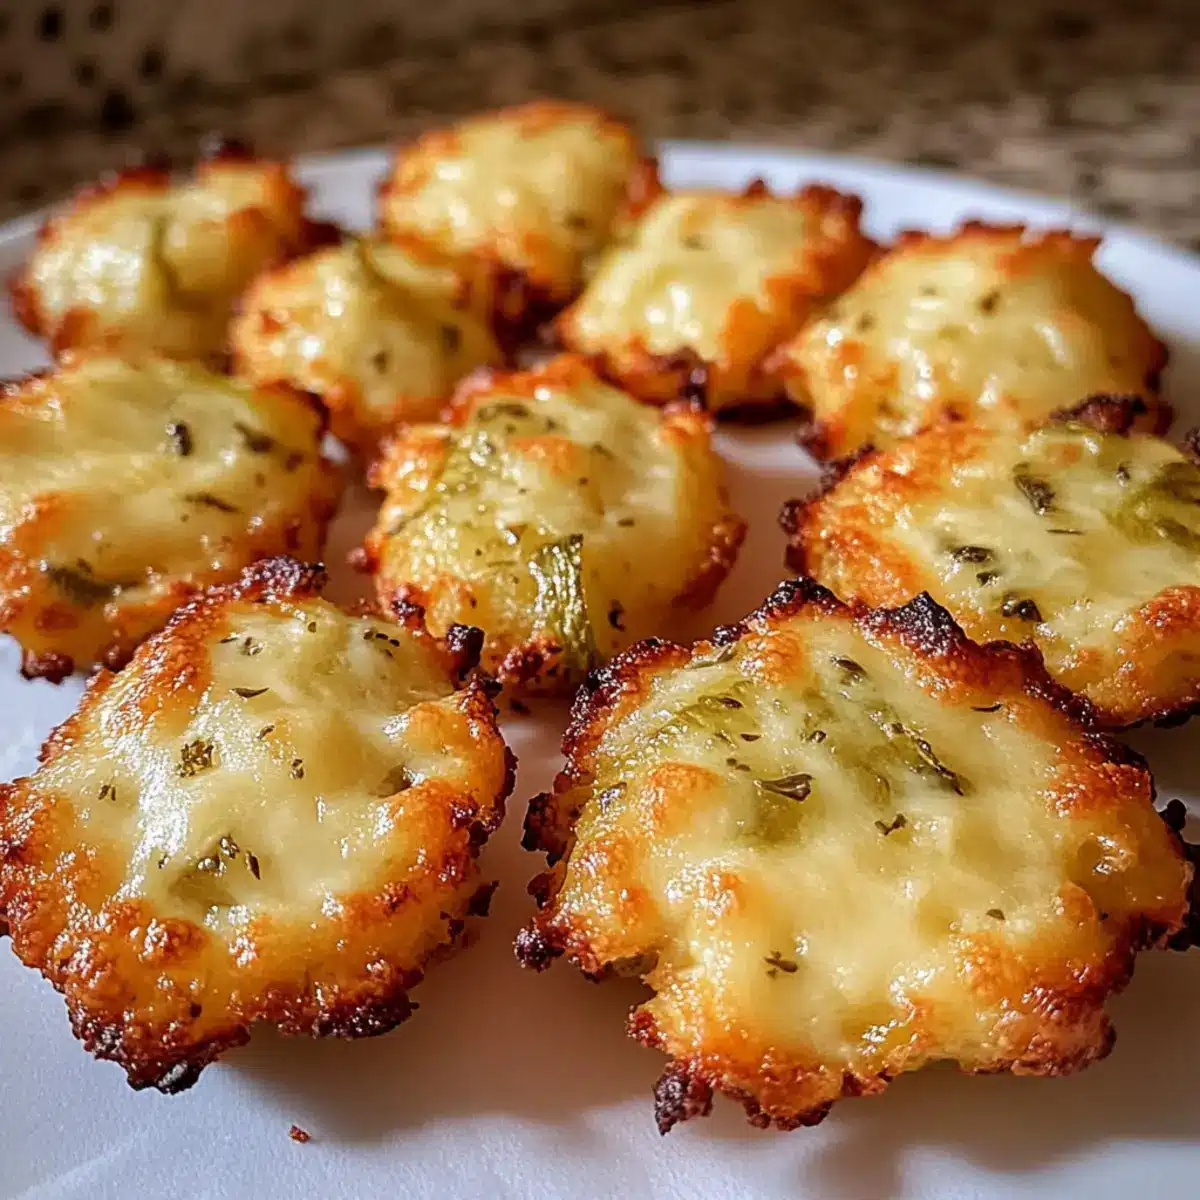
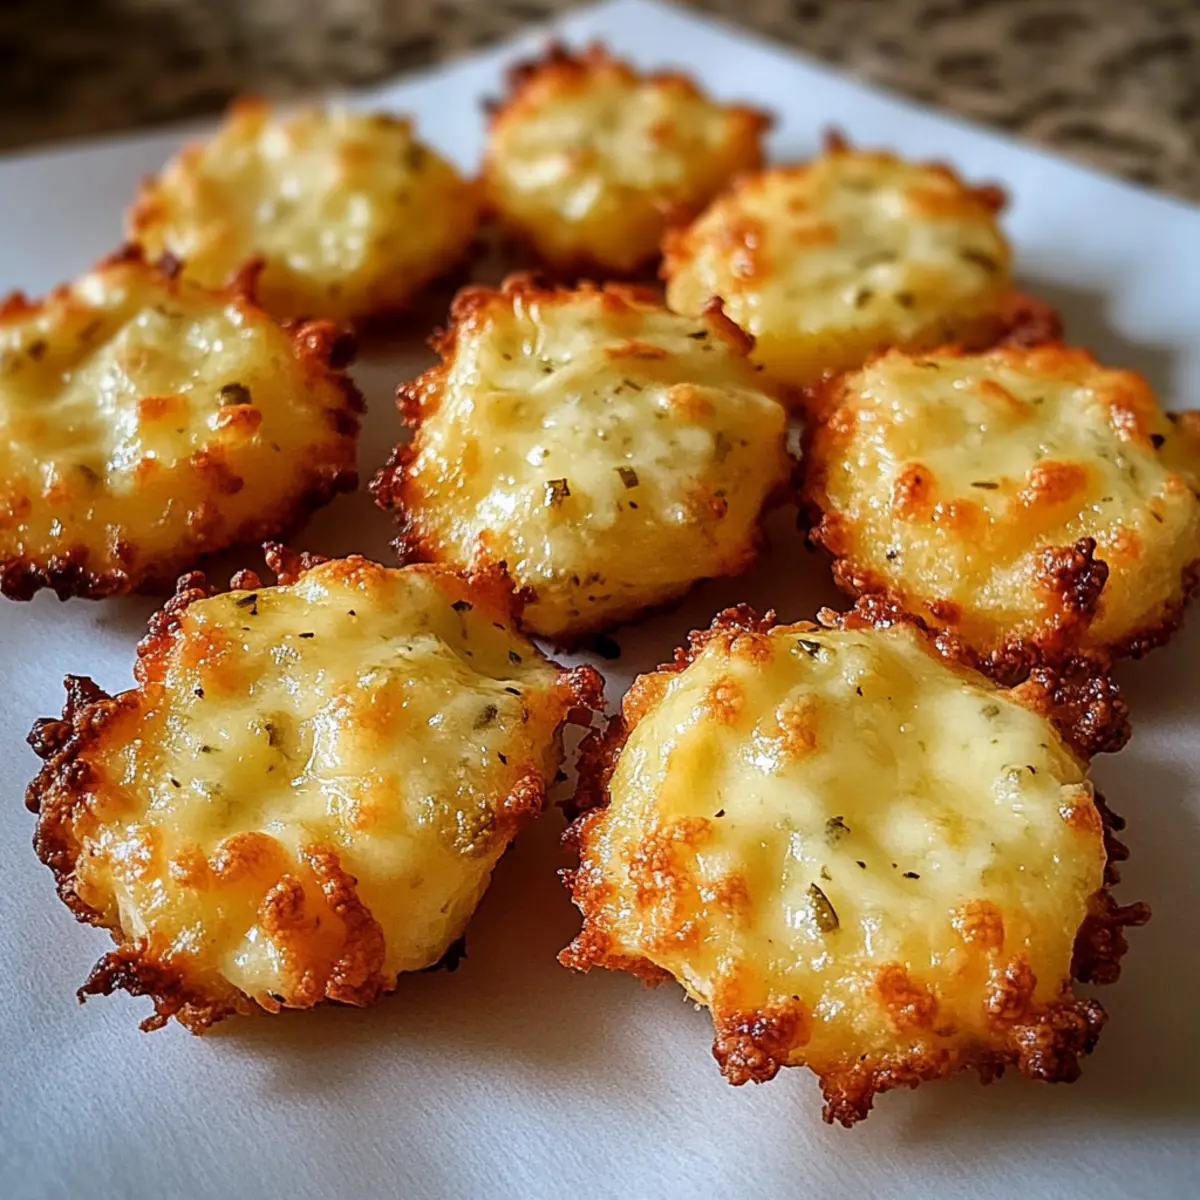
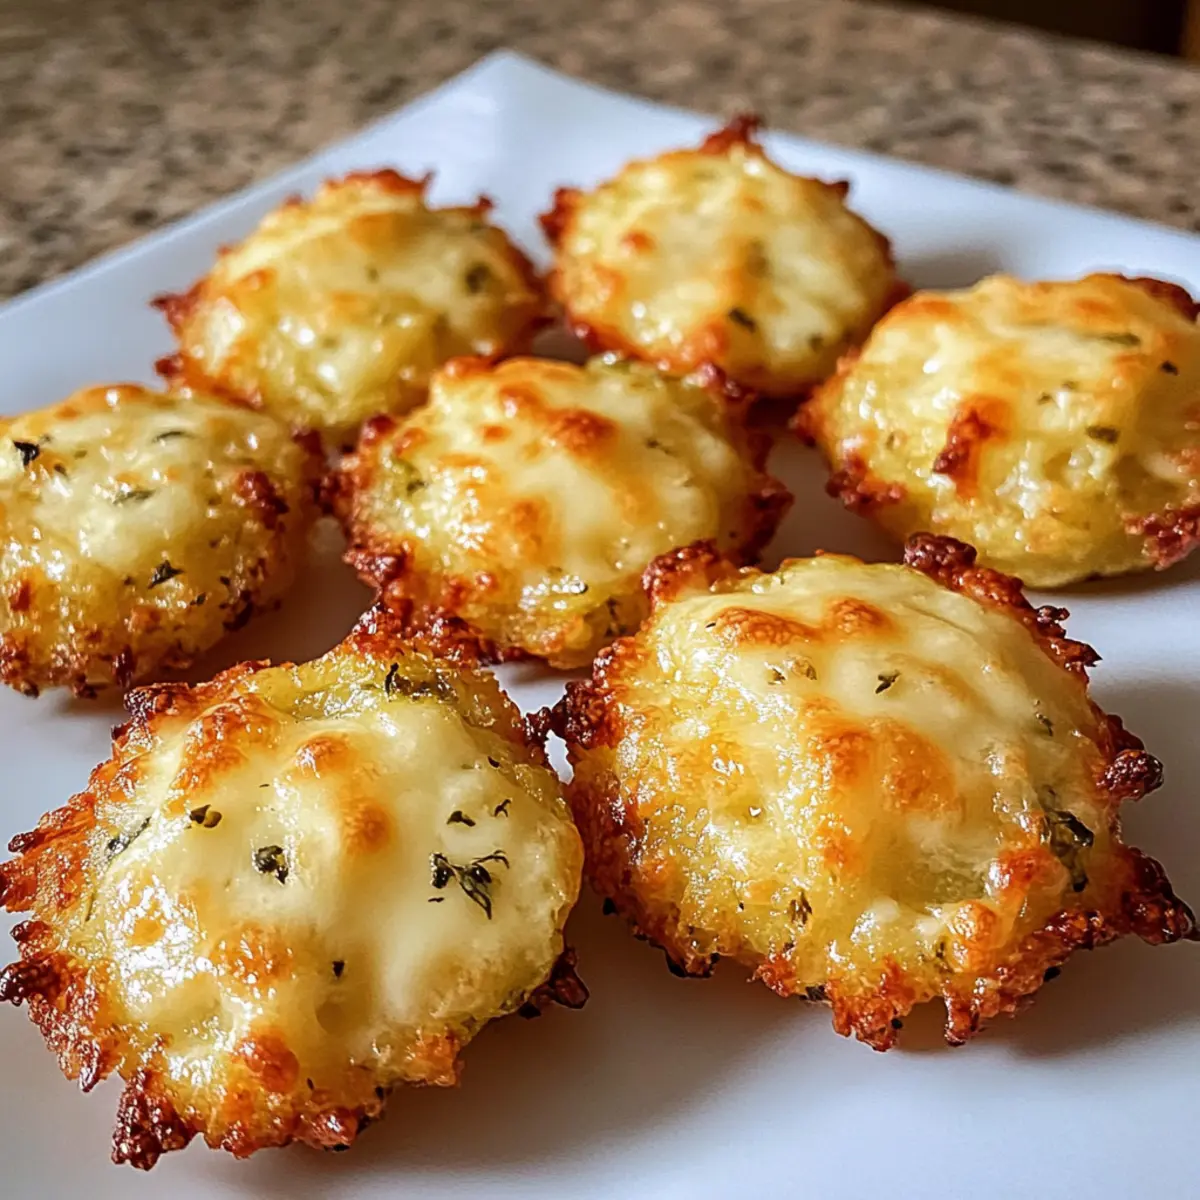
The aroma of freshly baked snacks fills the air, and it’s hard to resist peeking into the oven. Today, I’m thrilled to share my recipe for Crispy Pickle Cheese Bites—a snack that promises both a satisfying crunch and a creamy explosion of flavor. With gooey cheddar and mozzarella mingling with tangy dill pickles, these delightful bites come together in just 20 minutes. What’s even better? They’re not only easy to whip up but also gluten-free with a quick adjustment. Whether you’re hosting friends for a game night or simply seeking a delicious homemade alternative to fast food, these Crispy Pickle Cheese Bites are a sure-fire hit. Are you ready to impress your taste buds and elevate your snacking game? Let’s dive into this quick and easy recipe!
Why Are Crispy Pickle Cheese Bites Irresistible?
Easy Preparation: Just mix and bake! These bites can be whipped up in 20 minutes, making them a perfect last-minute snack.
Flavor Explosion: The blend of cheddar and mozzarella paired with tangy dill pickles creates a taste sensation that keeps you coming back for more.
Versatile Indulgence: Feel free to customize! Switch out dill pickles for bread-and-butter ones or add chopped jalapeños for a spicy twist.
Gluten-Free Option: By using gluten-free breadcrumbs, you can enjoy these bites without the worry, making them great for everyone.
Crowd-Pleasing Treat: Perfect for game nights or parties, these bites are sure to impress your guests and leave them asking for the recipe! If you want to explore more delightful snacks, check out my Garlic Steak Bites or Apple Fritter Bites.
Crispy Pickle Cheese Bites Ingredients
For the Cheese Mixture
• Shredded Cheddar Cheese – Provides a rich, cheesy flavor and contributes to the gooey texture; try substituting with Monterey Jack for a spicier kick.
• Shredded Mozzarella Cheese – Adds meltiness and a chewy texture; if you’re out of mozzarella, provolone or Gouda work beautifully too.
For the Filling
• Finely Chopped Dill Pickles – Introduces a zesty crunch that balances the richness of cheese; be sure to avoid fresh cucumbers due to their high water content.
• Garlic Powder – Enhances the overall flavor with a savory note; an optional add for those wanting a bolder taste.
For Extra Crunch
• Breadcrumbs (optional) – Adds an extra crunch to each bite; switch to gluten-free breadcrumbs to keep this snack gluten-free.
For Baking
• Nonstick Spray/Parchment Paper – Prevents sticking to the baking sheet, keeping your bites perfectly shaped!
Step‑by‑Step Instructions for Crispy Pickle Cheese Bites
Step 1: Preheat and Prepare
Begin by preheating your oven to 375°F (190°C). While the oven heats, line a baking sheet with parchment paper or lightly coat it with nonstick spray. This prep step ensures that your Crispy Pickle Cheese Bites won’t stick, allowing for a smooth transfer from the baking sheet to your plate when they are done.
Step 2: Combine the Ingredients
In a mixing bowl, combine the shredded cheddar and mozzarella cheeses along with the finely chopped dill pickles, garlic powder, and breadcrumbs if you choose to use them. Stir well until all ingredients are fully incorporated, creating a cohesive mixture that will form the delightful bites. If the mixture feels too sticky, refrigerate it for about 10 minutes to make shaping easier.
Step 3: Form the Bites
Once your mixture is ready, take small amounts and roll them into balls, roughly the size of a golf ball. Place the formed balls onto your prepared baking sheet, leaving space between them for even cooking. This step is crucial as it allows the Crispy Pickle Cheese Bites to crisp up nicely while baking.
Step 4: Bake to Perfection
Put the baking sheet in your preheated oven and bake for 10 minutes. Keep an eye on the bites; they should turn golden brown and develop a crispy exterior. If you prefer an extra crunch, you can bake them for an additional 1-2 minutes, but watch them closely to prevent burning.
Step 5: Cool and Serve
Once baked, remove the baking sheet from the oven and let the Crispy Pickle Cheese Bites cool for a few minutes. This cooling period is important to avoid burns from the melted cheese inside. After they have cooled slightly, they’re ready to be served warm, showcasing that beautiful golden hue and scrumptious gooey center.
What to Serve with Crispy Pickle Cheese Bites
Enhance your snack experience with these delicious pairings that complement the flavors of your Crispy Pickle Cheese Bites.
-
Zesty Dipping Sauces: Offer a variety of dips like ranch, sriracha mayo, or dill yogurt sauce for added flavor and fun!
-
Crispy Potato Wedges: Serve up crunchy potato wedges tossed with herbs for a satisfying contrast to the gooey cheese bites.
-
Fresh Veggie Platter: A colorful assortment of crunchy veggies, like carrots, cucumbers, and bell peppers for a refreshing crunch alongside the cheesy bites.
-
Classic Charcuterie Board: Elevate your snack time! Pair these bites with cured meats, nuts, and cheeses for an impressive spread.
-
Homemade Coleslaw: This tangy side dish adds a refreshing crunch that balances the rich flavors of the cheesy bites.
-
Chilled Lemonade or Iced Tea: Refreshing drinks, like zesty lemonade or iced tea, perfectly cut through the richness of cheesy flavors.
-
Sweet Dessert Treats: Finish with mini desserts like chocolate truffles or fruit skewers to give a sweet note to your snack experience.
-
Lightly Toasted Bread: Offer slices of lightly toasted baguette to scoop up bites or simply enjoy on the side, enhancing the whole experience.
These suggestions will surely elevate your snacking moments, making every gathering even more delightful!
Storage Tips for Crispy Pickle Cheese Bites
Fridge: Store leftover Crispy Pickle Cheese Bites in an airtight container for up to 2 days. This keeps them fresh for snacking later or for quick meal prep.
Freezer: For longer storage, freeze the bites on a baking tray until firm, then transfer them to a resealable freezer bag. They can be frozen for up to 2 months.
Reheating: To restore crispiness, reheat the bites in the oven at 350°F for 5-7 minutes. Avoid microwaving, as it may make them soggy.
Make-Ahead Tip: You can prepare the bites and freeze them before baking. Just add an extra 2-3 minutes to the baking time when cooking from frozen.
Make Ahead Options
These Crispy Pickle Cheese Bites are ideal for meal prep, allowing busy home cooks to enjoy homemade snacks anytime! You can prepare the cheese mixture and shape the bites up to 24 hours in advance; simply cover and refrigerate them until ready to bake. Be sure to blot the pickles to remove excess moisture to maintain quality. When you’re ready to serve, preheat your oven and bake the bites directly from the fridge for about 10 minutes, or add a couple of extra minutes if they’ve been sitting out. This way, you’ll have perfectly crispy, cheesy snacks with minimal effort, making your busy weeknights a little easier!
Crispy Pickle Cheese Bites Variations
Feel free to unleash your creativity with these Crispy Pickle Cheese Bites and make them your own!
-
Sweet Twist: Substitute dill pickles with bread-and-butter pickles for a sweeter and delightful flavor contrast. You might just discover a new favorite!
-
Spicy Kick: Add chopped jalapeños to the cheese mixture for a fiery touch. This heat will take your bites to a whole new level, perfect for a thrill-seeking palate.
-
Cheese Blend: Experiment with different cheeses like Gruyère or Fontina for a unique flavor profile. Each cheese brings its distinctive character, making your bites even more exciting!
-
Herb Infusion: Mix in fresh herbs like dill or chives into the cheese mix for an aromatic boost. Just imagine that fresh herb scent mingling with the cheesy goodness!
-
Gluten-Free Upgrade: Use gluten-free breadcrumbs to ensure everyone can enjoy these bites without worry. You’ll still achieve that desired crunch!
-
Crunchy Coating: For extra texture, roll formed bites in crushed cornflakes or panko breadcrumbs before baking. This adds a delightful crunch that kids and adults alike will love.
-
Garlic Lovers: Increase the amount of garlic powder or add fresh minced garlic to elevate that savory flavor. You can never have too much garlic, right?
-
Dipping Delight: Serve these bites with a variety of delicious dips like sriracha mayo or ranch for a complete snacking experience. It’s a wonderful way to customize each bite!
Expert Tips for Crispy Pickle Cheese Bites
-
Cool Before Handling: Let the bites cool for a few minutes after baking to prevent burns from the molten cheese.
-
Chill for Easy Shaping: If the mixture is sticky, refrigerate it for about 10 minutes before rolling, making it easier to form perfect bites.
-
Blot Excess Moisture: Pat down your pickles with a paper towel to remove excess moisture before mixing, which helps maintain the crispiness of the bites.
-
Spice It Up: Add a pinch of smoked paprika or cayenne pepper to the cheese mixture for a nice kick of flavor in your Crispy Pickle Cheese Bites.
-
Air Fry for More Crunch: For an even crispier result, cook in an air fryer at 375°F for 6-8 minutes, ensuring you achieve that delightful crunch without added oil.
Crispy Pickle Cheese Bites Recipe FAQs
What type of pickles should I use?
Absolutely! For the best flavor, I recommend using finely chopped dill pickles. These add a tangy crunch that perfectly complements the rich flavors of the cheddar and mozzarella cheeses. Avoid fresh cucumbers as they contain too much moisture, which can make your bites soggy.
How long can I store leftover Crispy Pickle Cheese Bites?
Very! Leftover Crispy Pickle Cheese Bites can be stored in an airtight container in your fridge for up to 2 days. This keeps them fresh for snacking or quick meals. Just be sure to allow them to cool completely before storing to maintain their texture.
Can I freeze these cheese bites? How do I do it?
Of course! Freezing is a great way to extend the life of your bites. First, shape the mixture into balls and place them on a baking tray lined with parchment paper. Freeze them until firm, then transfer to a resealable freezer bag. They can be stored in the freezer for up to 2 months. When you’re ready to enjoy, simply bake them straight from the freezer, adding an extra 2-3 minutes to the baking time.
What if my cheese mixture is too sticky to handle?
No worries! If you find that the mixture is too sticky to form into balls, try refrigerating it for about 10 minutes. This will firm it up, making shaping much easier. Patience is key, and this small adjustment can save a lot of hassle during preparation.
Are there dietary options available for these bites?
Absolutely! To make these Crispy Pickle Cheese Bites gluten-free, simply use gluten-free breadcrumbs instead of regular bread crumbs. Additionally, be sure to check that your cheese selection is gluten-free, as most cheeses are, but it’s always good to double-check to accommodate any dietary restrictions.
Crispy Pickle Cheese Bites: Snack Bliss in Just 20 Minutes
Ingredients
Equipment
Method
- Preheat your oven to 375°F (190°C). Line a baking sheet with parchment paper or lightly coat with nonstick spray.
- Combine the shredded cheddar and mozzarella cheese with the dill pickles, garlic powder, and breadcrumbs in a mixing bowl. Stir until well incorporated.
- Roll small amounts of the mixture into balls, placing them on the baking sheet with space between each.
- Bake for 10 minutes or until golden brown. For extra crunch, bake an additional 1-2 minutes.
- Remove from oven and let cool for a few minutes before serving warm.
Leave a Reply