
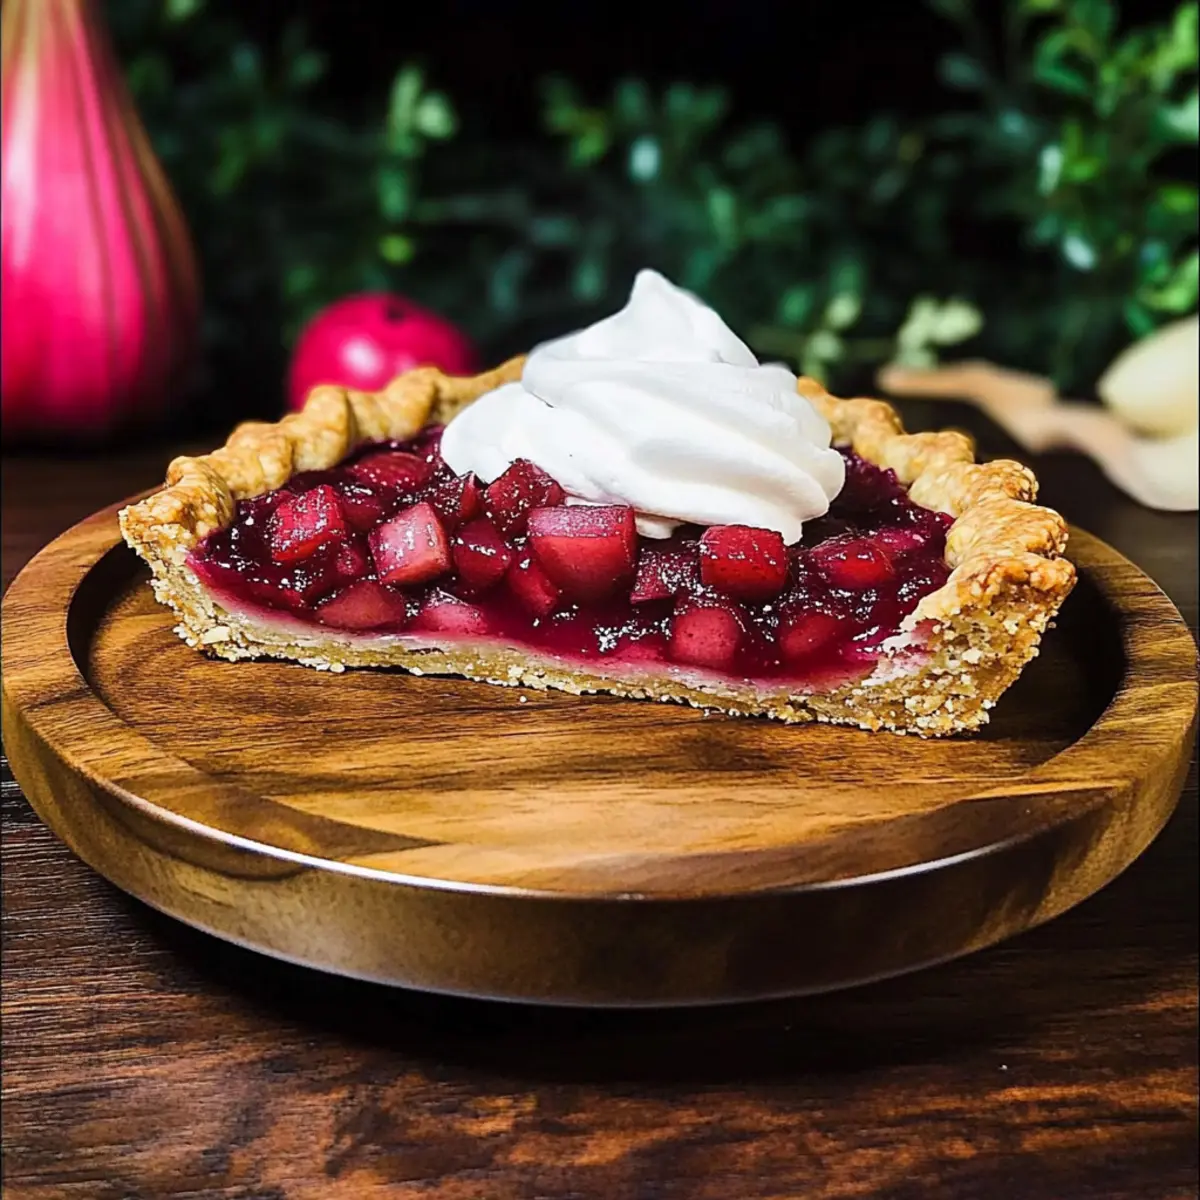
The air is filled with the sweet anticipation of spring, and what better way to celebrate than with a Rustic Rhubarb Tart with Oat Crust? As rhubarb makes its annual debut, I can’t help but revel in the stunning ruby-colored filling that perfectly balances tartness and sweetness. This delightful tart isn’t just a feast for the eyes; it’s remarkably easy to whip up, making it the ideal treat for casual gatherings or your afternoon tea. With its hearty oat crust, this recipe not only embraces the essence of seasonal ingredients but also offers a comforting twist that will warm your soul. Ready to unlock the secrets of this charming dessert that friends and family will love? Let’s dive in and transform these simple ingredients into something extraordinary!
Why Is This Tart So Irresistible?
Simplicity at its finest: This Rustic Rhubarb Tart with Oat Crust is a breeze to create, even for novice bakers. Flavorful balance: The sweet and tart notes of rhubarb harmonize perfectly with the nutty oat crust, creating a delightful taste explosion. Seasonal showcase: Celebrate spring with ingredients at their peak—this tart truly captures the freshness of the season. Customizable: Feel free to mix in your favorite fruits, like strawberries or blueberries, to personalize each bite. Perfect for gatherings, this dessert will impress friends and family at your next brunch or tea party while also satisfying those looking for healthier, homemade options.
Rhubarb Tart with Oat Crust Ingredients
For the Crust
- ½ cup quick oats – Adds a nutty flavor and texture in the crust; substitute with oat flour, but you may require additional water.
- 1 cup all-purpose flour – Provides structure for the tart crust; consider using whole wheat flour for a heartier alternative.
- 2 tbsp sugar – Sweetens the crust just enough; brown sugar can give a deeper flavor profile.
- ½ tsp kosher salt – Enhances the overall taste; regular salt can also be used if necessary.
- 1 stick cold butter – Essential for achieving a flaky crust; opt for vegan butter for a dairy-free version.
- ¼ cup ice water – Helps bind the crust ingredients together; adjust the quantity as needed for the right consistency.
For the Filling
- 3 cups diced rhubarb – The star ingredient, bringing a delightful tartness; fresh rhubarb is best, but frozen can work in a pinch.
- ¾ cup sugar – Sweetens the filling to counterbalance the tartness; feel free to substitute with honey or maple syrup.
- ¼ cup cornstarch – Thickens the filling and improves texture; arrowroot powder can serve as a suitable option.
- 1 tsp lemon juice – Adds a refreshing brightness to the filling’s flavor profile.
For Finishing Touches
- 1 egg, beaten – Used for brushing on the crust for a shiny finish; plant-based milk can be a good replacement for vegan diners.
- Turbinado sugar, as needed – Sprinkled for a crunchy finish on the crust; regular granulated sugar will suffice if you don’t have turbinado.
- 1 ½ cups whipping cream – Adds richness as a topping; coconut cream is a delightful dairy-free substitute.
- 1 tbsp sugar (for cream) – Sweetens the whipped cream for an extra layer of flavor.
Embrace the joy of home cooking with this Rhubarb Tart with Oat Crust—it’s sure to enchant your guests and make any spring celebration unforgettable!
Step‑by‑Step Instructions for Rustic Rhubarb Tart with Oat Crust
Step 1: Prepare the Crust
Begin by blending the quick oats in a food processor until they reach a fine consistency. In a mixing bowl, combine these oats with all-purpose flour, sugar, and salt. Cut in the cold butter until the mixture resembles pea-sized pieces, then gradually add ice water until the dough clumps together. Form it into a ball, wrap in plastic, and chill in the refrigerator for 30-60 minutes to firm up.
Step 2: Roll and Assemble Dough
Preheat your oven to 400°F (200°C) as you roll out the chilled dough. On a lightly floured surface, use a rolling pin to stretch the dough into a 12-inch circle. Carefully transfer the dough onto a baking sheet. Don’t worry if cracks appear; just mend them with your fingers to ensure the crust holds during baking.
Step 3: Prepare the Filling
In a large bowl, toss the diced rhubarb with sugar, cornstarch, and lemon juice until all pieces are well-coated. This mixture should look glossy and visually appealing. Spoon the filling into the center of the rolled-out dough, leaving a bit of the edge uncovered to create the rustic look of your rhubarb tart.
Step 4: Form the Tart
Gently fold the edges of the crust over the filling, creating pleats as needed to give a beautiful rustic appeal. Brush the exposed crust with the beaten egg to achieve a golden, glossy finish. Sprinkle turbinado sugar over the crust for added crunch and sweetness, elevating the overall presentation of your rustic rhubarb tart.
Step 5: Bake the Tart
Place the assembled tart in your preheated oven and bake for 40-50 minutes. The tart is done when the crust is golden brown, and the filling is bubbling enticingly at the edges. Keep an eye on the crust to ensure it doesn’t over-brown, adjusting the position in the oven if necessary.
Step 6: Serve
Once baked, allow the tart to cool on a wire rack for 20-30 minutes before slicing. For an extra layer of indulgence, whip the cream until soft peaks form, then add sugar until you achieve stiff peaks. Serve generous dollops of this whipped cream over each slice of your delightful rustic rhubarb tart.

Rhubarb Tart with Oat Crust Variations
Feel free to explore and customize this recipe with these delightful twists that will keep your taste buds excited!
- Berry Burst: Replace rhubarb with strawberries or blueberries for a sweet, fruity filling that’s bursting with flavor. The vibrancy of berries brings a whole new freshness to the tart!
- Spiced Adventure: Add warm spices like cinnamon or ginger to the filling for a cozy, aromatic touch. This hint of spice wonderfully complements tart fruits.
- Nutty Oat Crust: Swap half of the oat flour for almond flour to enhance the nutty flavor of the crust. This not only adds richness but also a delightful crumbly texture!
- Vegan-Friendly: Use vegan butter and plant-based milk instead of egg for brushing, ensuring that everyone can enjoy this delicious tart. It’s an inclusive dessert that won’t compromise on taste!
- Citrus Zing: Add zest from an orange or a lemon to the rhubarb filling for a bright, citrusy twist. The citrus notes encapsulate springtime and elevate the flavor profile.
- Sweet and Savory: Incorporate a pinch of salt and a couple of tablespoons of finely chopped rosemary to your filling. This unexpected combination will surprise and delight your guests.
- Chocolate Drizzle: Once baked and cooled, drizzle melted dark chocolate over the tart for an indulgent touch. Chocolate pairs surprisingly well with the tart rhubarb flavor—it’s a match made in heaven!
- Creamy Alternative: Instead of whipping cream, top the tart with crème fraîche for a delightful tang that beautifully offsets the sweetness. This lovely alternative adds a gourmet flair.
Don’t forget to check out our delicious Baked Prosciutto Tart for another exciting recipe idea and embrace the joy of home-cooked delights!
What to Serve with Rustic Rhubarb Tart with Oat Crust
Embrace the warmth of gathering friends and family around the table with delightful accompaniments that elevate your spring dessert experience.
- Creamy Whipped Cream: This luscious topping adds a rich creaminess that perfectly balances the tartness of the rhubarb, enhancing each bite.
- Vanilla Ice Cream: Melting over warm slices, this classic pairing complements the tart while providing a delightful contrast of temperature and texture.
- Fresh Berries Salad: A vibrant mix of strawberries and blueberries adds a burst of freshness and a touch of sweetness, making each forkful feel like spring.
- Lemonade or Iced Tea: Serve a refreshing glass of lemonade or iced tea to contrast the rich flavors of the tart, invigorating the palate with each sip.
- Cheese Platter: Pair the tart with creamy cheeses like brie or goat cheese for a harmonious interplay of flavors that transforms dessert into a sophisticated affair.
- Nutty Granola Crumble: Sprinkled on top of each slice, this crunchy element adds texture and complements the oats in the crust, enhancing the experience.
- Herbal Infused Simple Syrup: Drizzle some over the tart for a sweet, aromatic enhancement that elevates its rustic charm to gourmet status.
Make Ahead Options
These Rustic Rhubarb Tarts with Oat Crust are perfect for meal prep enthusiasts looking to save time on busy days! You can prepare the oat crust up to 24 hours in advance; simply roll it out, wrap it tightly in plastic, and refrigerate to maintain freshness. The rhubarb filling can also be made ahead and stored in an airtight container in the refrigerator for up to 3 days—this ensures the flavors meld beautifully. When you’re ready to bake, assemble the tart by filling the crust and folding over the edges, then brush with egg and sprinkle sugar before popping it into the oven. This way, you’ll have a delicious dessert with minimal last-minute effort!
How to Store and Freeze Rhubarb Tart with Oat Crust
Room Temperature: Keep the tart covered at room temperature for up to 1 day to maintain freshness, but be mindful of humidity.
Fridge: Store any leftover rhubarb tart in an airtight container in the refrigerator for up to 3 days. This helps preserve its flavors and textures.
Freezer: The tart can be frozen before baking for a make-ahead option. Wrap it tightly in plastic wrap and then aluminum foil; it will stay fresh in the freezer for up to 2 months.
Reheating: To enjoy the tart after freezing, thaw it in the fridge overnight, then bake in a preheated oven at 350°F for about 15–20 minutes until heated through.
Expert Tips for Rhubarb Tart with Oat Crust
-
Keep Ingredients Cold: Ensure your butter and water are ice-cold to create a light, flaky crust. This is crucial for the perfect texture!
-
Don’t Overmix Dough: Avoid overworking the crust dough. Mix just until combined to prevent toughness—this will keep your Rhubarb Tart delicate and airy.
-
Fresh Over Frozen: Whenever possible, use fresh rhubarb for the best flavor. If you must use frozen, make sure to thaw it and drain excess moisture to avoid a soggy filling.
-
Adjust Sweetness: Taste your filling mixture before baking. Depending on your rhubarb’s tartness, you might want to adjust the sugar to suit your preference!
-
Keep an Eye on Baking: Check the tart in the last 10 minutes of baking. Rotate it if necessary to ensure even browning and prevent burning.
-
Perfect Presentation: Let the tart cool before slicing—this helps maintain the structure and makes for prettier slices!
Rhubarb Tart with Oat Crust Recipe FAQs
How do I select ripe rhubarb?
Absolutely! Look for rhubarb stalks that are firm, crisp, and a vibrant ruby color. Avoid stalks with dark spots or wilted leaves, as these can indicate overripeness. Fresh rhubarb is key to a delicious tart, so make sure to choose stalks without blemishes!
What is the best way to store leftovers?
Very! After slicing your Rhubarb Tart with Oat Crust, store the leftovers in an airtight container in the refrigerator for up to 3 days. This keeps the crust from becoming too soft while maintaining the tart flavor of the rhubarb. You can also cover the tart with plastic wrap for added protection!
Can I freeze this rhubarb tart?
Indeed! If you’d like to make this tart ahead of time, freeze it before baking. Wrap it tightly in plastic wrap and then aluminum foil to prevent freezer burn. It will stay fresh for up to 2 months. When you’re ready to enjoy, simply thaw it in the refrigerator overnight and bake as directed, adjusting the time if needed.
What if my rhubarb filling is too watery?
No worries! If you notice your filling is a bit runny, you might need to adjust your cornstarch next time. Make sure to toss the rhubarb with sugar, cornstarch, and lemon juice evenly, as this helps absorb excess moisture. If it’s already baked, you can always serve it with whipped cream to balance the texture.
Are there any dietary considerations for this tart?
Absolutely! This wonderful Rhubarb Tart with Oat Crust can be made vegan by using plant-based butter and milk instead of eggs and whipping cream. Additionally, if you or your guests have allergies, consider substituting the all-purpose flour with gluten-free flour blends, ensuring you verify the safety of all your ingredients.
How long can I keep the tart in the freezer after baking?
Great question! If you bake the tart and have leftovers, you can freeze slices for up to 3 months. Make sure to wrap them individually in plastic wrap and then store them in a freezer-safe bag or container. When you’re ready to enjoy, thaw in the fridge overnight, then reheat in a 350°F oven for about 15-20 minutes.
Delicious Rhubarb Tart with Oat Crust for Spring Celebrations
Ingredients
Equipment
Method
- Begin by blending the quick oats in a food processor until they reach a fine consistency. In a mixing bowl, combine these oats with all-purpose flour, sugar, and salt. Cut in the cold butter until the mixture resembles pea-sized pieces, then gradually add ice water until the dough clumps together. Form it into a ball, wrap in plastic, and chill in the refrigerator for 30-60 minutes to firm up.
- Preheat your oven to 400°F (200°C) as you roll out the chilled dough. On a lightly floured surface, use a rolling pin to stretch the dough into a 12-inch circle. Carefully transfer the dough onto a baking sheet, mending any cracks with your fingers.
- In a large bowl, toss the diced rhubarb with sugar, cornstarch, and lemon juice until all pieces are well-coated. Spoon the filling into the center of the rolled-out dough, leaving a bit of the edge uncovered.
- Gently fold the edges of the crust over the filling, creating pleats as needed. Brush the exposed crust with the beaten egg. Sprinkle turbinado sugar over the crust.
- Place the assembled tart in your preheated oven and bake for 40-50 minutes until the crust is golden brown and the filling is bubbling. Adjust the position in the oven if necessary.
- Allow the tart to cool on a wire rack for 20-30 minutes before slicing. Whip the cream until soft peaks form, then add sugar until stiff peaks. Serve over each slice.
Leave a Reply