
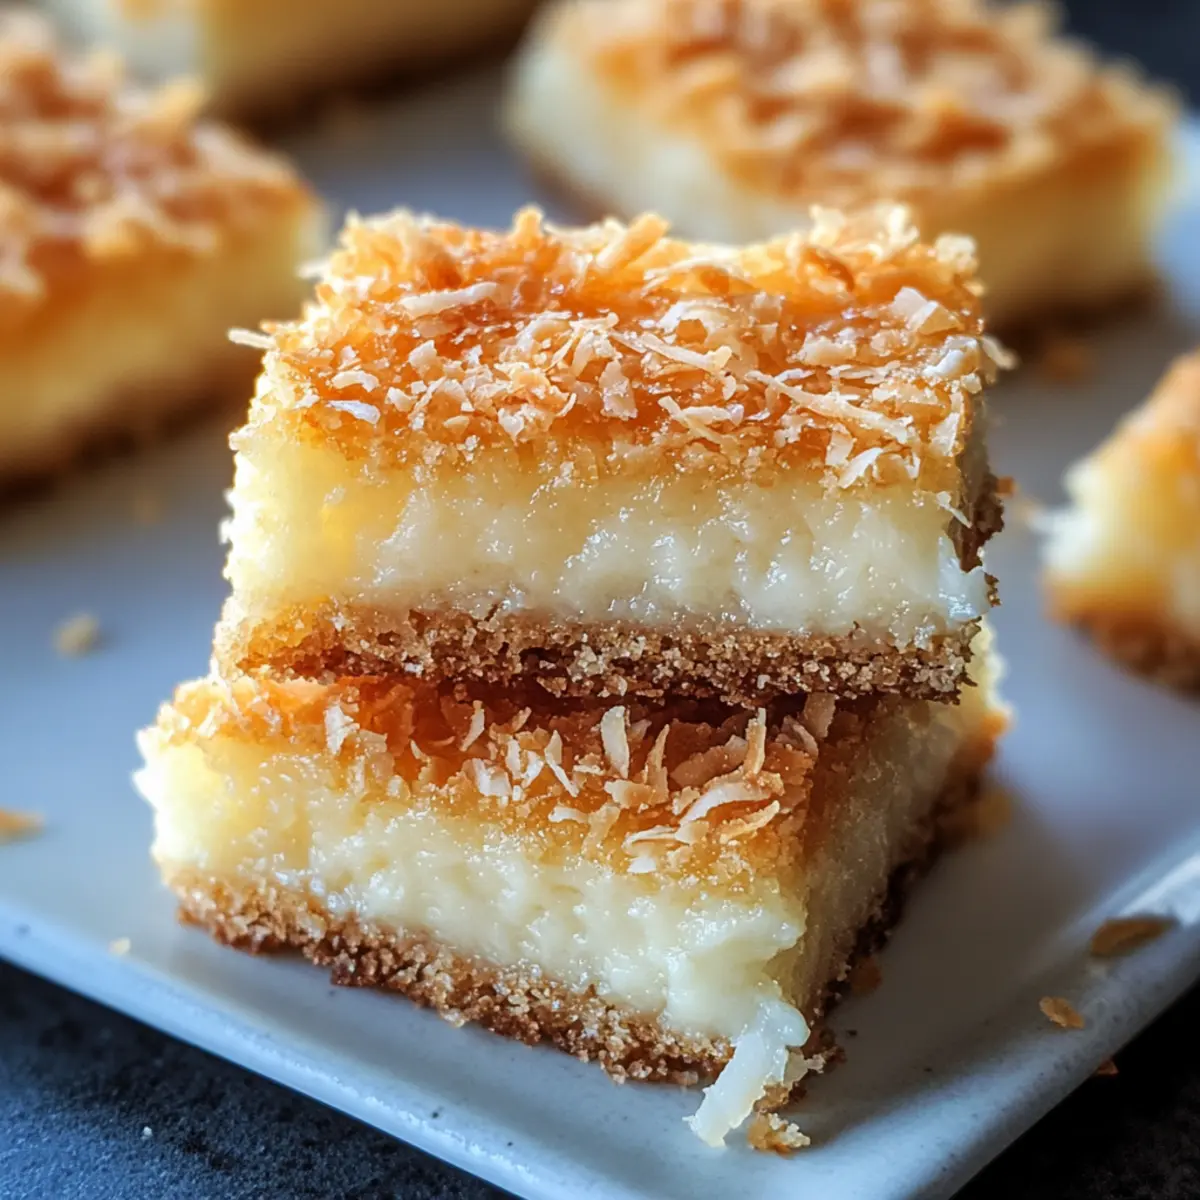
The aroma of melted butter and sweet marshmallows wafting through my kitchen transports me back to my childhood, where every bake was an adventure wrapped in joy. Today, I want to share my delightfully easy recipe for Chewy Coconut Bars, a simple yet satisfying treat that can be whipped up in just 30 minutes. These bars strike the perfect balance with their rich, buttery base and irresistibly chewy coconut filling, making them a must-try for any home chef craving a tropical escape without the fuss. Plus, they’re perfect for coffee breaks or sweet indulgences after dinner—your loved ones will be begging for seconds! Ready to create something delicious that will elevate your homemade dessert game? Let’s dive in!
Why Are Chewy Coconut Bars Perfect?
Simplicity at Its Best: With just a handful of ingredients, these bars are incredibly easy to make, perfect for those busy weeknights or when unexpected guests arrive.
Irresistible Flavor: The combination of buttery richness and chewy coconut brings a tropical vibe to your dessert table, sure to impress anyone who tries them.
Quick Preparation: In just 30 minutes, you can have a delightful treat that satisfies your sweet tooth, making it an ideal choice for those last-minute cravings.
Versatile Enjoyment: Serve these bars warm or cold, alone or with toppings like vanilla ice cream or chocolate drizzle—the possibilities are deliciously endless!
For more scrumptious inspirations, check out my Nut Free Chewy or 4-ingredient Chewy Chocolate recipes that are also quick and satisfying!
Chewy Coconut Bars Ingredients
For the Base
- Butter (Melted) – Adds richness and creates a melt-in-your-mouth texture.
- Marshmallows – The secret ingredient that provides chewiness and softness.
- Sugar – Balances the coconut’s natural flavor with sweetness; granulated sugar is preferred.
- Eggs – Bind the ingredients and contribute to a soft crumb structure.
- Vanilla Extract – Adds depth of flavor; Dominican Vanilla is recommended for authenticity.
For the Mixture
- Flour – Provides the structure; all-purpose flour is standard.
- Salt – A pinch enhances sweetness and overall flavor.
- Unsweetened Coconut Flakes – The star ingredient that delivers tropical coconut flavor and texture; sweetened coconut may alter the desired taste.
These Chewy Coconut Bars are not just a treat but an experience that connects us back to joyful moments in the kitchen.
Step‑by‑Step Instructions for Chewy Coconut Bars
Step 1: Melt Butter and Marshmallows
In a medium saucepan over medium-low heat, combine the melted butter and marshmallows. Stir gently until both ingredients are fully melted and smooth, about 5 minutes. Keep this mixture warm to ensure it blends well with the other ingredients, giving your Chewy Coconut Bars the perfect chewy texture.
Step 2: Combine Wet Ingredients
In a stand mixer, beat together the granulated sugar, eggs, and vanilla extract for about 2 minutes until the mixture is light and fluffy. Gradually add the melted butter and marshmallow mixture, mixing until everything is fully combined. This step helps to create a rich, cohesive base for your bars.
Step 3: Incorporate Dry Ingredients
With the mixer running on low speed, slowly add the all-purpose flour and unsweetened coconut flakes to the wet mixture. Mix until just combined, ensuring there are no dry spots. The batter should be smooth and thick, providing a delightful texture to your Chewy Coconut Bars as it bakes.
Step 4: Bake the Bars
Preheat your oven to 325°F (163°C). Line a 13 x 9 x 1-inch baking sheet with parchment paper, then spread the coconut batter evenly across the pan. Bake for 20–25 minutes, or until the edges are golden and the center is set. Keep an eye on them towards the end to ensure they don’t overbake.
Step 5: Cool and Cut
Once baked, remove the Chewy Coconut Bars from the oven and allow them to cool in the pan for about 30 minutes. Once cool, use the parchment paper to lift the bars out of the pan and cut them into squares. This will make them easier to serve and enjoy!
Expert Tips for Chewy Coconut Bars
• Melt Thoroughly: Ensure the butter and marshmallows are completely melted together, as this will create that desirable chewy texture in your bars.
• Don’t Overmix: When combining the dry ingredients, mix just until combined to avoid tough bars. The perfect chewy coconut bars depend on the right blending!
• Watch the Baking Time: Ovens can vary, so keep an eye on your bars. A slight underbake will yield oatmeal-like chewy centers, while overbaking may leave them crumbly.
• Use Parchment Paper: Lining your baking pan helps prevent sticking. It makes cooling and cutting the bars easier, ensuring beautifully shaped chewy coconut bars.
• Add Some Fun: Consider mixing in chocolate chips or nuts for a unique twist! These add flavors and textures that enhance your chewy coconut bars even more.
Make Ahead Options
These Chewy Coconut Bars are perfect for meal prep enthusiasts! You can prepare the batter up to 24 hours in advance. Simply follow the steps to melt the butter and marshmallows, then mix and store the batter in an airtight container in the refrigerator. This allows the flavors to meld beautifully. When you’re ready to bake, just give it a quick stir and spread it into the prepared baking sheet. For freezing, bake the bars first and let them cool completely before cutting and wrapping them tightly. They will maintain their chewy texture and flavor for up to three months in the freezer. When it’s time to enjoy, simply let them thaw at room temperature, and they’ll be just as delicious as the day you made them!
What to Serve with Chewy Coconut Bars
Imagine gathering around the table with loved ones, enjoying sweet bites that bring warmth and joy to every moment.
- Vanilla Ice Cream: A creamy scoop draped over warm Chewy Coconut Bars creates a delightful contrast, enhancing the tropical flavor of the coconut.
- Fresh Berries: The tartness of strawberries or raspberries brightens the rich sweetness of the bars, adding a refreshing touch to your dessert experience.
- Caramel Sauce: Drizzling warm caramel over the bars intensifies the sweetness, offering an extra layer of indulgence that’s simply irresistible.
- Coffee or Tea: A steaming cup of coffee or a fragrant herbal tea perfectly balances the sweetness, creating a cozy atmosphere for savoring each bite.
- Chocolate Drizzle: A simple drizzle of melted chocolate adds elegance and a rich finish, harmonizing beautifully with the coconut’s flavor profile.
- Coconut Whipped Cream: For a tropical flair, serve with light, airy coconut whipped cream that echoes the bars’ flavor and invites delightful spoonfuls.
- Toasted Nuts: A sprinkle of toasted almonds or pecans provides a lovely crunch, complementing the chewy texture of the bars while adding a nutty richness.
- Lemonade or Iced Tea: Refreshing drinks like lemonade or iced tea cleanse the palate, making every bite of your Chewy Coconut Bars even more enjoyable.
- Chocolate Chip Cookies: For a sweet platter, pair these bars with classic chocolate chip cookies—different textures and flavors that make for a delightful dessert spread.
- Fruit Salad: A light fruit salad adds vibrancy and freshness, counterbalancing the sweetness with juicy and colorful bites.
How to Store and Freeze Chewy Coconut Bars
Room Temperature: Store your Chewy Coconut Bars in an airtight container at room temperature for up to 5 days to maintain their chewy texture and flavor.
Fridge: For extended freshness, you can refrigerate the bars for up to 1 week. Be sure to wrap them tightly to prevent drying out.
Freezer: Freeze the bars for up to 3 months. Wrap each bar in plastic wrap, followed by aluminum foil, for optimal protection.
Reheating: To enjoy your Chewy Coconut Bars warm, simply pop them in the microwave for 10-15 seconds, enhancing the gooey goodness you’ve come to love!
Chewy Coconut Bars Variations & Substitutions
Feel free to add your personal touch to these chewy delights—a little creativity can go a long way!
- Nutty Crunch: Add 1/2 cup of chopped nuts like walnuts or almonds for a delightful crunch.
- Chocolate Lovers: Mix in 1/2 cup of chocolate chips with the coconut flakes for a rich chocolate-coconut combo.
- Tropical Twist: Substitute some of the coconut flakes with dried pineapple or mango for a fruity tropical vibe.
- Flavored Marshmallows: Use coconut or vanilla-flavored marshmallows to enhance the coconut flavor even further.
- Gluten-Free Option: Substitute all-purpose flour with a gluten-free baking blend, ensuring your bars cater to everyone.
- Increased Coconut: Increase the coconut flakes to 2 cups for an extra chewy and intensely coconutty flavor.
- Spicy Kick: Add a pinch of cayenne or ginger to the batter for a surprising hint of spice.
- Chocolate Drizzle: Once cooled, drizzle melted chocolate over the bars for an elegant finish—perfect for special occasions!
Remember, you can explore other sweet treats like my scrumptious Cereal Bars Homemade or the delicious Nut Free Chewy recipe for more baking inspiration!
Chewy Coconut Bars Recipe FAQs
How do I choose the right coconut flakes for Chewy Coconut Bars?
Absolutely! For the best flavor and texture, use unsweetened coconut flakes. Sweetened coconut may make your bars overly sweet and affect the desired coconut taste. Look for flakes that are large and slightly moist—this will help keep your bars chewy and delicious.
What’s the best way to store Chewy Coconut Bars?
Very simple! Store your Chewy Coconut Bars in an airtight container at room temperature for up to 5 days. If you want to keep them fresh for longer, refrigerate them for up to a week. Just make sure they’re well-wrapped to prevent them from drying out.
Can I freeze Chewy Coconut Bars?
Of course! Freezing is a great option. To do this, individually wrap each cooled bar in plastic wrap, followed by aluminum foil. This layered approach ensures they stay fresh for up to 3 months. When you’re ready to enjoy them, simply let them thaw at room temperature for a few hours, or warm them in the microwave for an irresistible gooey treat!
What if my bars turn out too crumbly?
That can happen, but don’t worry! If your Chewy Coconut Bars are crumbly, it might be due to overbaking or not mixing the wet and dry ingredients thoroughly. To achieve the perfect chewy texture, keep a close eye on your bars while baking; they should be set but soft in the center. If they baked too long, next time aim for the lower end of the baking time to avoid crumbliness.
Are Chewy Coconut Bars suitable for people with allergies?
Great question! These bars contain common allergens such as eggs and dairy (butter). If you need a dairy-free option, you can substitute the butter with coconut oil or a dairy-free butter alternative. For egg-free versions, you might try a flaxseed meal or chia seed substitute, mixing 1 tablespoon of either with 2.5 tablespoons of water and letting it sit until it thickens. Always check for any other specific allergies when serving!
How long will the Chewy Coconut Bars stay good after baking?
After baking, if stored properly at room temperature, your bars will remain fresh and delicious for about 5 days. If you want to keep them for up to a week, refrigerating them is the way to go. Just make sure they’re in an airtight container to maintain their chewy texture. Enjoy!
Chewy Coconut Bars: Quick, Irresistible, and Totally Delicious
Ingredients
Equipment
Method
- In a medium saucepan over medium-low heat, combine the melted butter and marshmallows. Stir gently until fully melted and smooth, about 5 minutes.
- In a stand mixer, beat together the granulated sugar, eggs, and vanilla extract for about 2 minutes until light and fluffy. Gradually add the melted butter and marshmallow mixture, mixing until fully combined.
- With the mixer running on low speed, slowly add the all-purpose flour and unsweetened coconut flakes to the wet mixture. Mix until just combined.
- Preheat your oven to 325°F (163°C). Line a 13 x 9 x 1-inch baking sheet with parchment paper, then spread the coconut batter evenly across the pan. Bake for 20–25 minutes.
- Once baked, remove from the oven and allow to cool in the pan for about 30 minutes. Lift out using parchment paper and cut into squares.
Leave a Reply