
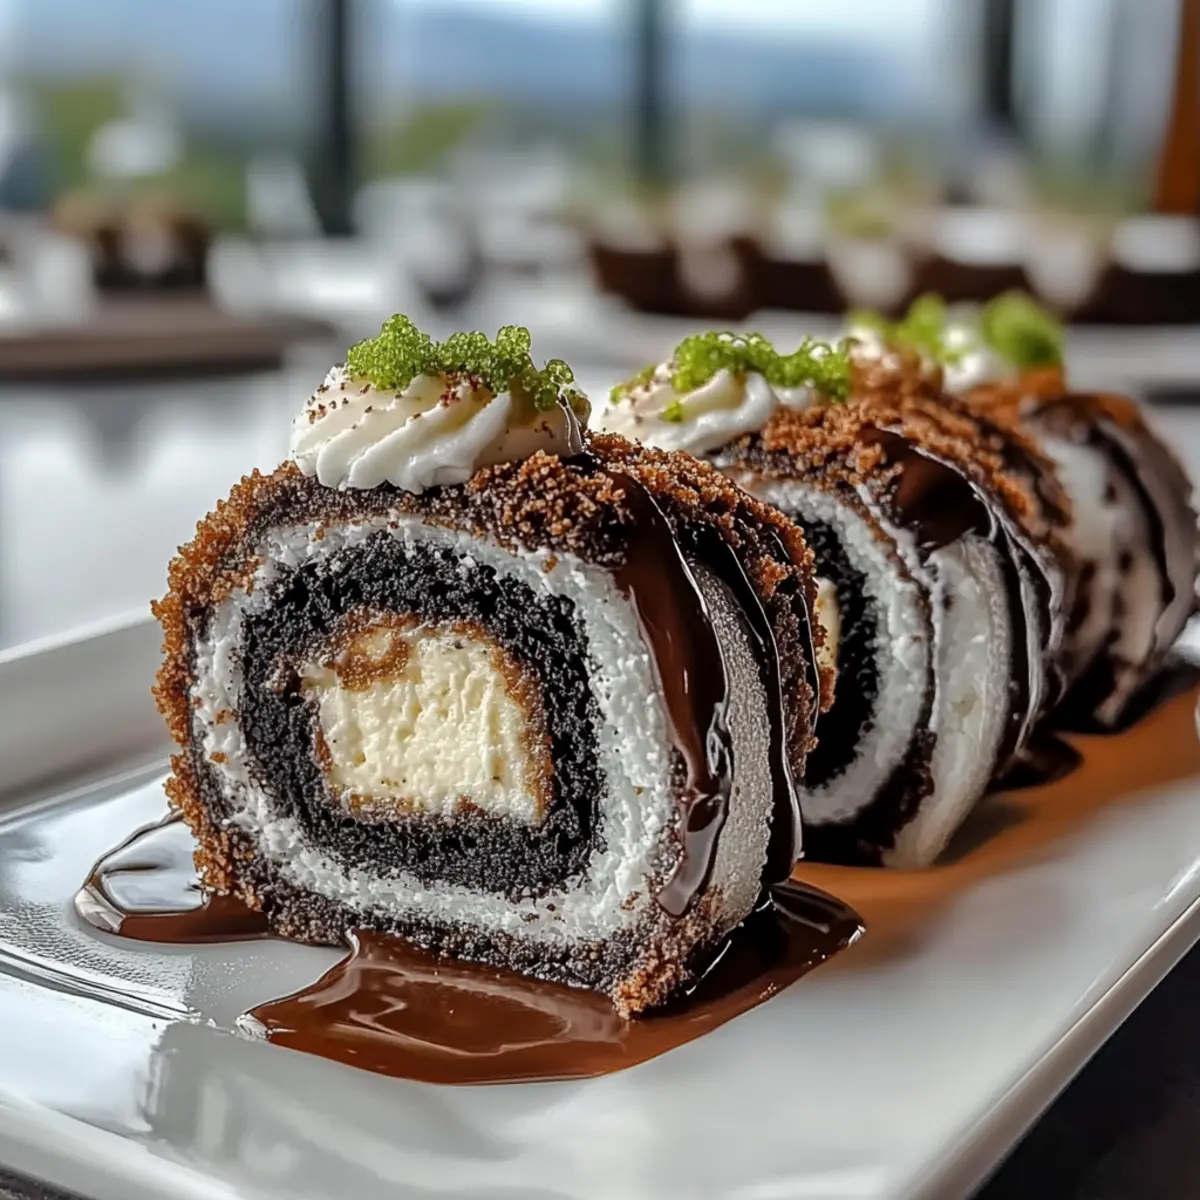
Have you ever wished for a dessert that feels like a playful fusion of your favorite treats? Enter Oreo Sushi Rolls—an exciting no-bake dessert that’s more than just a feast for the eyes. Each delightful slice seamlessly blends the classic cookies-and-cream flavor with a creamy cheesecake-like filling, all enveloped in a soft Oreo crust. What makes these rolls truly irresistible is their quick prep time and the way they transform ordinary gatherings into sweet celebrations. Whether you’re hosting a party or just want to treat yourself during a cozy movie night, these whimsical rolls are sure to impress. Curious about how to roll these sweet delights into your life? Let’s dive in!

Why Are Oreo Sushi Rolls Amazing?
Playful presentation: These charming no-bake treats are perfect for impressing guests.
Easy to make: With just a few simple steps, you can whip up a delicious dessert without turning on the oven.
Versatile flavors: Feel free to substitute Oreos with seasonal varieties or other cookie flavors for a unique twist.
Crowd-pleaser: They combine the beloved taste of cookies and cream, making them a hit at any gathering.
Customizable toppings: Top with extra chocolate drizzle or mini Oreos for an extra touch of fun—just like with my Gooey Sticky Rolls or Oreo Protein Balls!
Quick prep time: With no baking required, you can spend less time in the kitchen and more time enjoying your company.
Oreo Sushi Rolls Ingredients
-
For the Outer Layer
• Oreo Cookies – These provide the chocolate flavor and texture, forming the ideal base and topping; variations like Golden Oreos can add a fun flair.
• Cream Cheese – Essential for a smooth dough and tangy filling; make sure it’s softened for easy mixing.
• Powdered Sugar – Sweetens the filling and keeps it silky; for a different texture, granulated sugar can be substituted.
• Vanilla Extract – Enhances the dessert-like flavor of the filling; consider using almond extract for a twist. -
For the Filling
• Whipped Topping – Creates a light and fluffy filling, perfect for spreading easily; homemade whipped cream works great too.
• Salt – Balances sweetness while enhancing the chocolate flavor, making each bite even more delicious. -
For the Topping
• Chocolate Syrup – Adds a glossy finish and rich flavor; melted chocolate can be used but will firm up differently.
• Mini Oreo Cookies – Optional for decoration, giving your dessert an adorable touch.
These Oreo Sushi Rolls are a delightful no-bake dessert that takes your sweet treats to a whole new level!
Step‑by‑Step Instructions for Oreo Sushi Rolls
Step 1: Crush Oreos
Begin by placing 24 Oreo cookies into a food processor, blending them into fine crumbs. Alternatively, you can put them in a sealed zip-top bag and crush them with a rolling pin. Reserve 2 tablespoons of the crumbs for later use, and set the rest aside for creating your Oreo Sushi Rolls.
Step 2: Make Outer Layer
In a mixing bowl, combine the crushed Oreos with 4 ounces of softened cream cheese. Use a spatula to mix until a soft, dough-like consistency forms—about 2-3 minutes of mixing should do the trick. The mixture should be malleable and hold its shape, laying the groundwork for your delightful sushi roll.
Step 3: Prepare Filling
In a separate bowl, beat the remaining 4 ounces of cream cheese with powdered sugar, 1 teaspoon of vanilla extract, and a pinch of salt. Mix thoroughly until the filling is silky smooth and well-combined—this should take about 2 minutes. Gently fold in 1 cup of whipped topping, creating a light, fluffy filling perfect for your Oreo Sushi Rolls.
Step 4: Roll Out Dough
Lay a large piece of parchment paper on your work surface and scoop the Oreo dough onto it. Using a rolling pin, roll the dough into a rectangle, maintaining an even thickness of approximately 1/4 inch. Ensure the edges are smooth for easy rolling later. The dough should look like a solid, dark base ready for the filling.
Step 5: Add Filling
Remove the top layer of parchment paper from your rolled-out dough. Carefully spread the fluffy cream cheese filling evenly across the dough, leaving about a 1/2 inch border around the edges. This step is crucial, as it ensures that the filling stays contained when you roll it up.
Step 6: Form Roll
Starting from one of the longer sides, gently lift the parchment paper to help you roll the dough into a tight cylinder. Continue rolling, keeping the filling inside, until you reach the end. Wrap the roll tightly in the parchment paper and twist the ends to seal it, making sure it holds its shape.
Step 7: Chill
Place the wrapped roll in the refrigerator and chill it for at least 2 hours. This will allow the filling to firm up, making it easier to slice and serve. During this time, the flavors will meld together, enhancing the overall deliciousness of your Oreo Sushi Rolls.
Step 8: Slice & Serve
Once chilled, remove the roll from the refrigerator and unwrap it carefully. Using a sharp knife, cut the roll into 1-inch thick slices. Drizzle with chocolate syrup and sprinkle the reserved Oreo crumbs over the top for added flair. Optionally, garnish with mini Oreos, bringing a fun and playful presentation to your dessert platter.
Expert Tips for Oreo Sushi Rolls
-
Chill Thoroughly: Ensure the roll is well-chilled before slicing to prevent a messy filling. A minimum of 2 hours is ideal.
-
Choose the Right Cream Cheese: Always use softened cream cheese for easy mixing; neufchâtel cheese can be a lighter alternative without sacrificing creaminess.
-
Check Filling Consistency: When preparing the filling, be sure it’s fluffy and smooth before spreading. Lumpy filling can lead to uneven textures.
-
Roll with Care: Roll the dough tightly from the long side. A loose roll may not hold its shape when sliced.
-
Avoid Overmixing: When making the outer layer, mix just until a dough forms. Overmixing can lead to a tough texture, which won’t be as enjoyable in your Oreo Sushi Rolls.
Make Ahead Options
These Oreo Sushi Rolls are ideal for meal prep, saving you time during busy weeknights or party planning! You can prepare the entire roll up to 24 hours in advance. After chilling for at least 2 hours, wrap the finished roll tightly in plastic wrap and refrigerate. This ensures the filling remains creamy and the outer layer holds its shape. When you’re ready to serve, simply slice the chilled roll into rounds, drizzle with chocolate syrup, and sprinkle with reserved Oreo crumbs. By prepping ahead, you’ll create a delightful dessert with minimal effort, perfect for impressing guests or enjoying a sweet treat after a long day!
What to Serve with Oreo Sushi Rolls?
Transform your dessert spread into a delightful feast with these complementary treats that elevate the playful essence of Oreo Sushi Rolls.
-
Whipped Cream:
Light and fluffy, whipped cream makes each bite even more indulgent, allowing everyone to customize their dessert experience. -
Fresh Berries:
Sliced strawberries or raspberries add a refreshing burst of flavor, creating a delightful contrast to the sweet creaminess of the rolls. -
Chocolate Covered Strawberries:
These decadent bites are a perfect pairing, enhancing the chocolate notes while introducing a touch of elegance. -
Ice Cream Scoops:
A scoop of vanilla or cookies and cream ice cream offers a creamy balance, making this dessert duo unforgettable. -
Hot Chocolate:
Rich, warm chocolate drinks complement the crunchy and creamy elements of the rolls, creating a cozy vibe for any gathering. -
Coffee or Espresso:
The bold coffee flavors contrast beautifully with the sweet filling, and they offer a perfect pick-me-up alongside this delightful dessert. -
Mini Cheesecakes:
Pairing with mini cheesecakes can enhance that creamy goodness, making your dessert platter look as exciting as it tastes. -
Chocolate Dipped Pretzels:
The sweet-salty combination of these crunchy treats pairs wonderfully, providing an interesting texture to your dessert offering.
Oreo Sushi Rolls Variations & Substitutions
Feel free to let your creativity shine by personalizing these delightful dessert rolls to suit your taste buds!
-
Flavor Twist: Swap in Mint Oreos for a fresh, invigorating flavor that adds a fun twist to the classic combo.
Try it out during summer gatherings for a refreshing dessert! -
Lighten Up: Use Neufchâtel Cheese instead of cream cheese for a lighter filling that’s just as creamy and delicious.
This little swap allows you to enjoy a guilt-free treat without sacrificing taste. -
Fruit Fusion: Add in Sliced Strawberries or even Banana slices for a fruity contrast and an extra layer of flavor.
This combination works wonders as a refreshing complement to the rich cookies-and-cream filling! -
Different Drizzle: Instead of chocolate syrup, use Caramel Sauce for a sweet, sticky finish that will delight your guests.
This variation adds a unique flavor experience that can turn heads at any dessert table! -
Holiday Cheer: Substitute Pumpkin Spice Oreos during the fall season for a festive twist that captures the essence of autumn.
These seasonal flavors can transform your dessert into a holiday favorite. -
Crunchy Layer: Mix in Chopped Nuts or Crushed Pretzels into the filling for delightful texture contrast and a salty kick.
This twist elevates the rolls to a whole new level of deliciousness, making them even more indulgent! -
Dairy-Free Delight: Use Silken Tofu blended with a dash of lemon juice as a cream cheese alternative for a dairy-free version.
You’ll be surprised at how creamy and satisfying this alternative can be while keeping it plant-based! -
Classic Upgrade: Pair these sushi rolls with a scoop of Vanilla Ice Cream for a more indulgent dessert experience that screams decadence.
Simply let your guests layer the rolls over a scoop, encouraging a fun and delectable pairing.
Explore these variations to bring your Oreo Sushi Rolls to life, just like how I love mixing things up with my Air Fryer Rolls or creating fun snacks such as Oreo Protein Balls. Whatever your choice, enjoy the sweet journey!
How to Store and Freeze Oreo Sushi Rolls
- Fridge: Keep slices in an airtight container for up to 4 days. This helps maintain their texture and flavor, so they’re ready to enjoy anytime.
- Freezer: For longer storage, the full roll can be frozen for up to 2 months. Wrap it securely in plastic wrap and then place it in a freezer-safe bag before freezing.
- Thawing: When ready to serve, transfer the frozen roll to the fridge for several hours or overnight to thaw before slicing.
- Reheating: Oreo Sushi Rolls are best served cold, but you can drizzle warm chocolate syrup over them just before serving for a delightful twist!

Oreo Sushi Rolls Recipe FAQs
How do I choose the right Oreos for this recipe?
Absolutely! For the best flavor and texture, use regular Oreo cookies as the base. However, if you’re feeling adventurous, you can also substitute with Golden Oreos or specialty flavors like mint or birthday cake. Each variation will bring its unique twist, so feel free to experiment!
How should I store leftover Oreo Sushi Rolls?
Very simple! Keep any leftover slices in an airtight container placed in the refrigerator. They can last for up to 4 days. Just make sure to separate layers with parchment paper, so they don’t stick together. This way, you’ll always have a delicious treat waiting for you!
Can I freeze Oreo Sushi Rolls?
Yes, you can! To freeze the entire roll, wrap it tightly in plastic wrap and then place it inside a freezer-safe bag. This method will keep it fresh for up to 2 months. When you’re ready to enjoy, simply move it to the fridge for a few hours or overnight to thaw—it’ll still taste amazing!
What should I do if the dough feels too dry or crumbly?
If your Oreo dough isn’t coming together smoothly, don’t worry! Just add a bit more softened cream cheese, one tablespoon at a time, mixing until a cohesive dough forms. This will help bring it to the right consistency without making it too wet.
Are Oreo Sushi Rolls suitable for people with allergies?
Great question! Since this recipe contains cream cheese and Oreos, it’s not suitable for individuals with dairy or gluten allergies. You can, however, substitute gluten-free Oreos and vegan cream cheese for a dairy-free version. Always check packaging for allergy information!
Can I make these Oreo Sushi Rolls in advance?
Absolutely! You can make the whole roll a day ahead of time. Just remember to keep it wrapped tightly in plastic wrap and refrigerate. Slicing just before serving helps maintain freshness and visual appeal!

Delicious Oreo Sushi Rolls: A No-Bake Dessert Delight
Ingredients
Equipment
Method
- Crush 24 Oreo cookies in a food processor or crush in a zip-top bag with a rolling pin. Reserve 2 tablespoons of crumbs for later use.
- Combine the crushed Oreos with 4 ounces of softened cream cheese in a mixing bowl, mixing for 2-3 minutes until a soft dough forms.
- In a separate bowl, beat the remaining 4 ounces of cream cheese with powdered sugar, 1 teaspoon of vanilla extract, and a pinch of salt until silky smooth.
- Gently fold in 1 cup of whipped topping to create the filling.
- Roll the Oreo dough on a large piece of parchment paper into a rectangle about 1/4 inch thick.
- Spread the fluffy cream cheese filling evenly across the dough, leaving about a 1/2 inch border.
- Roll the dough into a tight cylinder starting from one of the longer sides, wrapping it in parchment paper to hold its shape.
- Chill the wrapped roll in the refrigerator for at least 2 hours.
- Slice the chilled roll into 1-inch thick slices, drizzle with chocolate syrup, and sprinkle reserved Oreo crumbs. Optionally garnish with mini Oreos.
Leave a Reply